Adding New Authorizations
If you haven't yet reviewed the documentation for the workflow, please see the UR Suite & Billing Module Workflow Overview resource.
For any patient you wish to populate in the billing census, you must maintain an active authorization. If the patients payment method does not require authorization, you can mark the authorization as such.
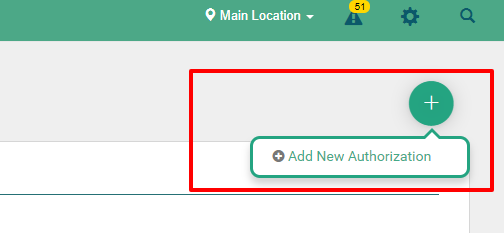
First, navigate to the main menu then click Utilization Review > UR Queue.
Once in the queue you can create your authorization by clicking the green (+) menu in the top right of the page then clicking on "add new authorization".
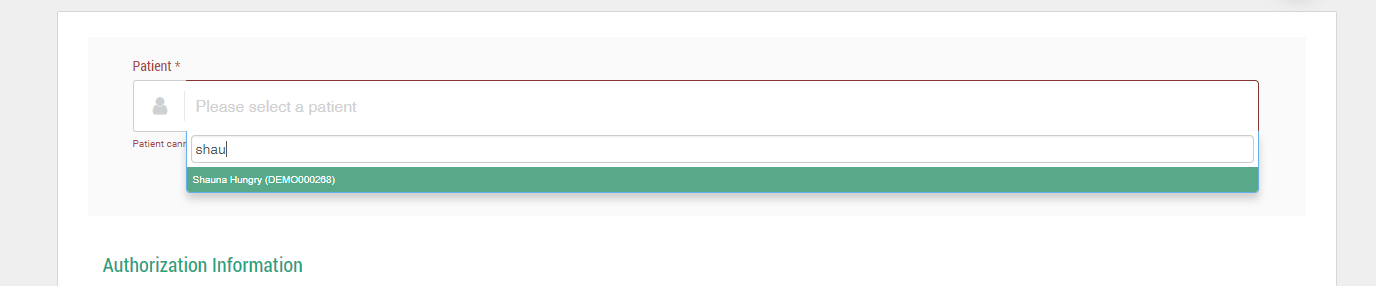
Select a Patient
Start by selecting a patient from the top of the authorization screen. Once you have imported your patient, the document will fill in will relevant information.
Select the Payer
If the patient only has one insurance provider, the carrier will default to that field. If there are more than one, you must select which payer this applies to.

You can also choose to import details from an existing authorization via the green link below the patients name, if this is not the first authorization added for the patient.
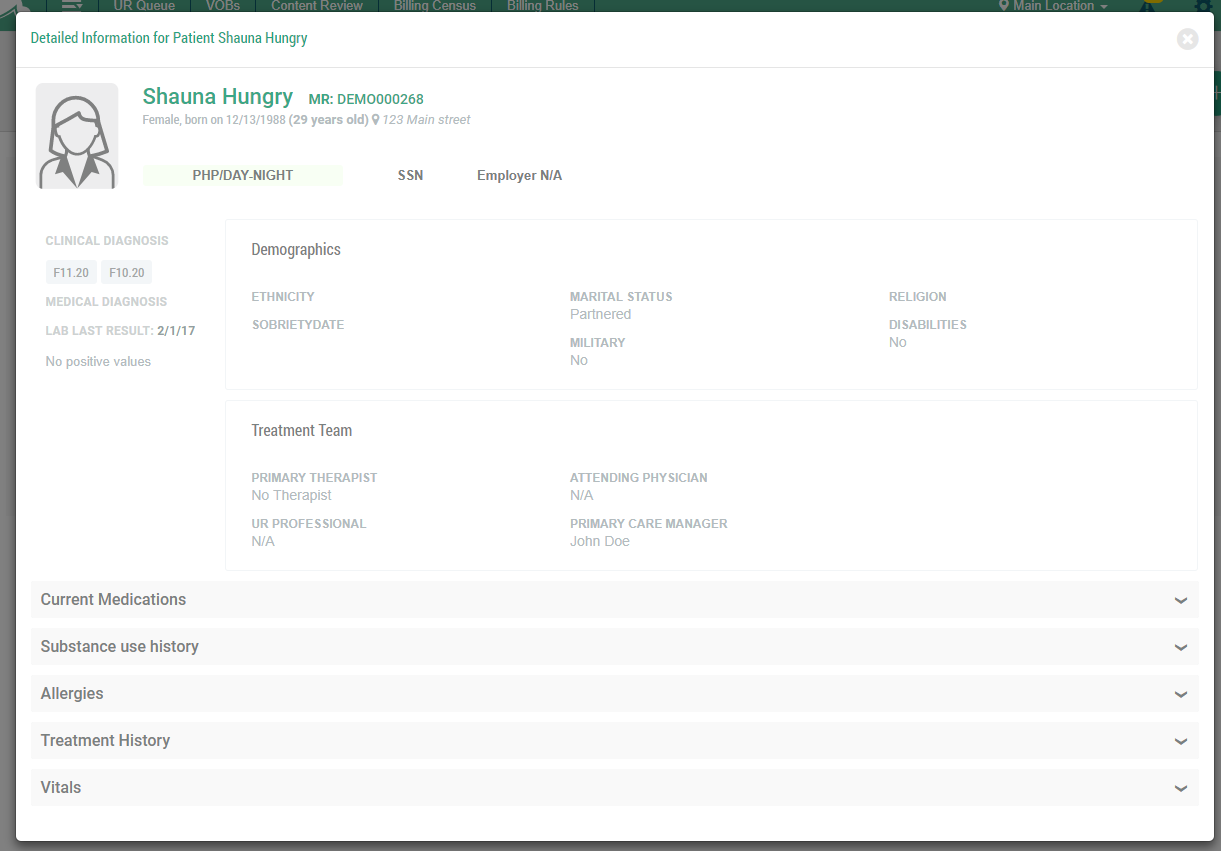
Feature Note: You can bring up a quick view of the patient, including demographics, last lab values, treatment team information, last recorded vitals, substance use history, treatment history and more by clicking the name of the patient. You will see a view like this:
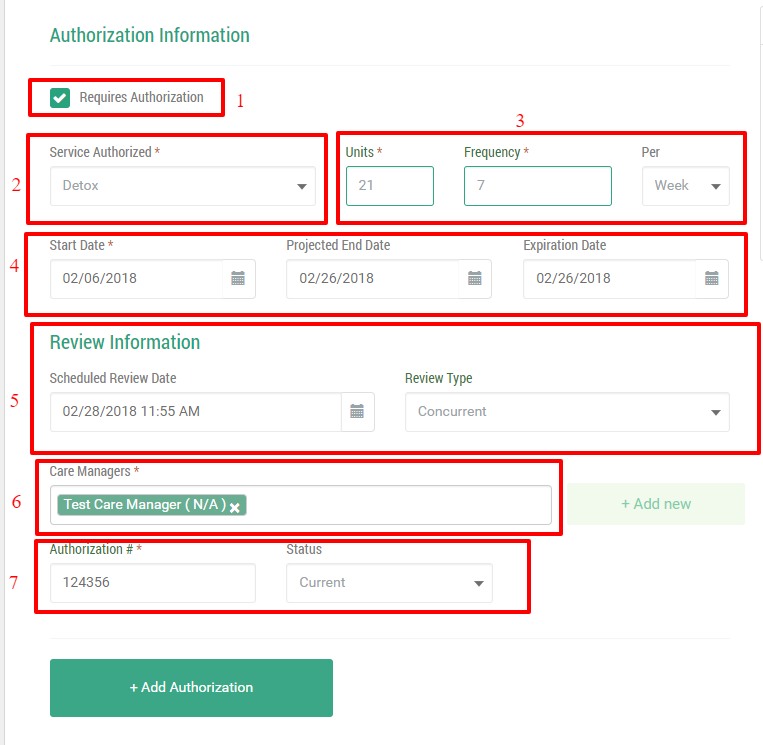
Enter the Authorization Details
The main section of the authorization will require you to fill in various information, some of which are required fields. See below:
-
Authorization Required: Does the patient require authorization for the service? By default the value will be checked, meaning yes it does.
-
Service Authorized: what services or levels of care are being authorized?
-
Units & Frequency: what are the total amount of units authorized and what is the frequency these benefits can be used? Note that these numbers will automatically created the projected end date and expiration date as well.
-
Start Date, End Date, Expiration Date: by default these values will be used to create the dates automatically, but they can be changed.
-
Review Information: you can now schedule your review right from the authorization screen. Simply select the review type and the date. Note that each review type has its own feature sets related to notifications.
-
Care Manager(s): you can select the care manager or add a new one for this authorization. This data will be imported along with their phone number and extension in subsequent authorizations.
-
Authorization Number & Status: the authorization number should be added here and status will be selected. You have several status types to choose from. This is one of the most important parts of the authorization as a patient can only have one active authorization at a time for the same service.
Set the Status of the Document
As mentioned in point #7, this is the most important part of adding the authorization. Your options include:
-
Current
-
Completed: Step Down
-
Care Completed
-
Pending
-
Denial
-
Suspended - AMA
Choose the option that best fits the current authorization.
Note: if you are unable to get an authorization for any reason, add the status type of "pending" until you can determine a better status. This will unlock all required fields and make notation available.
Adding the Authorization
Once the authorization has been completely filled out you can add the authorization to ZenCharts by clicking the +Add Authorization button. After that you will have one of three things happen:
-
The authorization will be successfully added
-
The "existing authorization" message will appear.
-
The "potential inconsistency" warning will appear.
If the existing authorization message appears, you need to status a previous authorization with something besides "current". You can do so by going to the existing authorization (it will open in a new window) and changing the status from there.
If the potential inconsistency warning appears, this can mean you may be adding an authorization to a patient that is a different payment method other than insurance, such as private pay. In this case, you'll want to deselect "requires authorization".