How To Create A New Patient Record (v3)
Log into ZenCharts and click the Expand tab on the left side of the screen and click on 'CRM'.
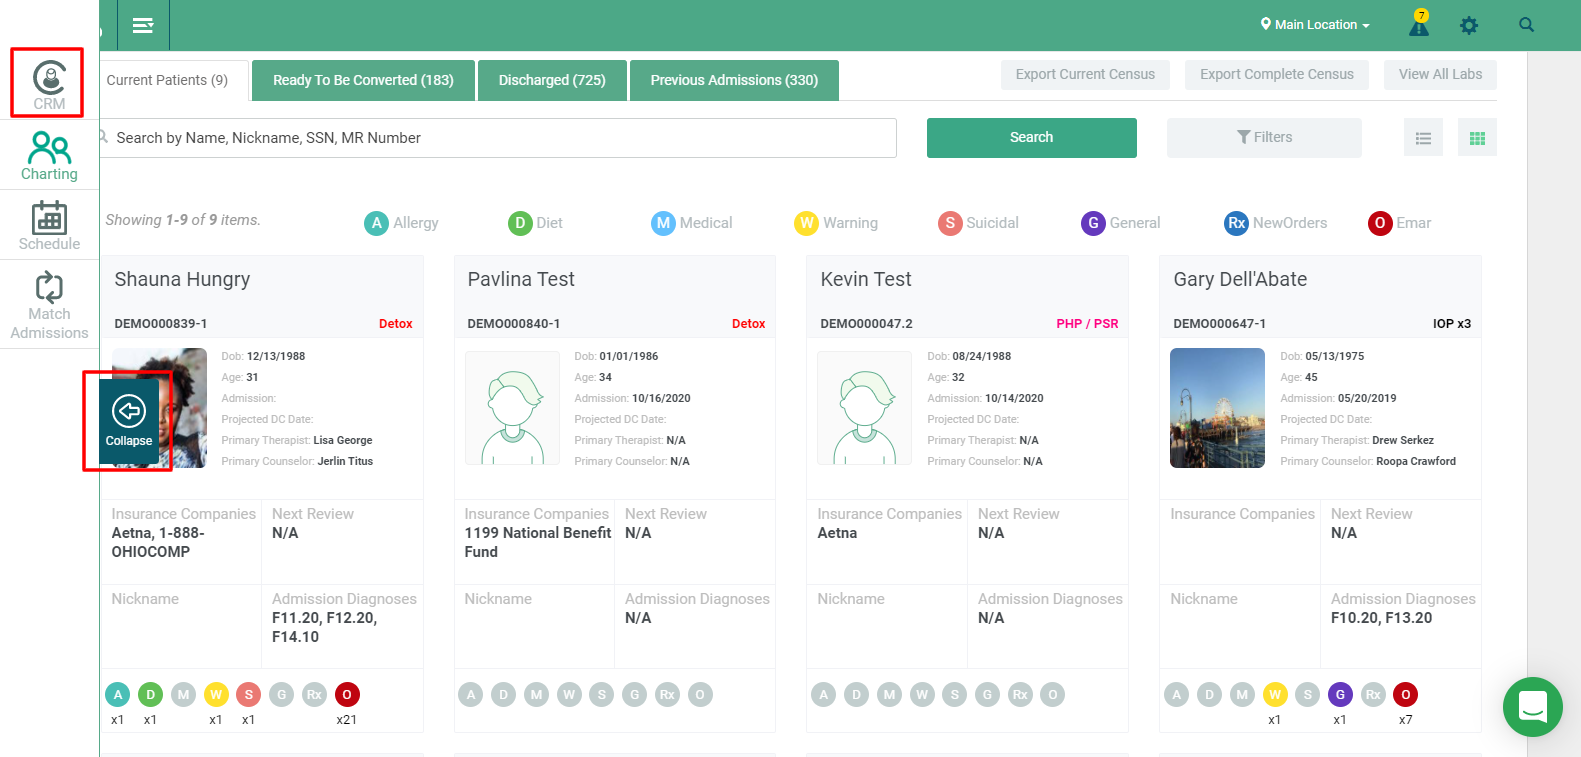
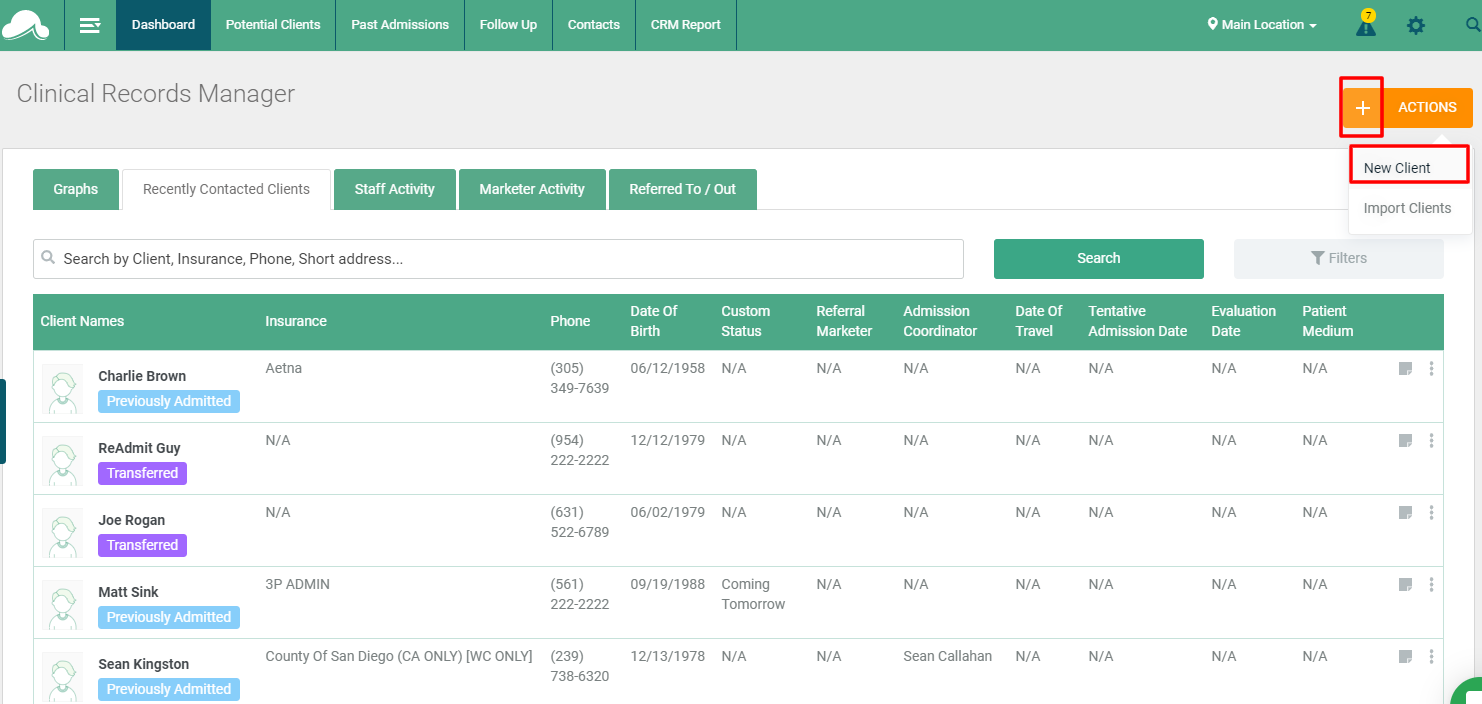
You will be brought to the CRM portion (Pre-admission area) of ZenCharts. Click on '+Actions' and click on 'New Client'.
Initial Client Information
You will be brought to the Initial Client Information page where you can enter the clients demographics and basic information, and any other information required by your facility. Then click 'Update Information' to save the newly added record.
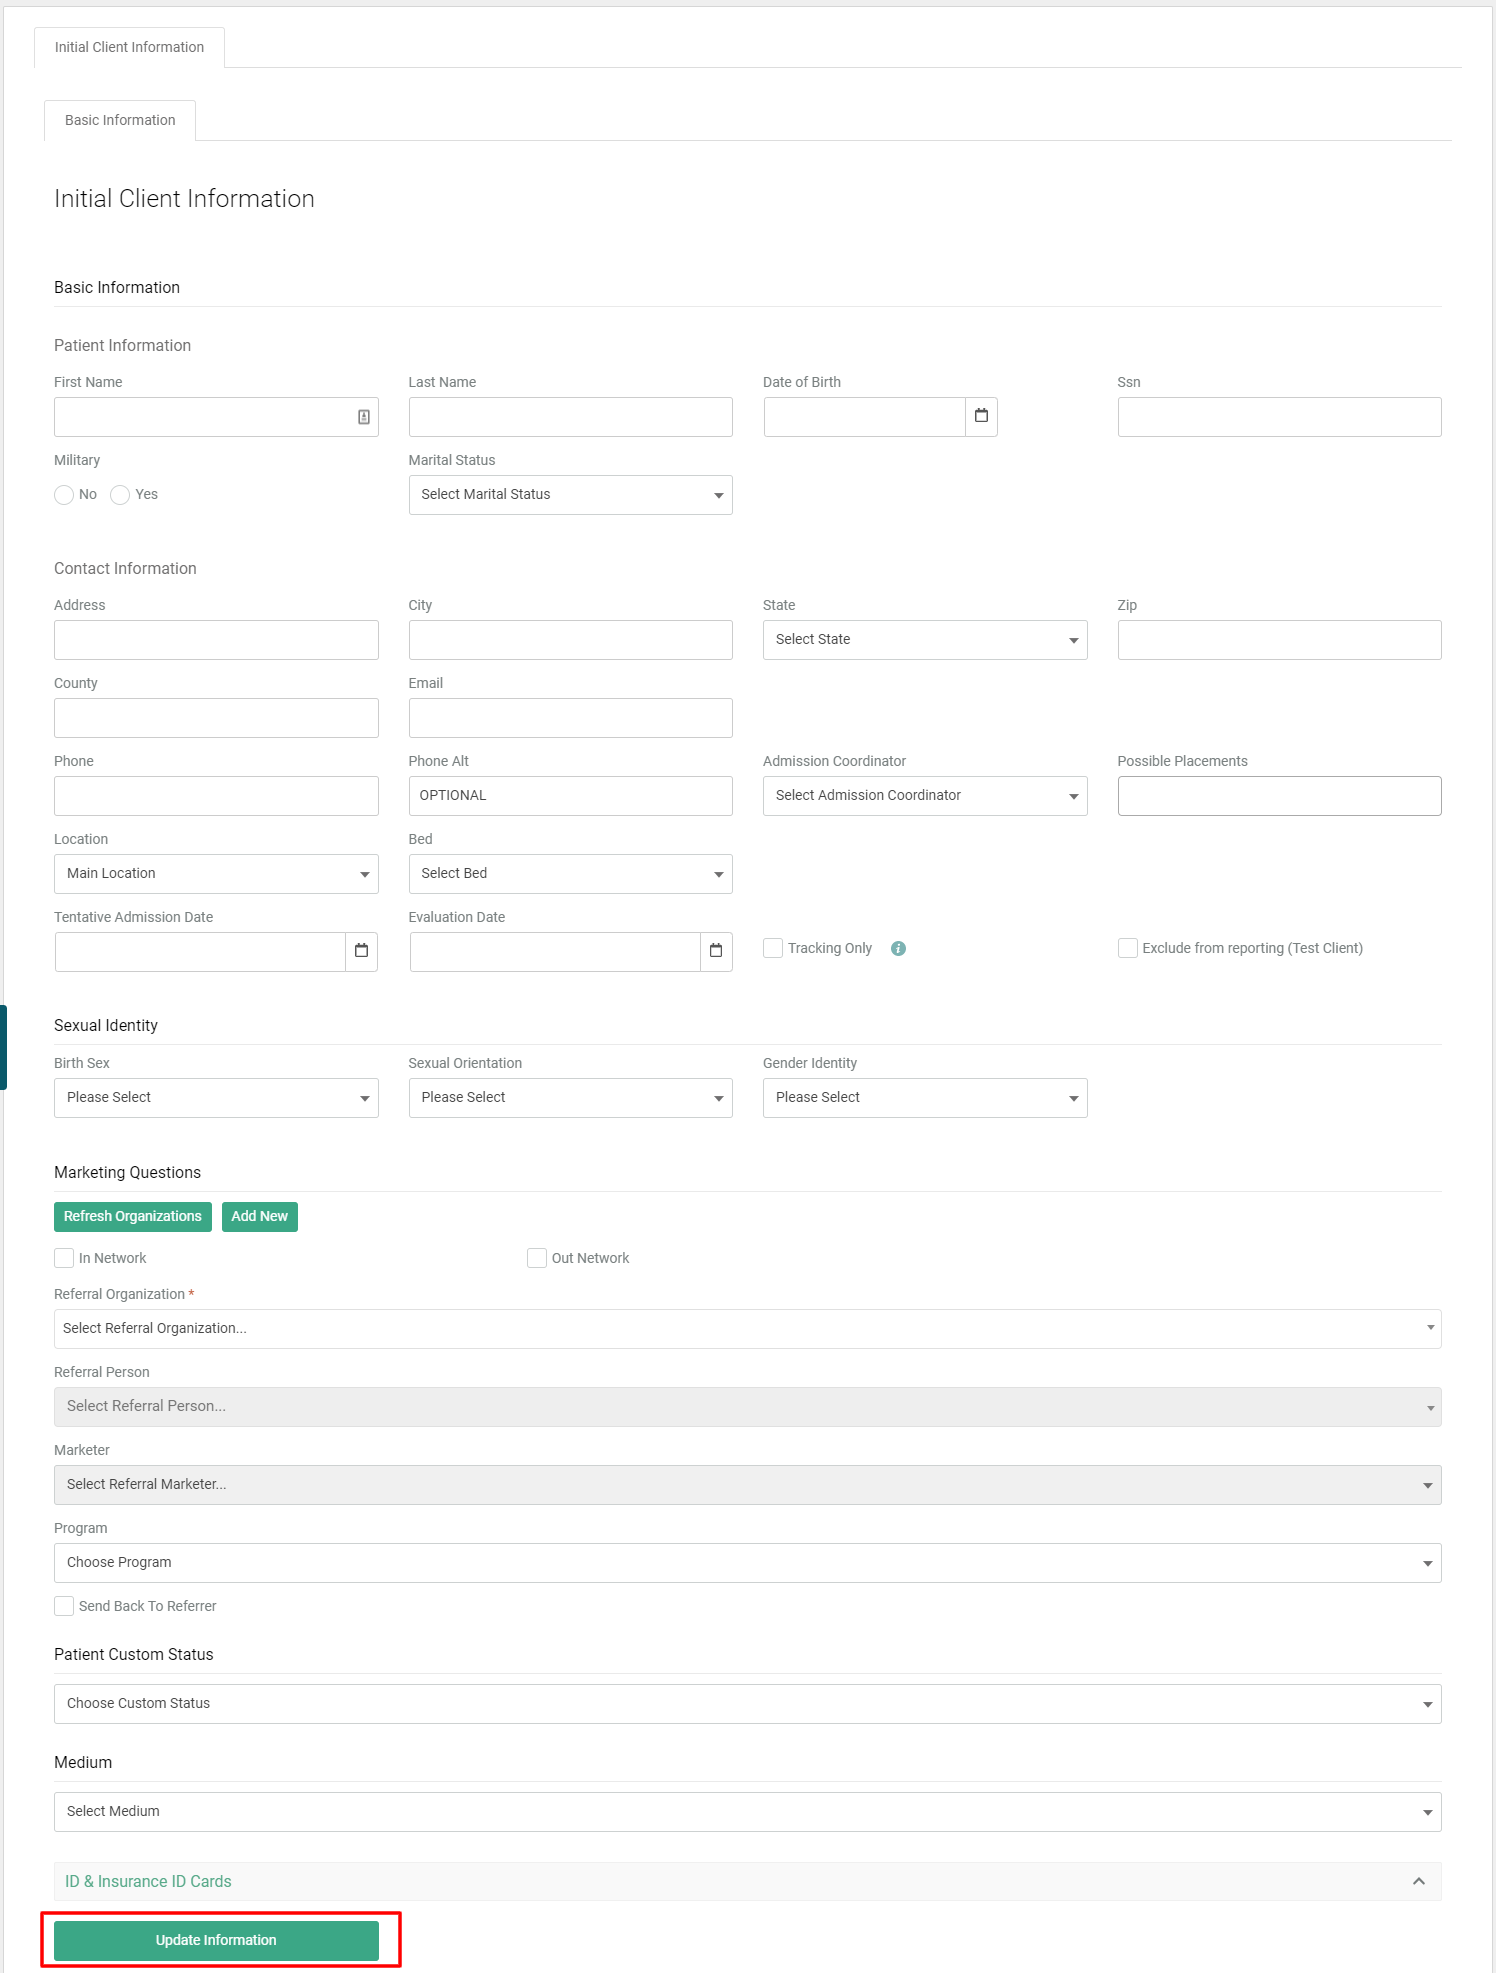
Depending on your settings, roles, and rights, you may be able to move around in different ways at this point. For the purpose of this tutorial we'll be using "classic" mode which has a standard order of operations.
Payment Methods
Next you will want to enter the client's payment method by clicking into the 'Client's Insurance' tab. You have the option to add Insurance information and/or private pay, with the option to set the primary method pf payment.
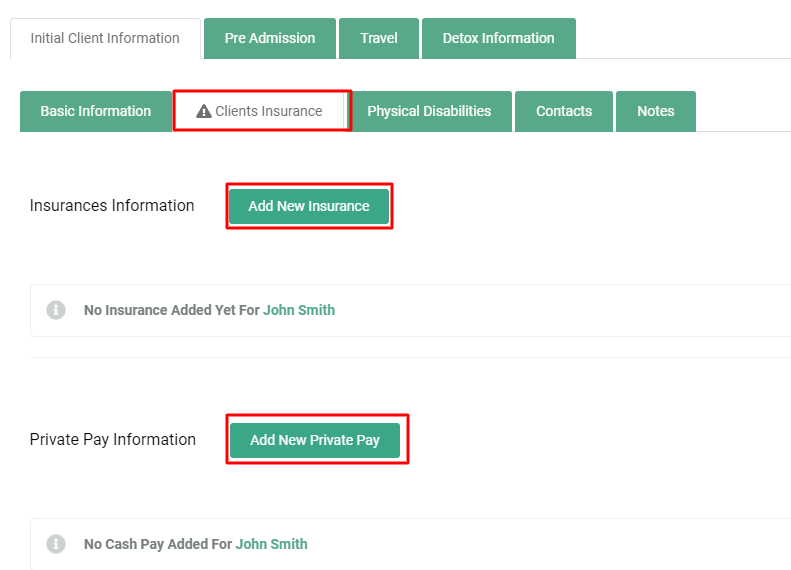
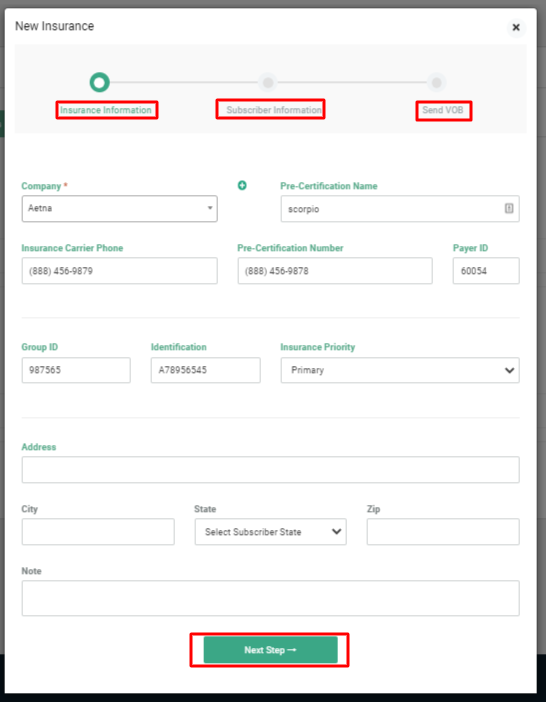
When Adding Insurance: First enter the Insurance Information and click on 'next step', then add the subscriber information and click 'next step', lastly, select the appropriate company or staff member who will be completing the VOB and click 'Send For Verification' . This will send a notification to the user it is assigned to, and allow them to sign in and complete the VOB (if the client is strictly private pay, you will be able to skip the insurance and VOB process) .
Contacts
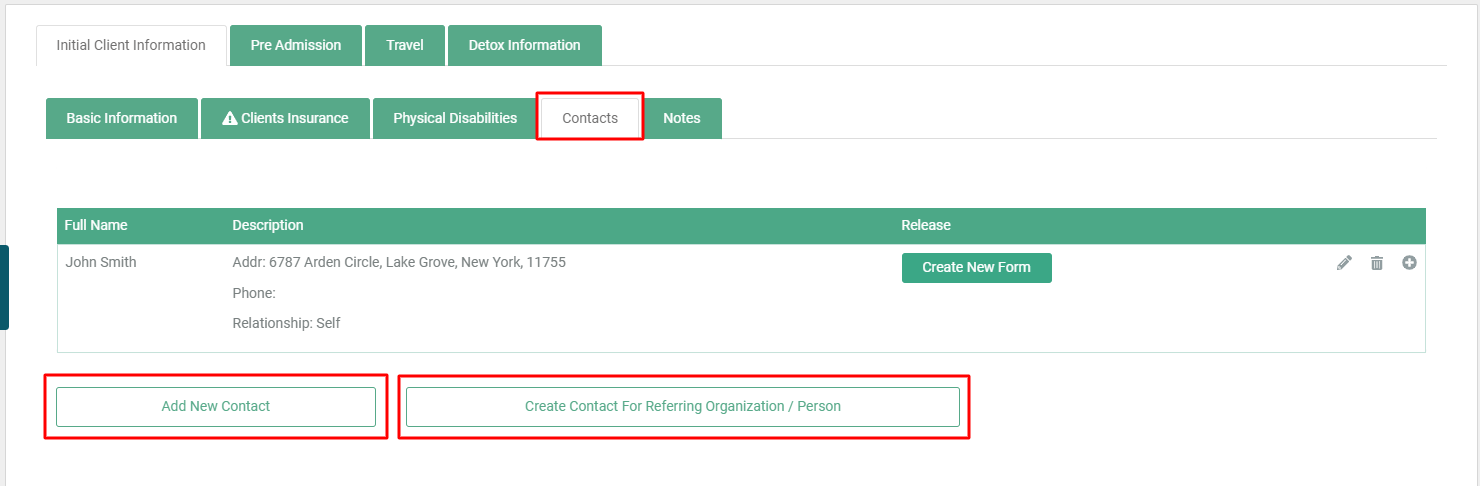
This is not a required step, but you have the option to create contacts for this client by clicking into the contacts tab and clicking 'Add New Contact' and filling out that information.
Pro-tip: Adding contacts now will auto-create a release of information during the patient intake.
Verify the Benefits
The staff member the VOB was assigned to will now be able to complete the VOB by clicking into the 'Verification of Benefits' tab then clicking 'Send Completed VOB' once the form has been filled out.

Financial Decision
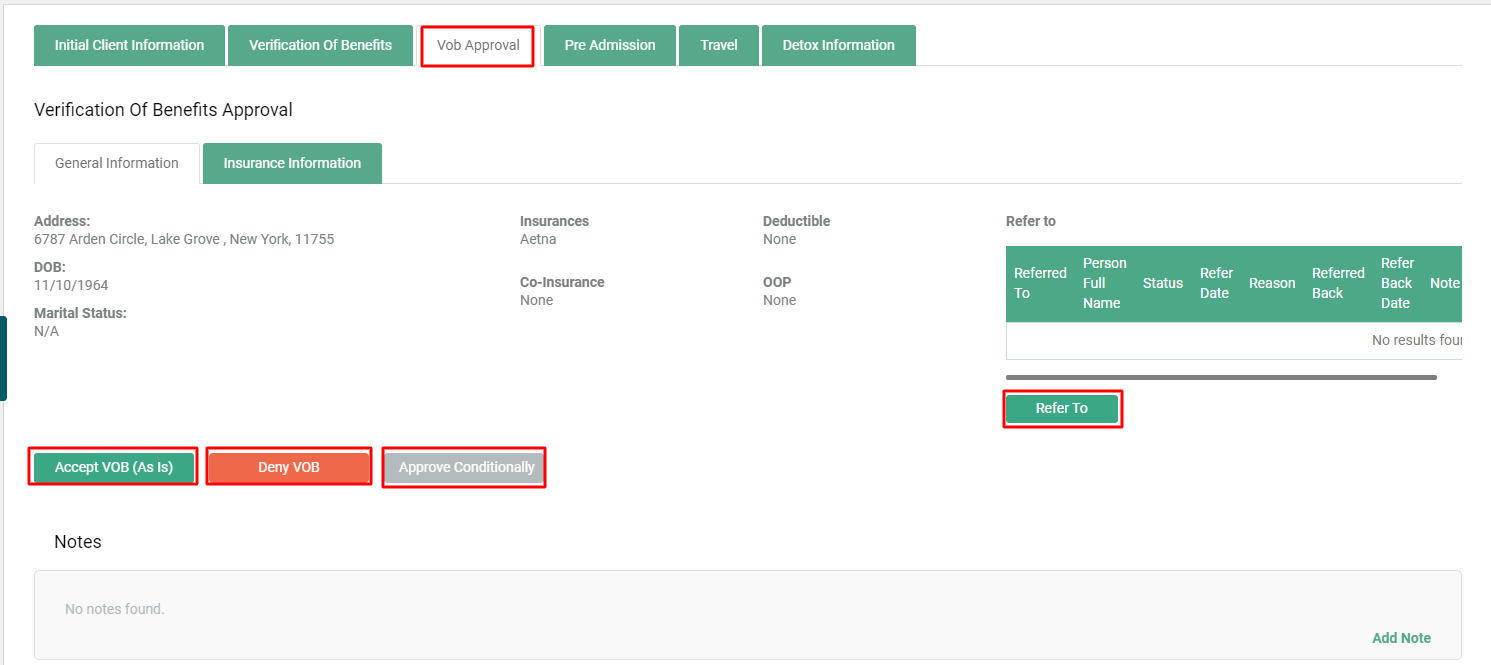
The next part of the process is role/rights driven so this may be a different user type for each facility, although it's typically the admissions director. Upon receipt of the verified benefits you'll be presented with some options on the 'VOB Approval' tab.
These options are:
-
Accept VOB (as is) - this allows you to continue the process, uninterrupted.
-
Conditionally Accept VOB - this allows you to set conditions and communicate with the admission coordinator on the record
-
Deny VOB - ends the process
-
Refer to - allows you to refer out the patient, hold a record and report on that later
Once the decision has been made. You can move forward with the process to the pre-admission screening.
Pre-Admission Assessment
You can now click into the 'Pre-Admission' tab at the top of the screen and complete the pre-admission screening/assessment set by your facility. If the assessment is set to have a review signature, the appropriate staff will need to review and sign the assessment before being able to move forward.
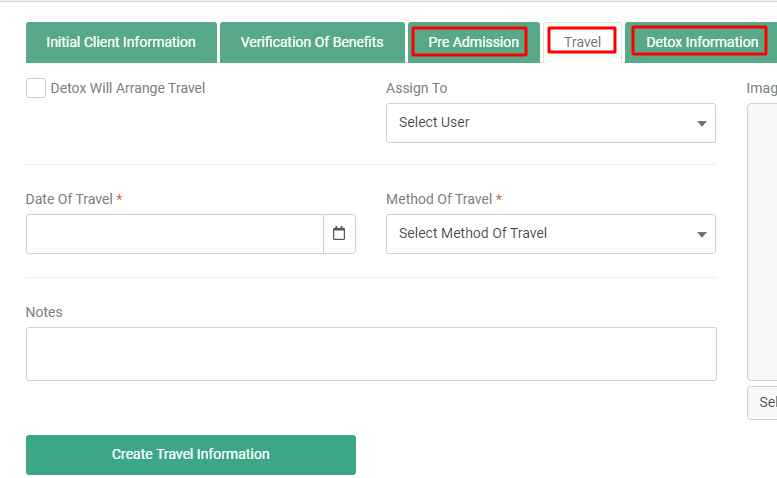
Optional travel, detox, and additional documentation
You can also arrange travel via the 'Travel' tab, and coordinate third party detox under the 'Detox information' tab and fill out financial or pre-intake forms from their respective tabs.
After completing these steps, your potential client record is now ready to be 'converted' when the client arrives at the facility.
Watch this Quick Tutorial that shows you how to go from A-Z with creating a new record in the CRM to converting the potential client to an active chart when they arrive at the facility.
(Note: for the purposes of the demo, assessments/VOB will not be filled out, and the VOB is assigned to the presenter to be able to show the full process in this video)
Click below to learn how to admit a client: