CRM 2.5 Full Documentation
The new CRM is fundamentally different than 2.0. You will now have the ability to activate tiered referral sources, create custom status types (think pipelines), create recurring followups, and most importantly report on it all.
Want to know:
How many referrals from XYZ Detox went to X Location?
How many referrals from XYZ Detox went to all Locations?
How many were entered as potential clients came from ABC Organization?
How many were entered as potential clients came from John Smith (person) at ABC Organization?
How many potential clients converted into client came from John Smith (person) at ABC Organization?
How many were entered as potential clients came from John Smith (person) at ABC Organization?
How many discharges this month?
How many discharges for each location?
How many admissions this month?
How many admissions from this location?
How many people did we refer out last month?
How many people from XYZ detox did we refer out?
How many people from XYZ marketer did we refer out?
1. Setting up the CRM
There are many new features in CRM 2.5, and it is important that you have the correct settings turned on in advance.
This includes:
-
Tiered referral sources.
-
Custom status types.
-
Default custom status types.
In order to simply upload all the organizations, people, and marketers please download our templates here:
Person template: https://drive.google.com/file/d/1ussAeXyJ7N5JhEaknIoXdJ8njmX25SCX/view?usp=sharing
Organization template: https://drive.google.com/file/d/13EFHKtPgdvPxbxRCvK5laCs-fdwJBd1x/view?usp=sharing
2. Navigating to the CRM
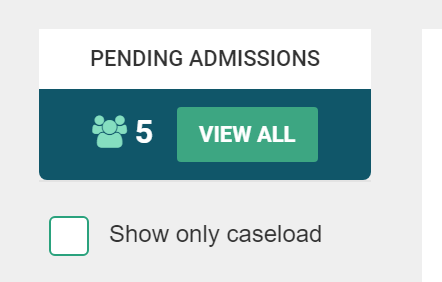
From the main waiting room select > pending admissions.
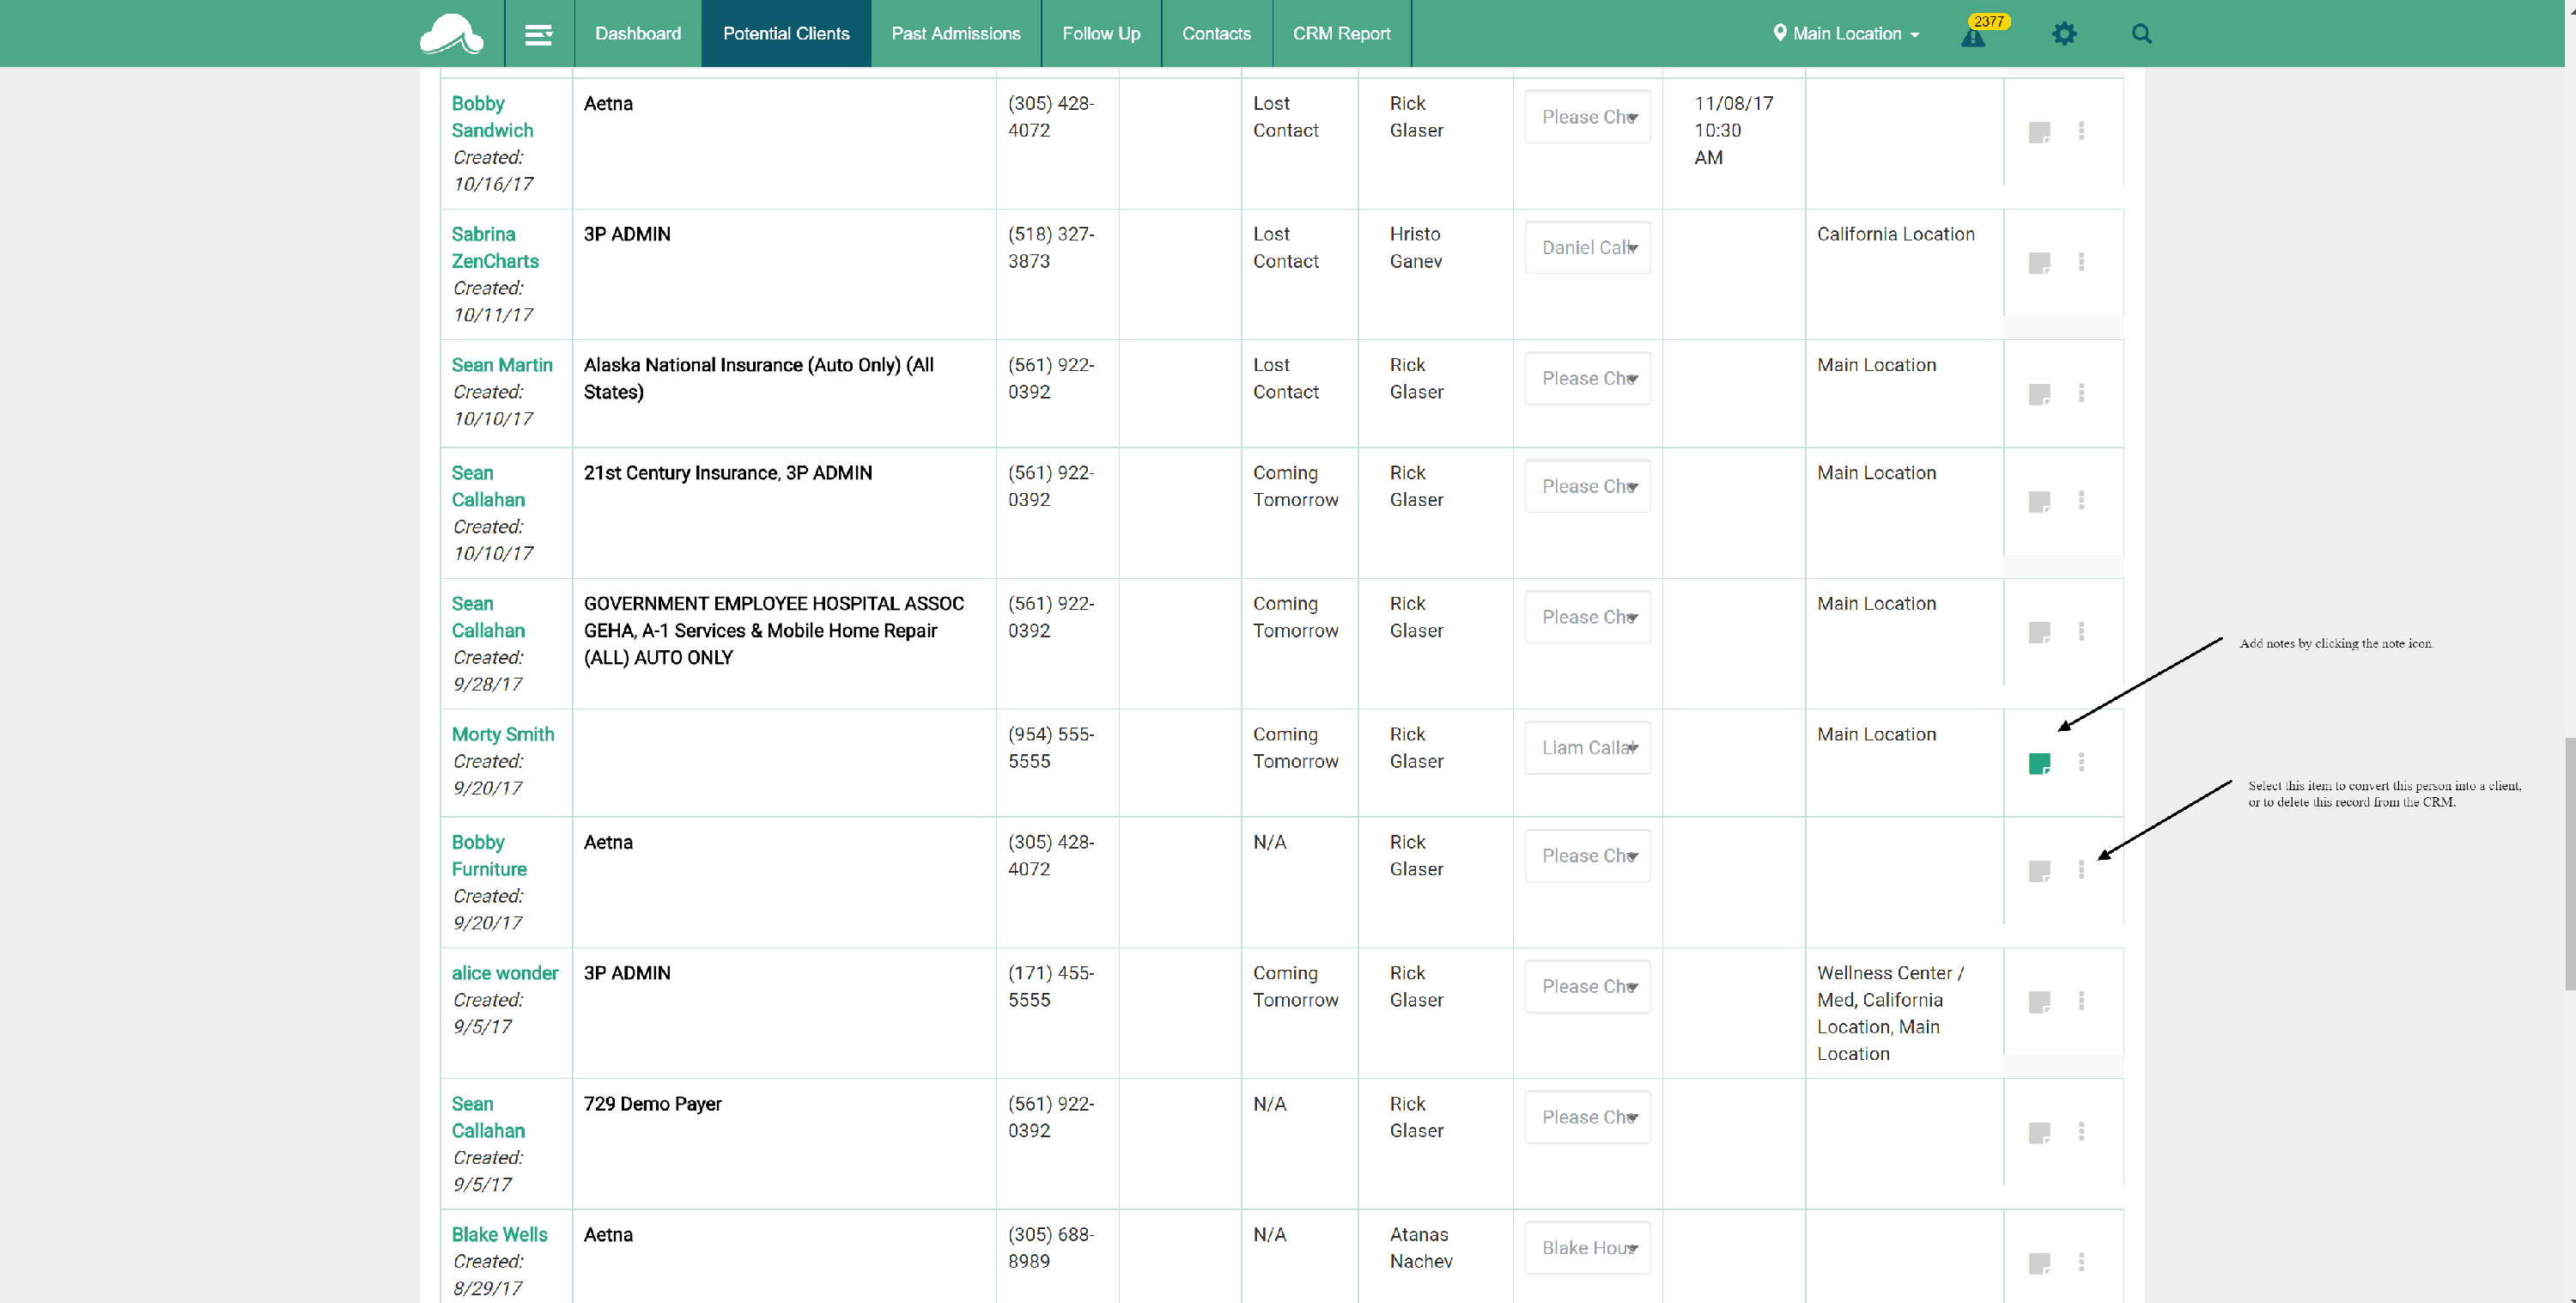
Once you arrive in the CRM of ZenCharts, you will see the potential guests page by default. Here you will be able to sort by each header shown, and previously set in the settings section. It is important to note that you can use these filters in combination with each other. Want to see all people in a specific custom status potentially admitting to a specific location? No problem.
If you need to add notes, or if you wish to convert this person into an active client from this screen, click the corresponding icon to the right of the page.
3. Past Admissions
The past admissions page will show you all clients that have discharged, and give you the ability to create a new case for that person. This will keep the discharged client in the CRM until they are ready to readmit.
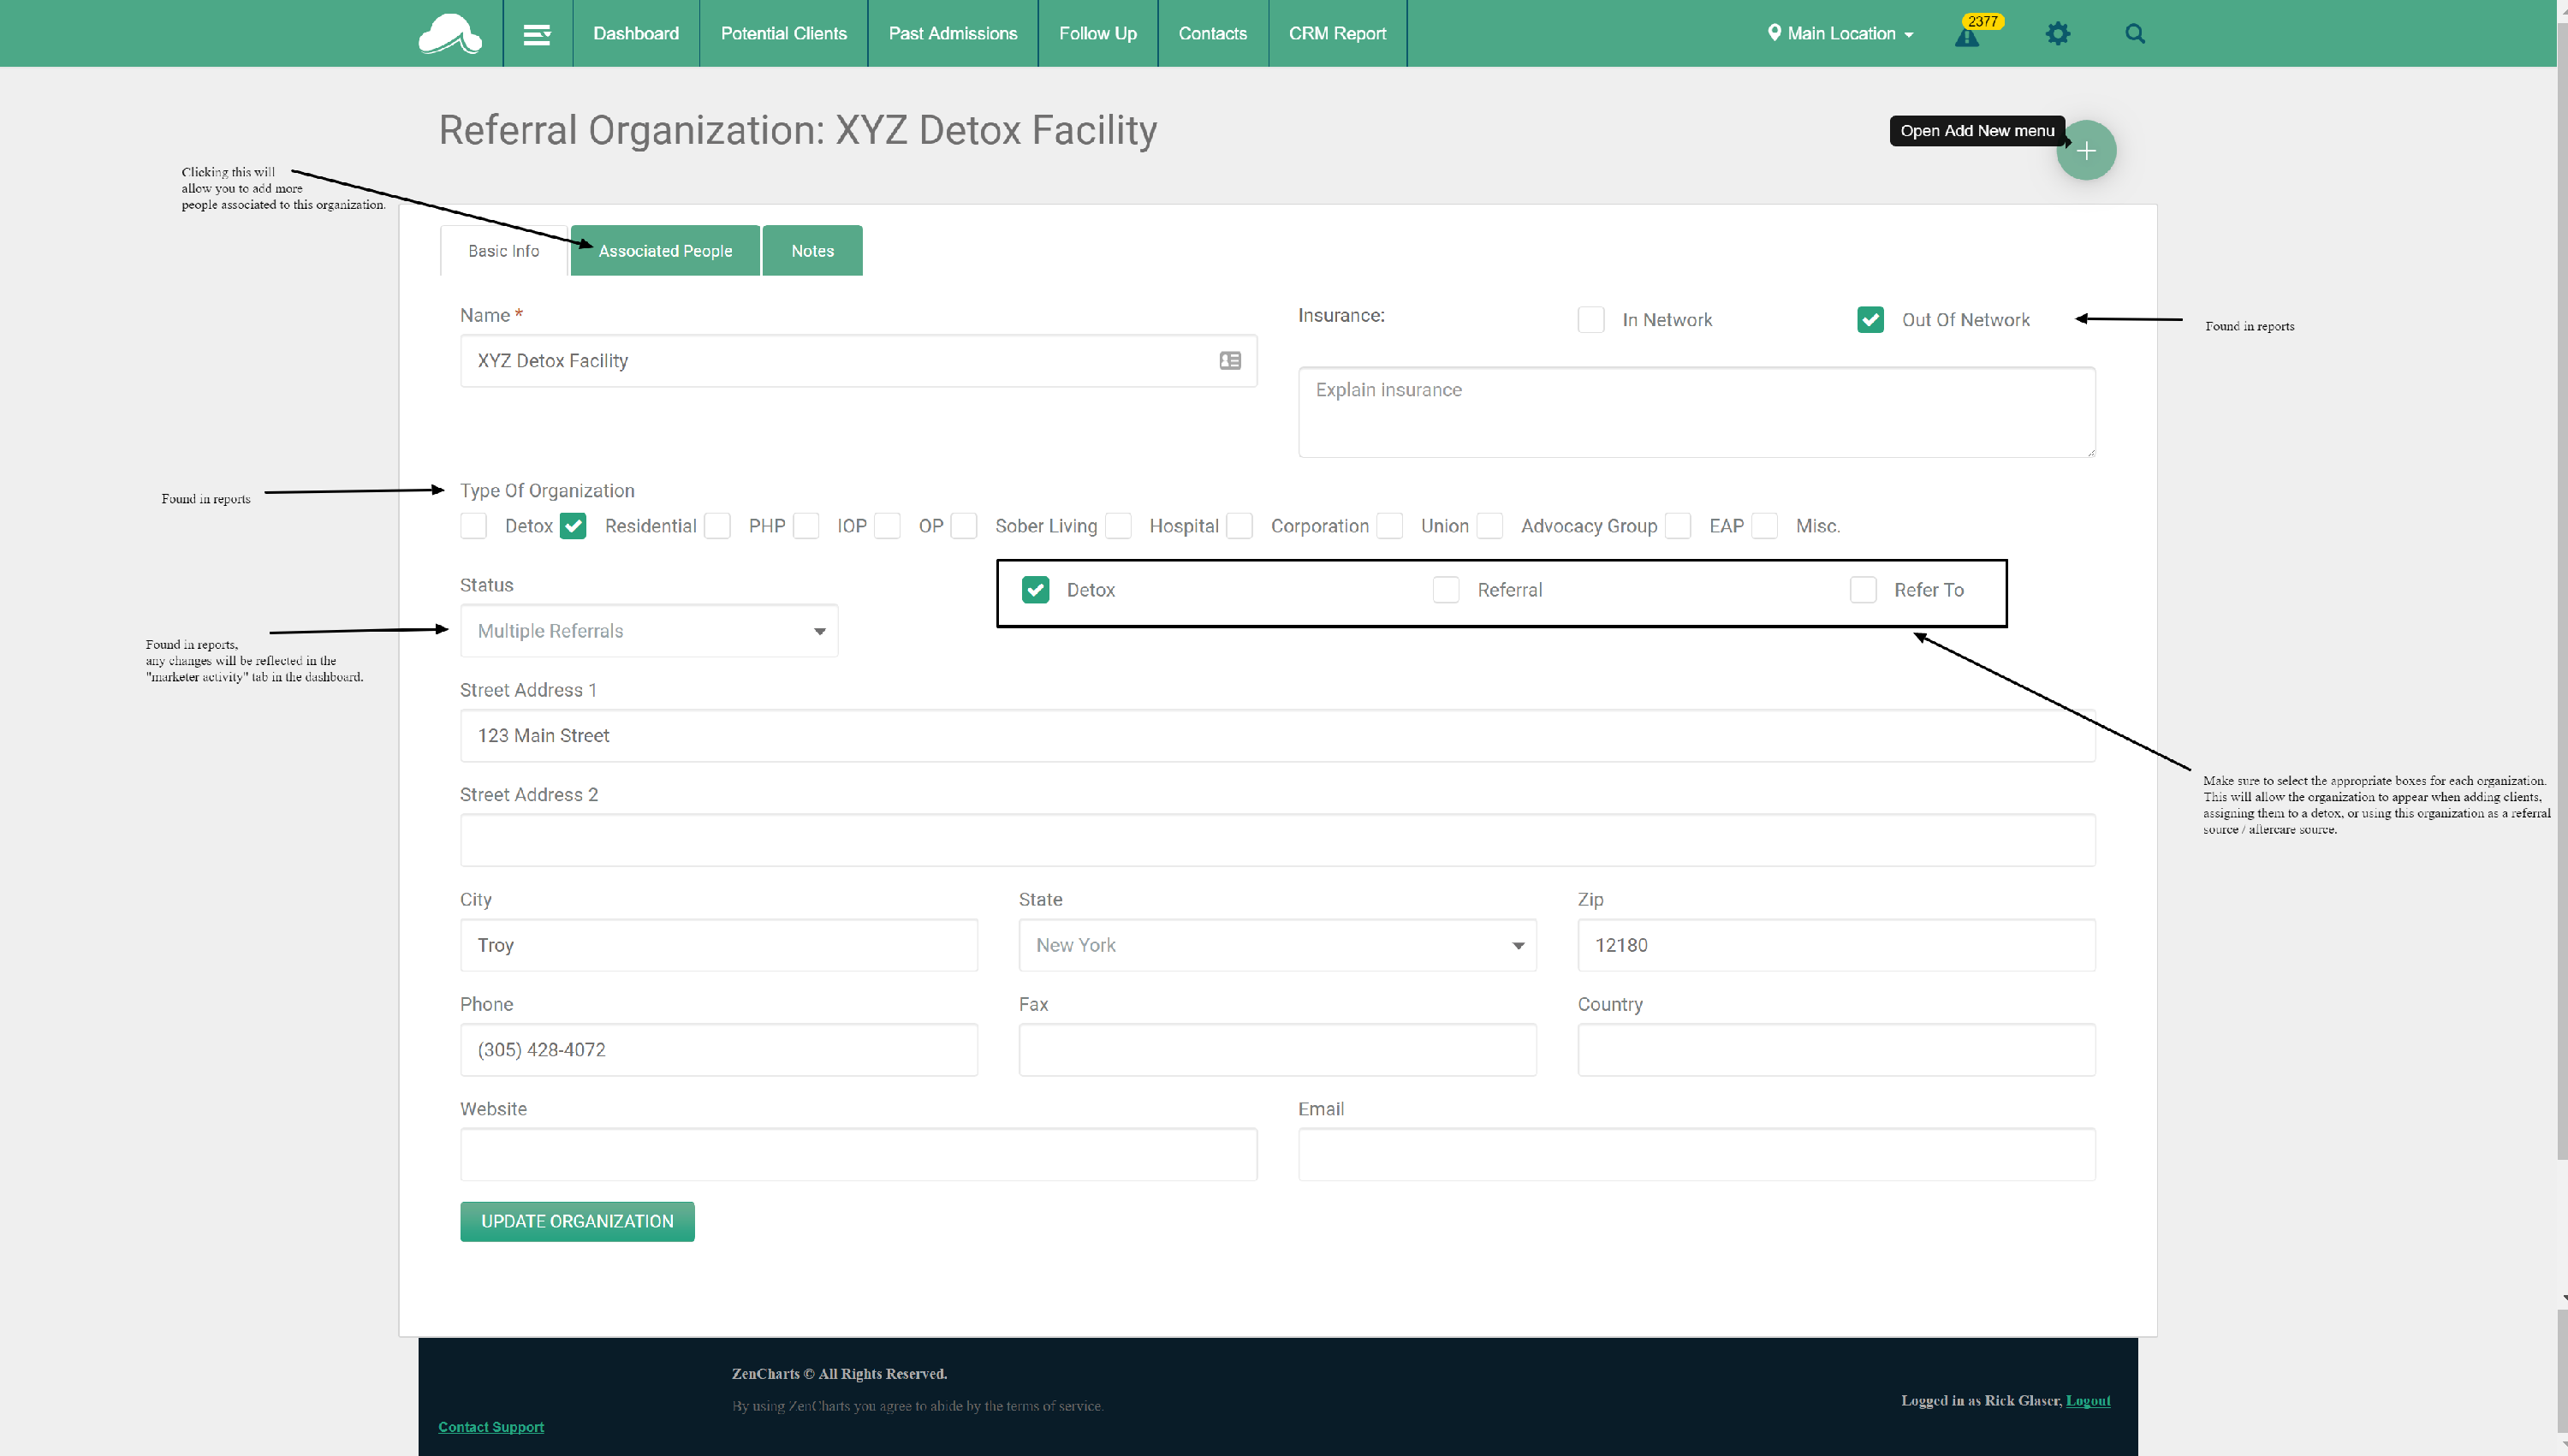
4. Adding Referral Organizations, People, and Associating Them to a Marketer (an internal staff member)
Tiered referral sources are an integral part of CRM 2.5. We now will associate a person, organization, and marketer to each potential client. We utilize the same logic when referring people out from within the system, adding aftercare referrals, and using 3rd party detox facilities.
Each organization will have one or more people associated to it. Each person will have a specific marketer associated to them. It is important that this information is as accurate as possible in order to maintain accurate reports.
5. Follow-up
Adding in follow-up reminders is simply done by navigating to the follow-up tab, and clicking "new follow-up".
If you only want to have people see the follow-up reminders specific to them, give that role "read" permissions in user rights. If you want a specific role to see all follow-up reminders for all staff, give that role "write" in the user rights section.
Once a person has a follow-up built in, it will appear in the other tabs from within this section. These follow-up reminders can be assigned to current, potential, and discharged clients as well as any type of person, or organization.
6. Dashboard
The dashboard is going to show you a very basic form of reporting. Where are people coming from in terms of referral sources, and geographically, as well as conversion rates, and payment method.
We have added some other tabs in order to see staff activity (such as VOB approvals), marketer activity (when notes are added, or organization status types change), as well as the most recently contacted potential clients.
7. CRM Super Report
The CRM report is what ties everything together. All reports are generated into a native Excel file to make sorting a bit easier. The data that can be included includes 184 different values that are entered throughout the CRM. Client notes added, organization notes, address, people - the list goes on.
We highly recommend building a few reports to get comfortable with the capabilities.
Remember: Once you build the report, it is saved.
8. Adding Potential Clients.
Adding clients can be done from the 'Potential Clients', 'Previous Clients', and the 'Dashboard' from within the CRM.
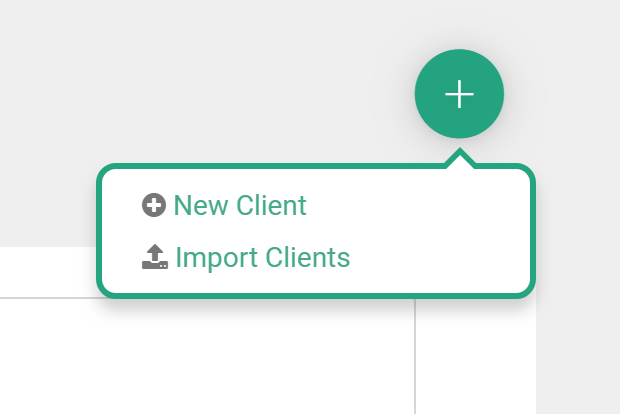
Simply click the + sign in the upper right corner, and + new client.
9. VOB Process / Adding Client Insurance
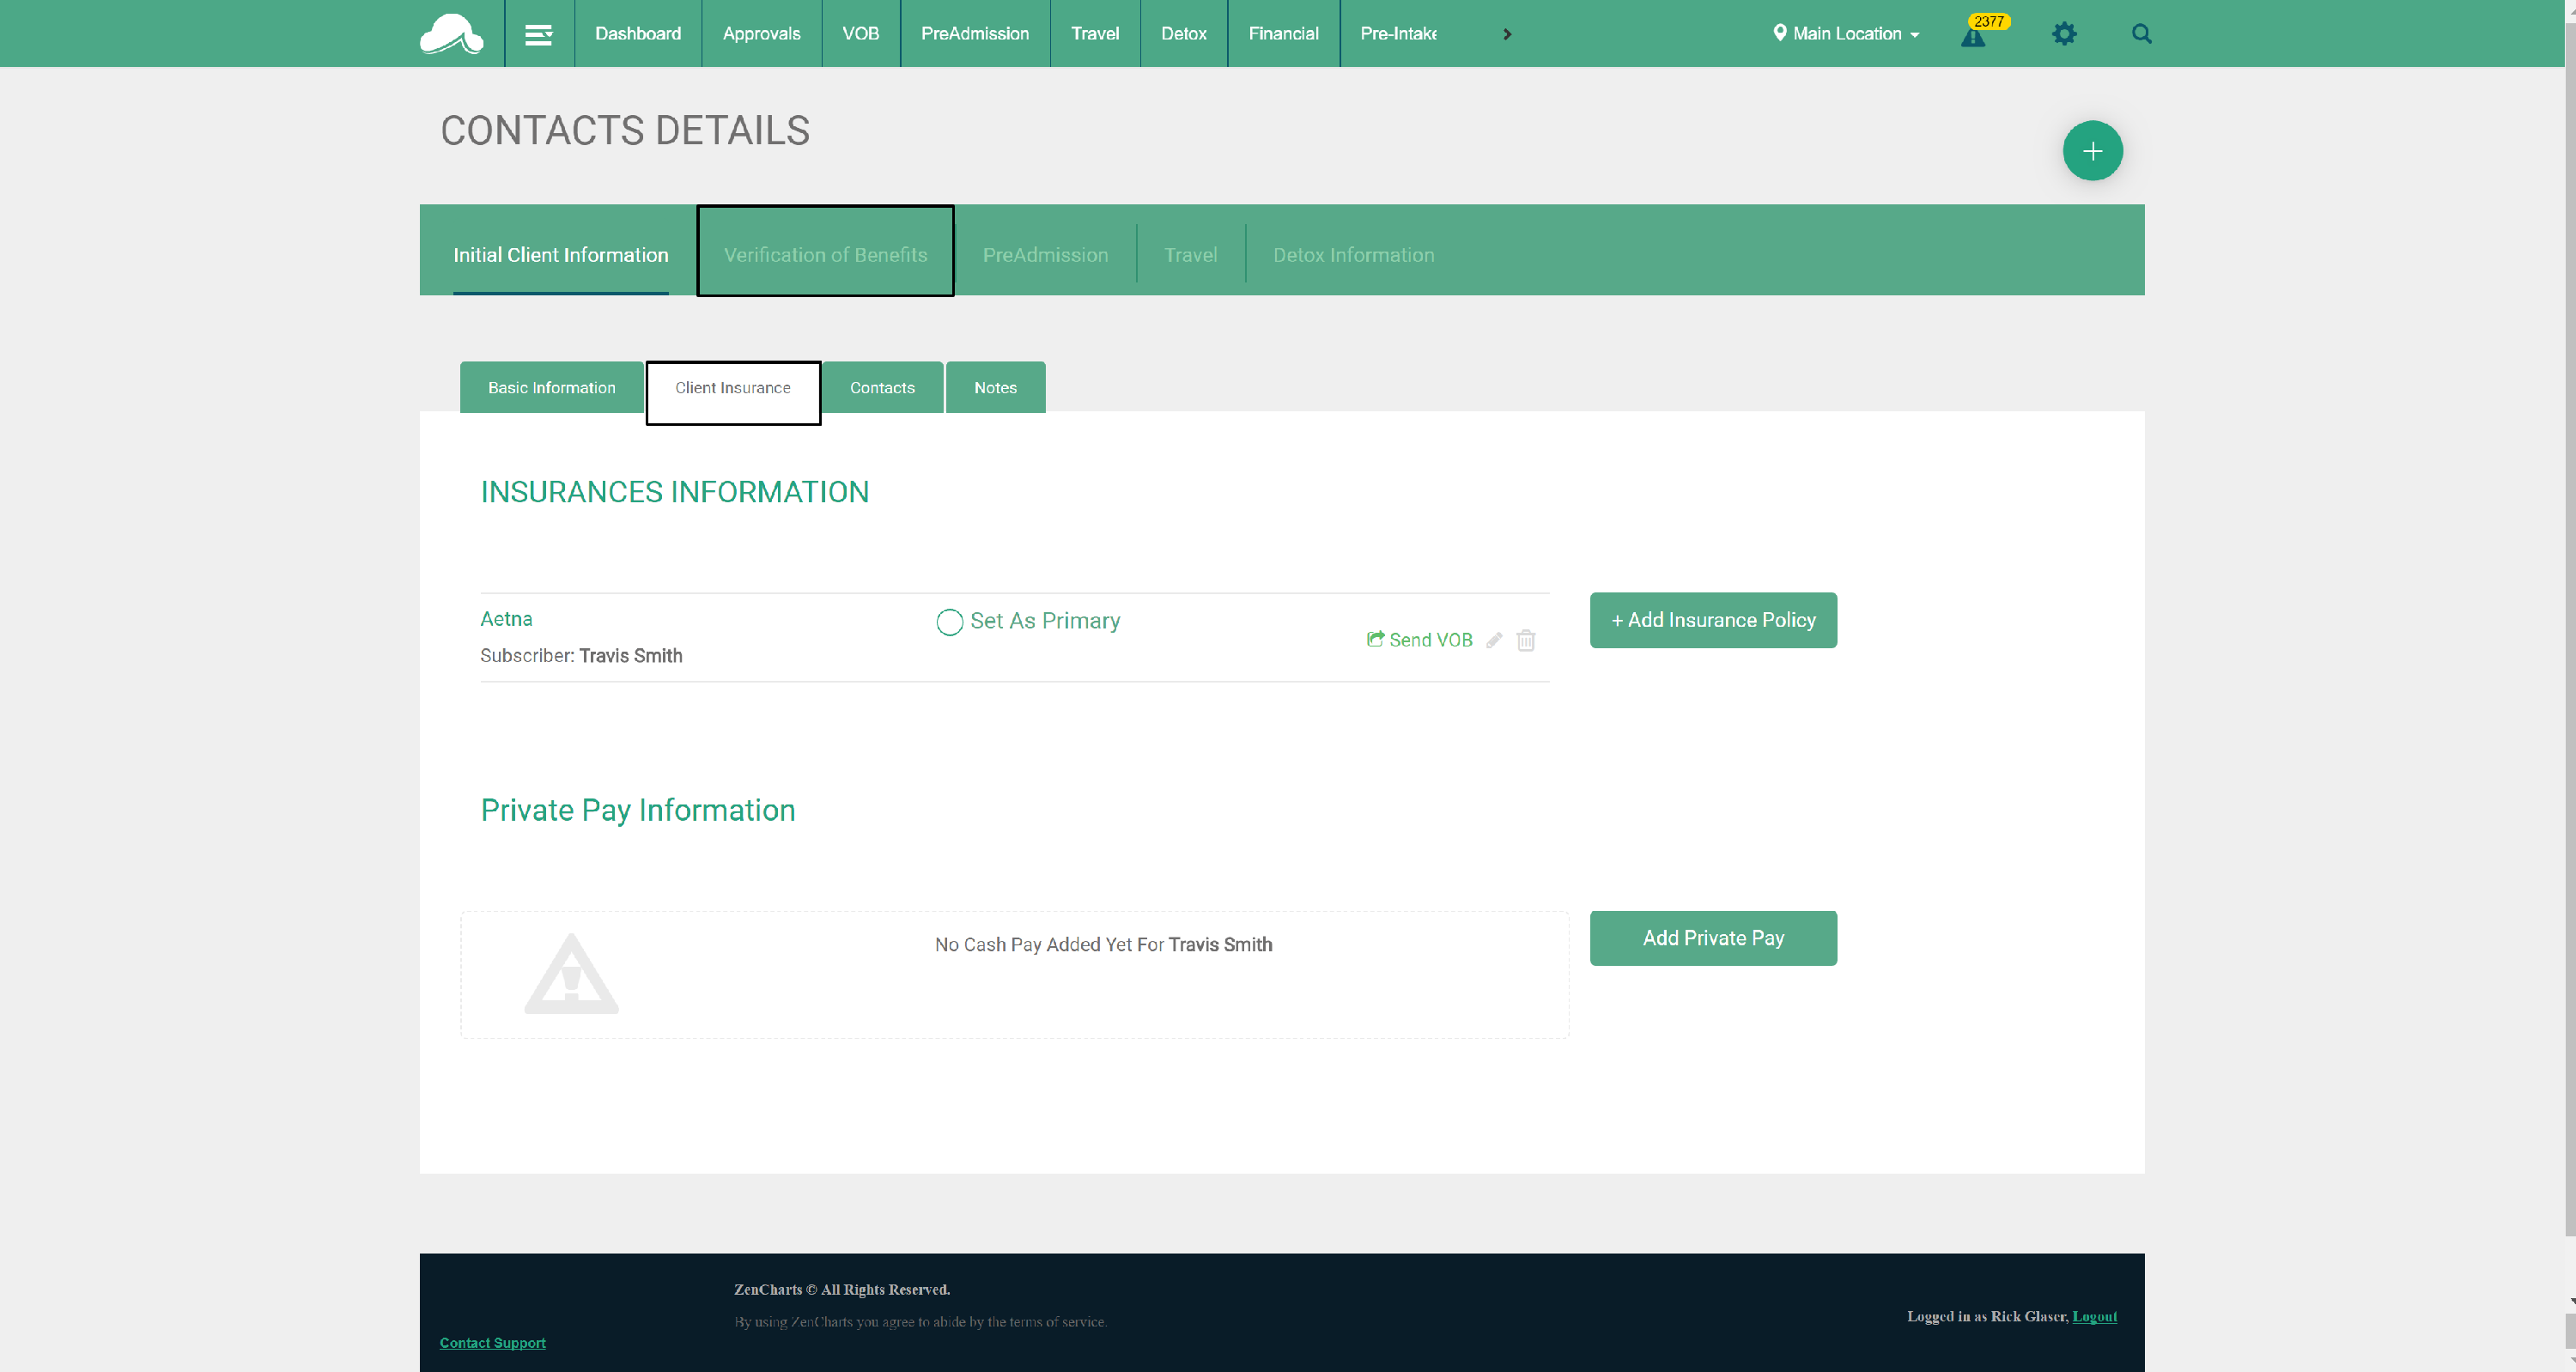
Once you have created a record for a potential client, you can then select their payment method, and if it is insurance - verify the policy.
-
Click on the person's name from the list of potential clients, or select them by searching for the person in the upper right corner of the screen.
-
Click the client insurance tab to manage the policies on file, or assign the policy to be verified.
-
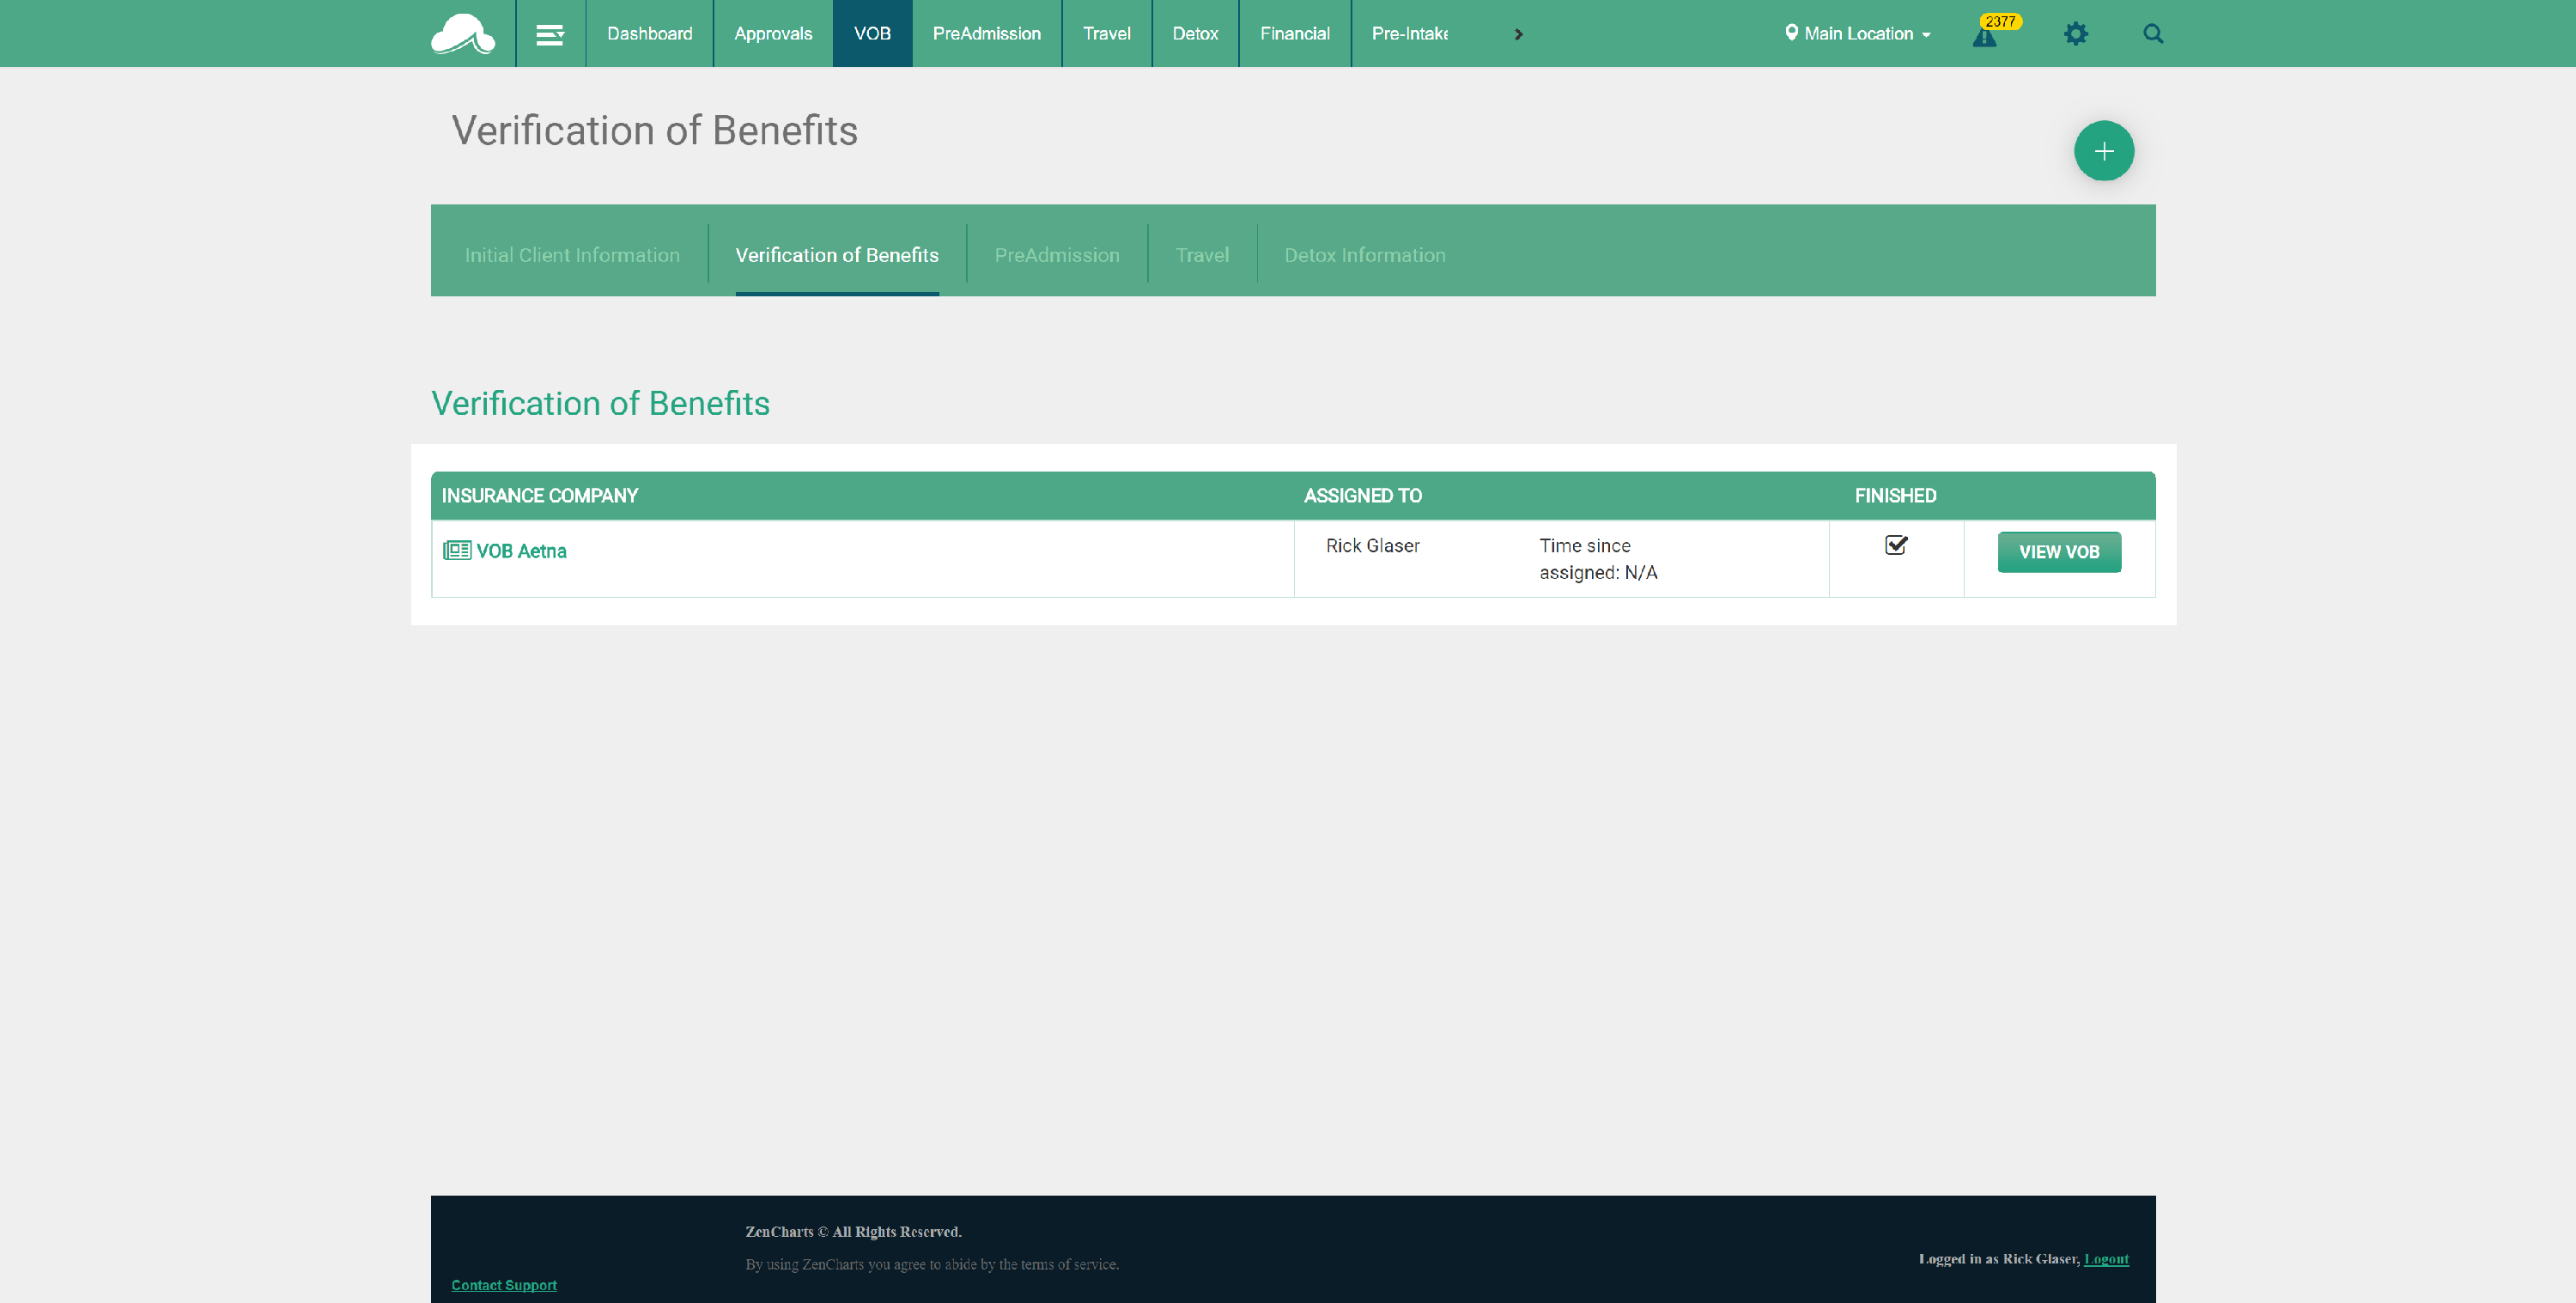
If the policy has been added, click the 'verification of benefits' sub-menu item to bring you to the verification page for that person. Note: you can only verify policies assigned to you.
4. Click view VOB to the right of the screen if you have been assigned to verify the policy, and want to enter the information.
5. Once you have finished entering all information, click 'Send Completed VOB'.
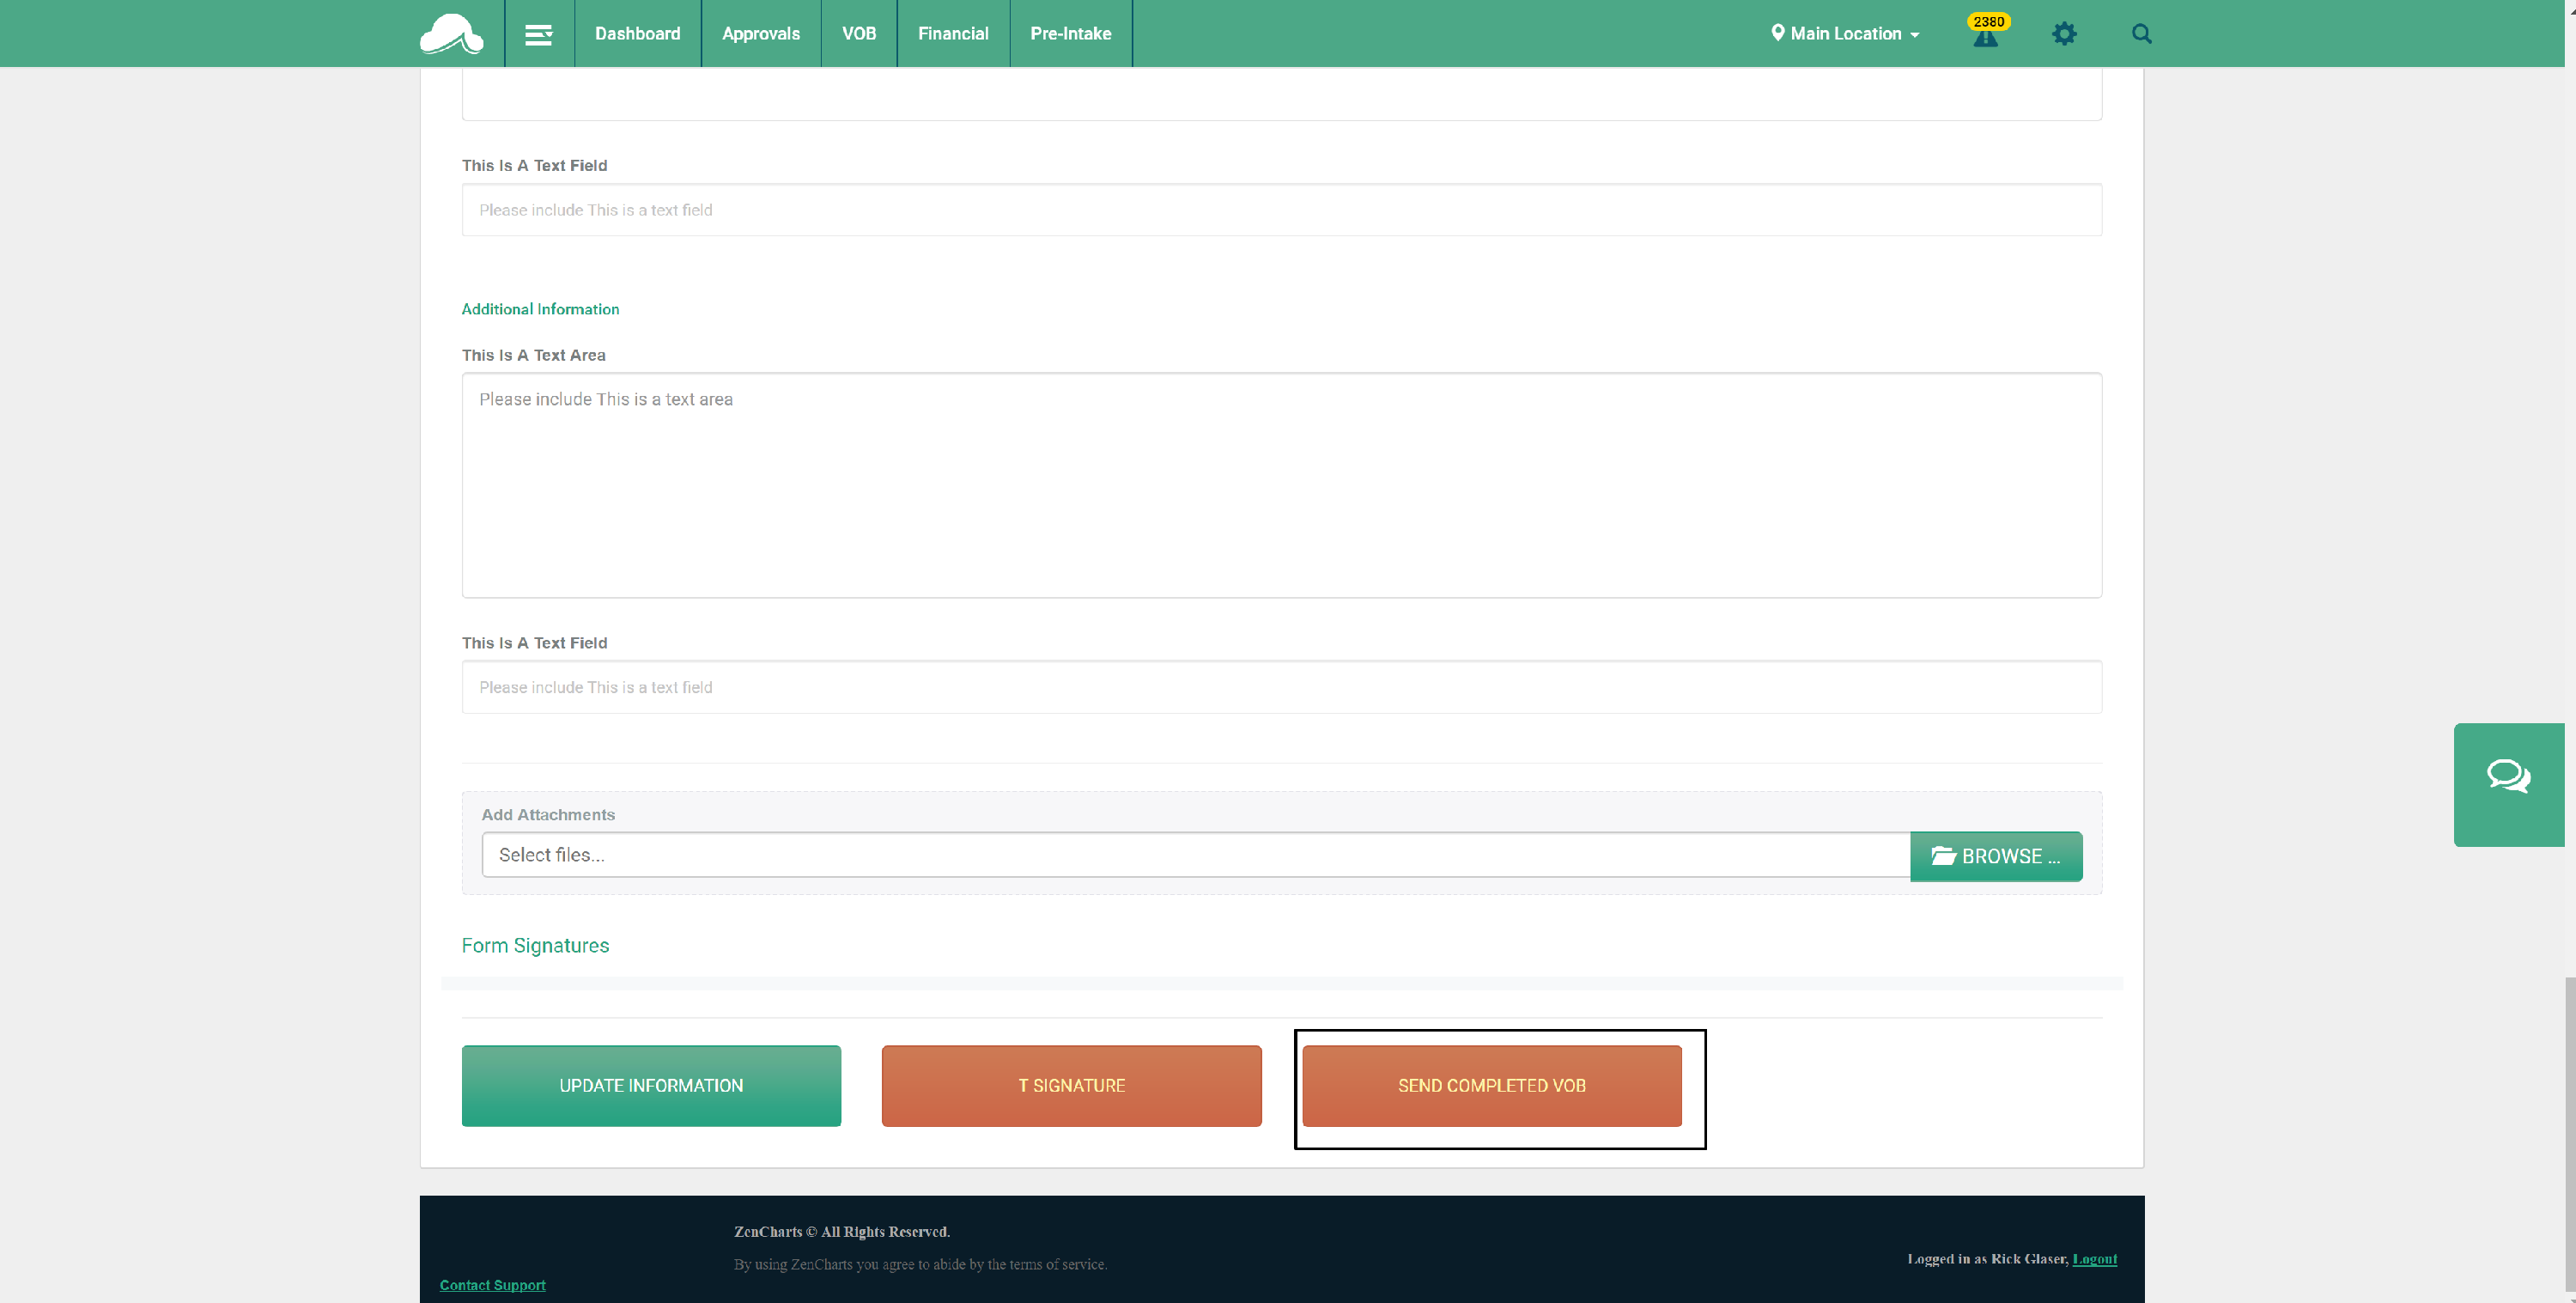
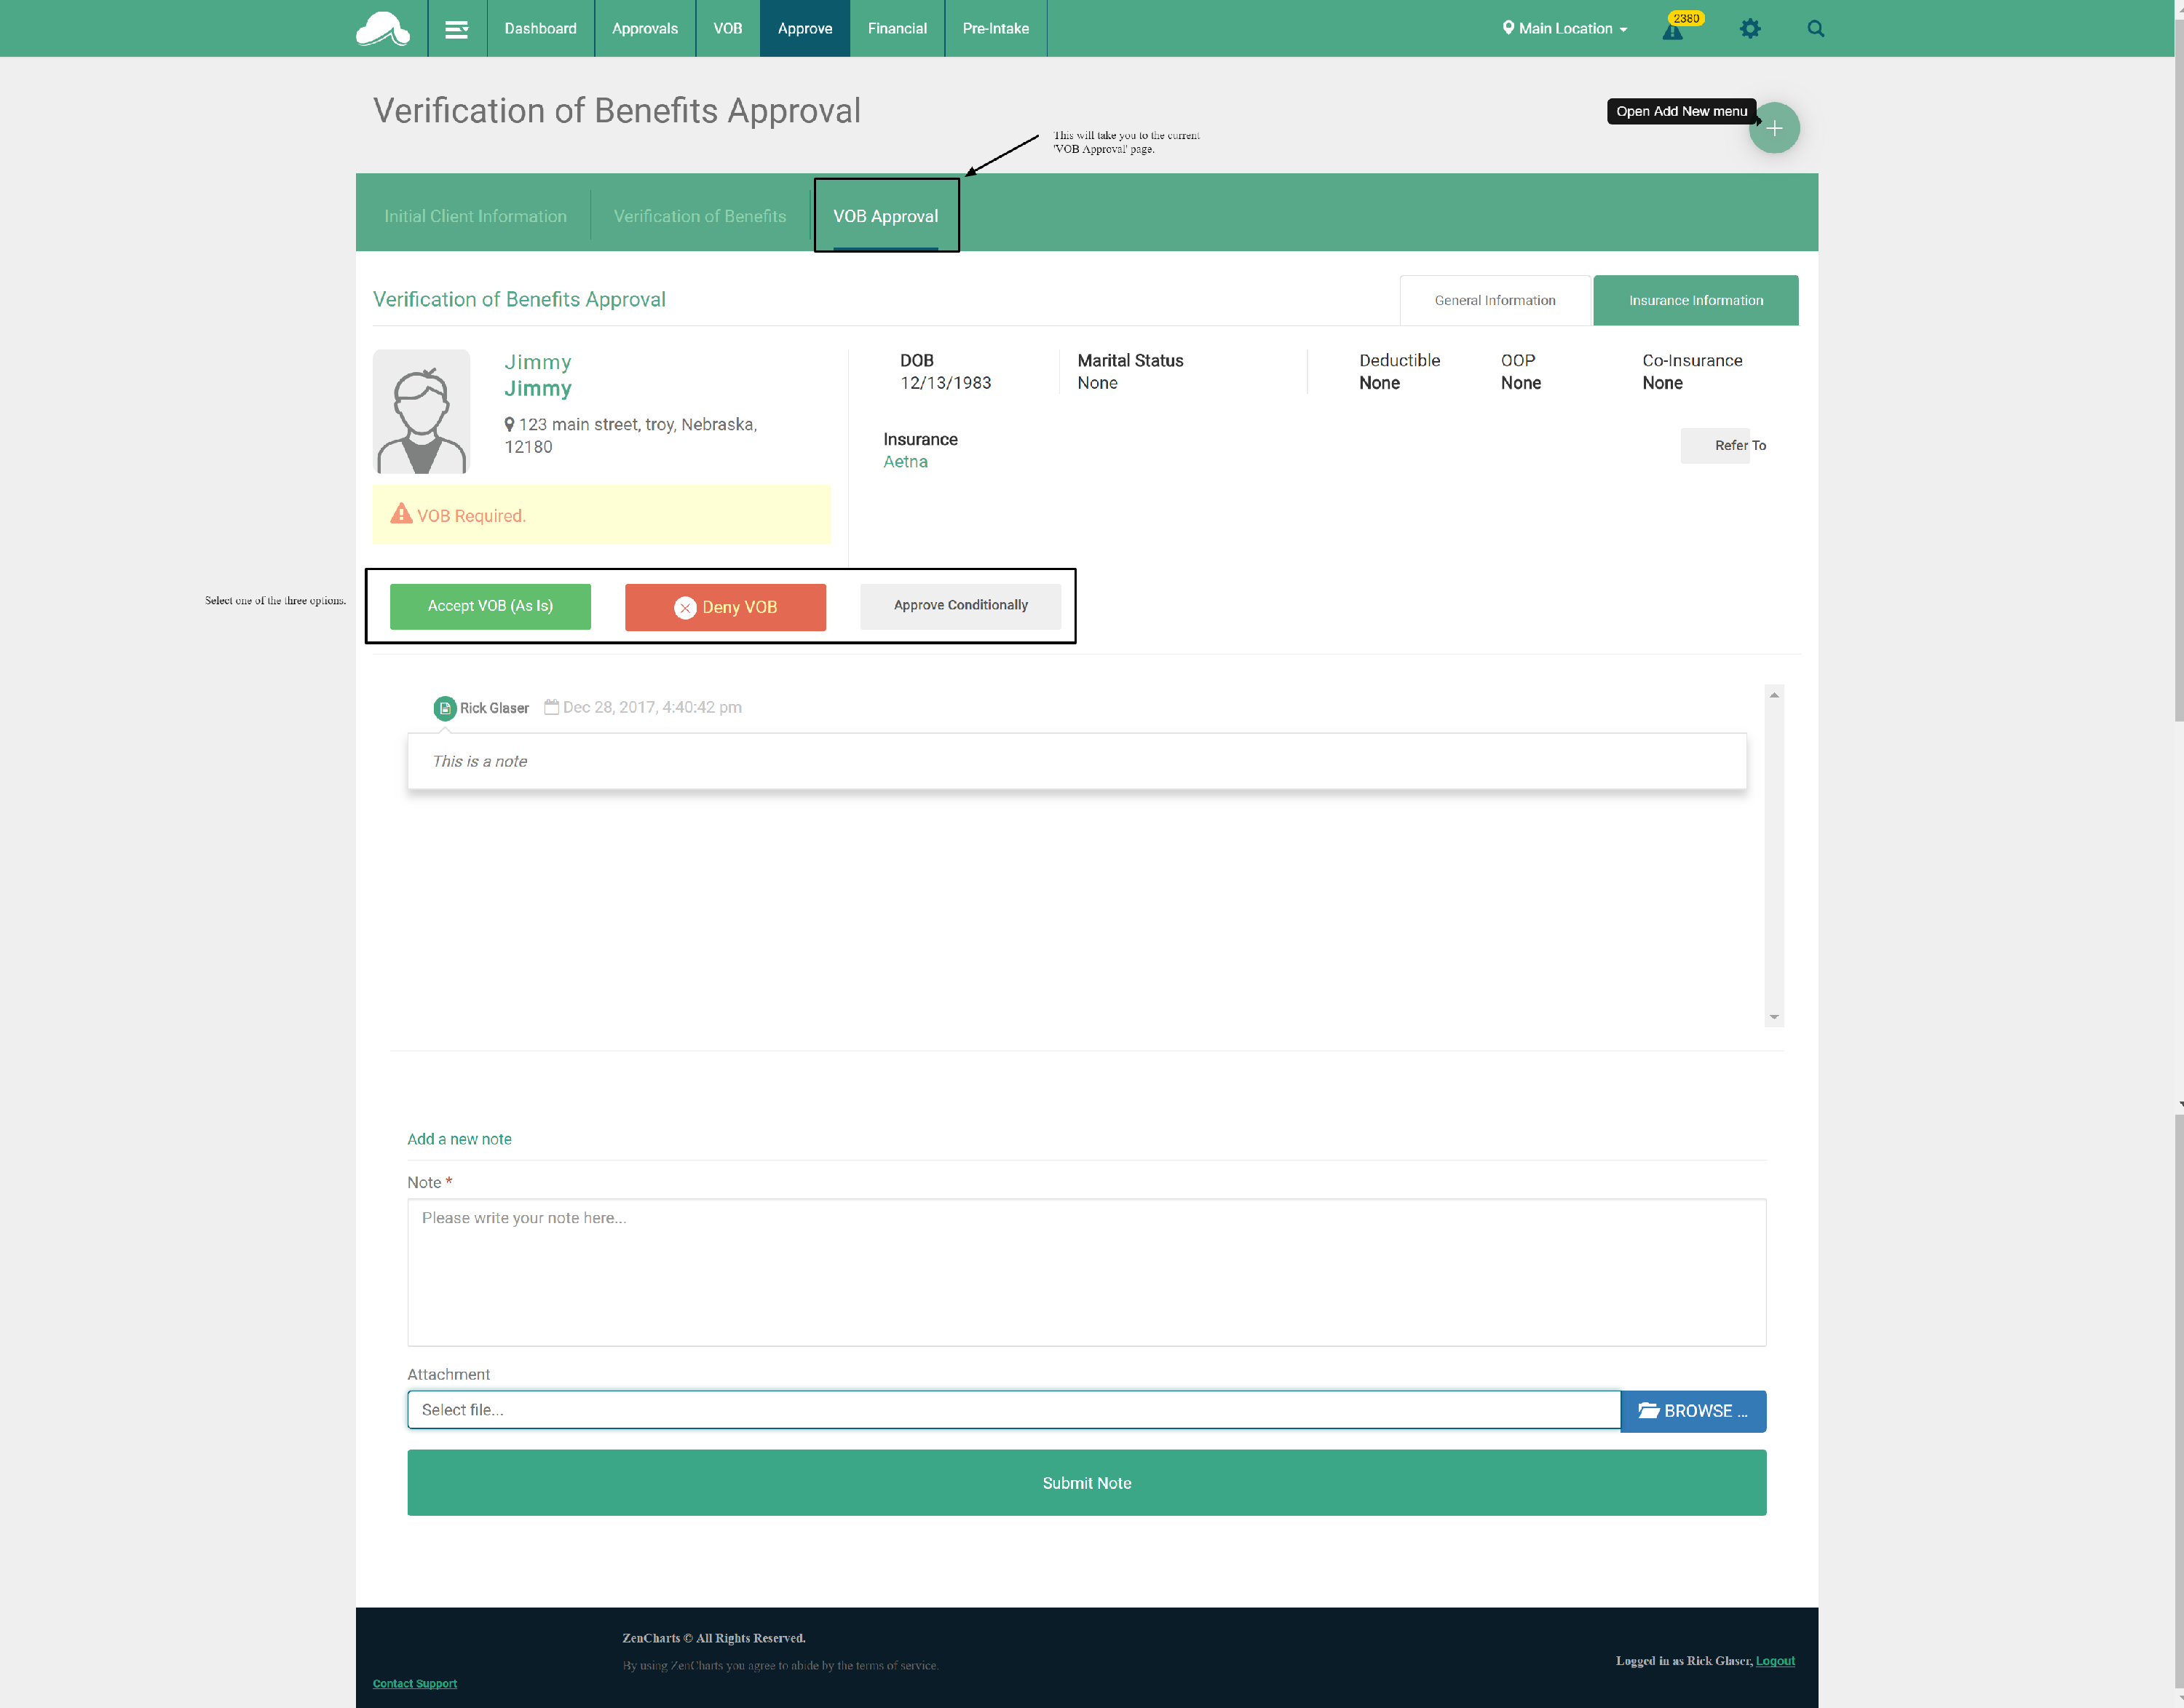
6. The Admissions Director will be notified that they have to make a financial decision based upon the information entered. They will do so on the VOB Approval page.
10. Completing the Pre-Admission Assessment / Screening, or Documentation Required Prior to the Patient Arrival.
To get to a patient's pre-admission prior to becoming a patient:
-
Click on the person's name from the list of potential clients, or select them by searching for the person in the upper right corner of the screen.
-
Select PreAdmission from the sub-navigation.
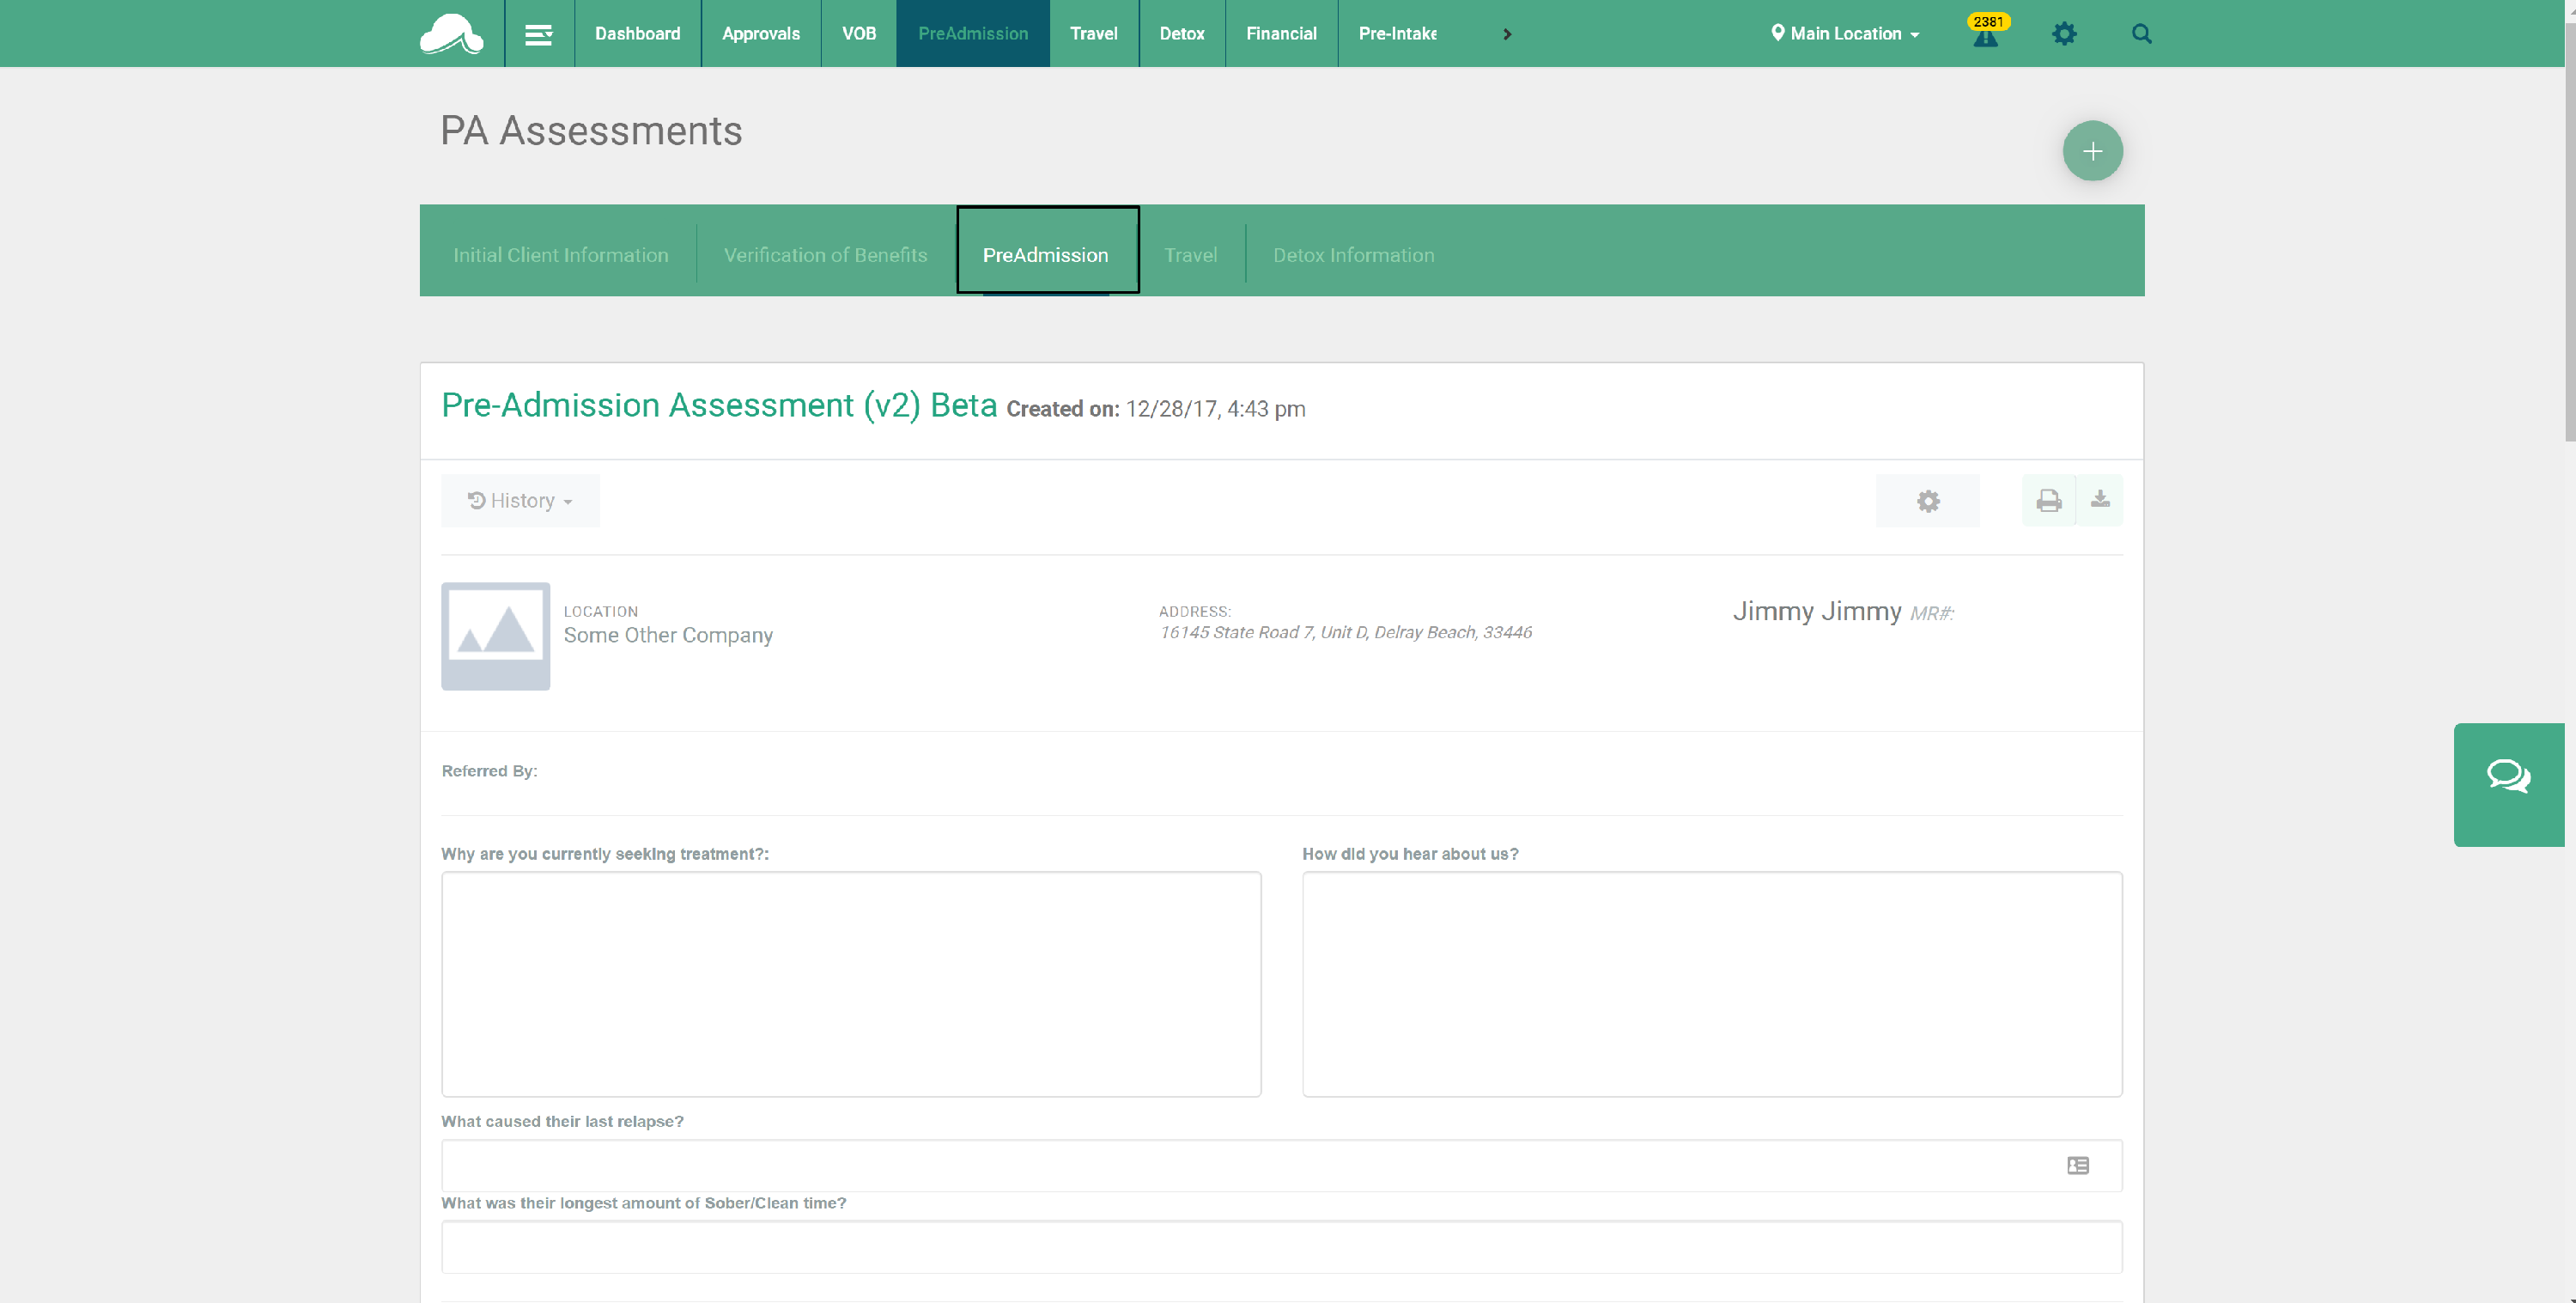
3. Once this item is signed (assuming you are using the preferred linear process), this person has now met criteria in order to be converted into a patient.
11. Adding Travel Information.
-
Click on the person's name from the list of potential clients, or select them by searching for the person in the upper right corner of the screen.
-
Select Travel from the sub-navigation.

3. You can enter flight information, attach an image of the person, and add in any relevant notes.
4. Information entered can be visible from the main Potential Clients page if you have the setting turned on.
12. Adding Detox Information.
-
Click on the person's name from the list of potential clients, or select them by searching for the person in the upper right corner of the screen.
-
Select Detox from the sub-navigation.
