Lab Screening and Confirmation
Login to ZenCharts
Go to the "Main Navigation" - "Medical" then "All Labs"
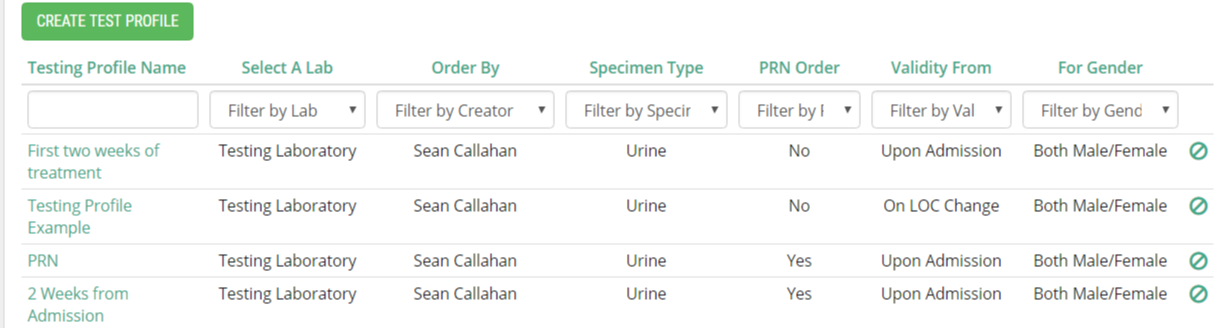
Part of the integration process is working with ZenCharts' staff to ensure the "Testing Profiles" are set to match your workflow.
"Testing Profiles" power the "Drug Testing Schedule", "Testing Que" and "PRN Test"
Now that the "Testing Profiles" are set we can Screen and or Confirm via the "Drug Testing Schedule" or "Testing Que"
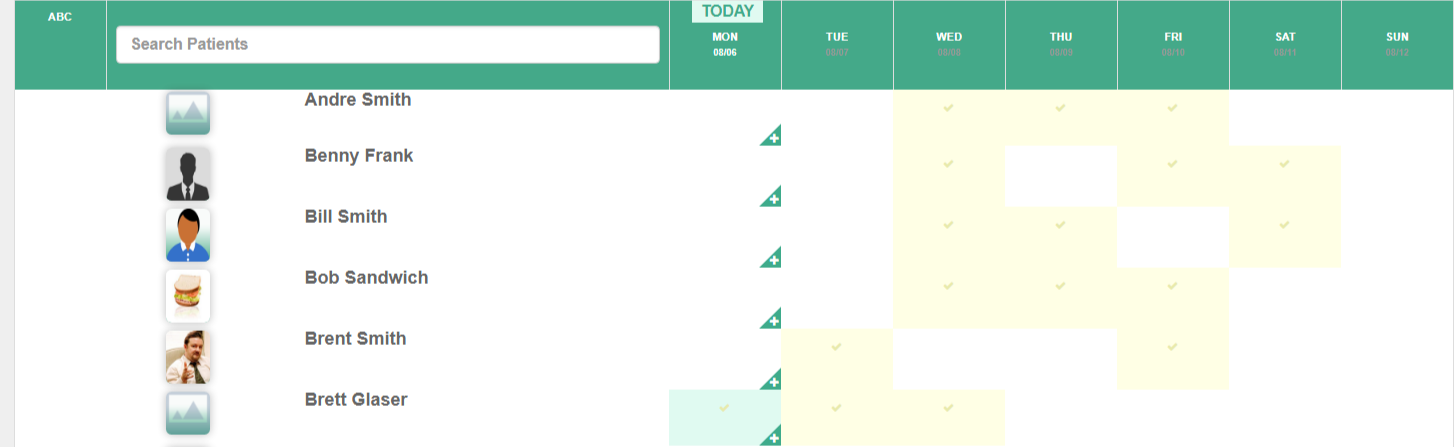
"Drug Testing Schedule"
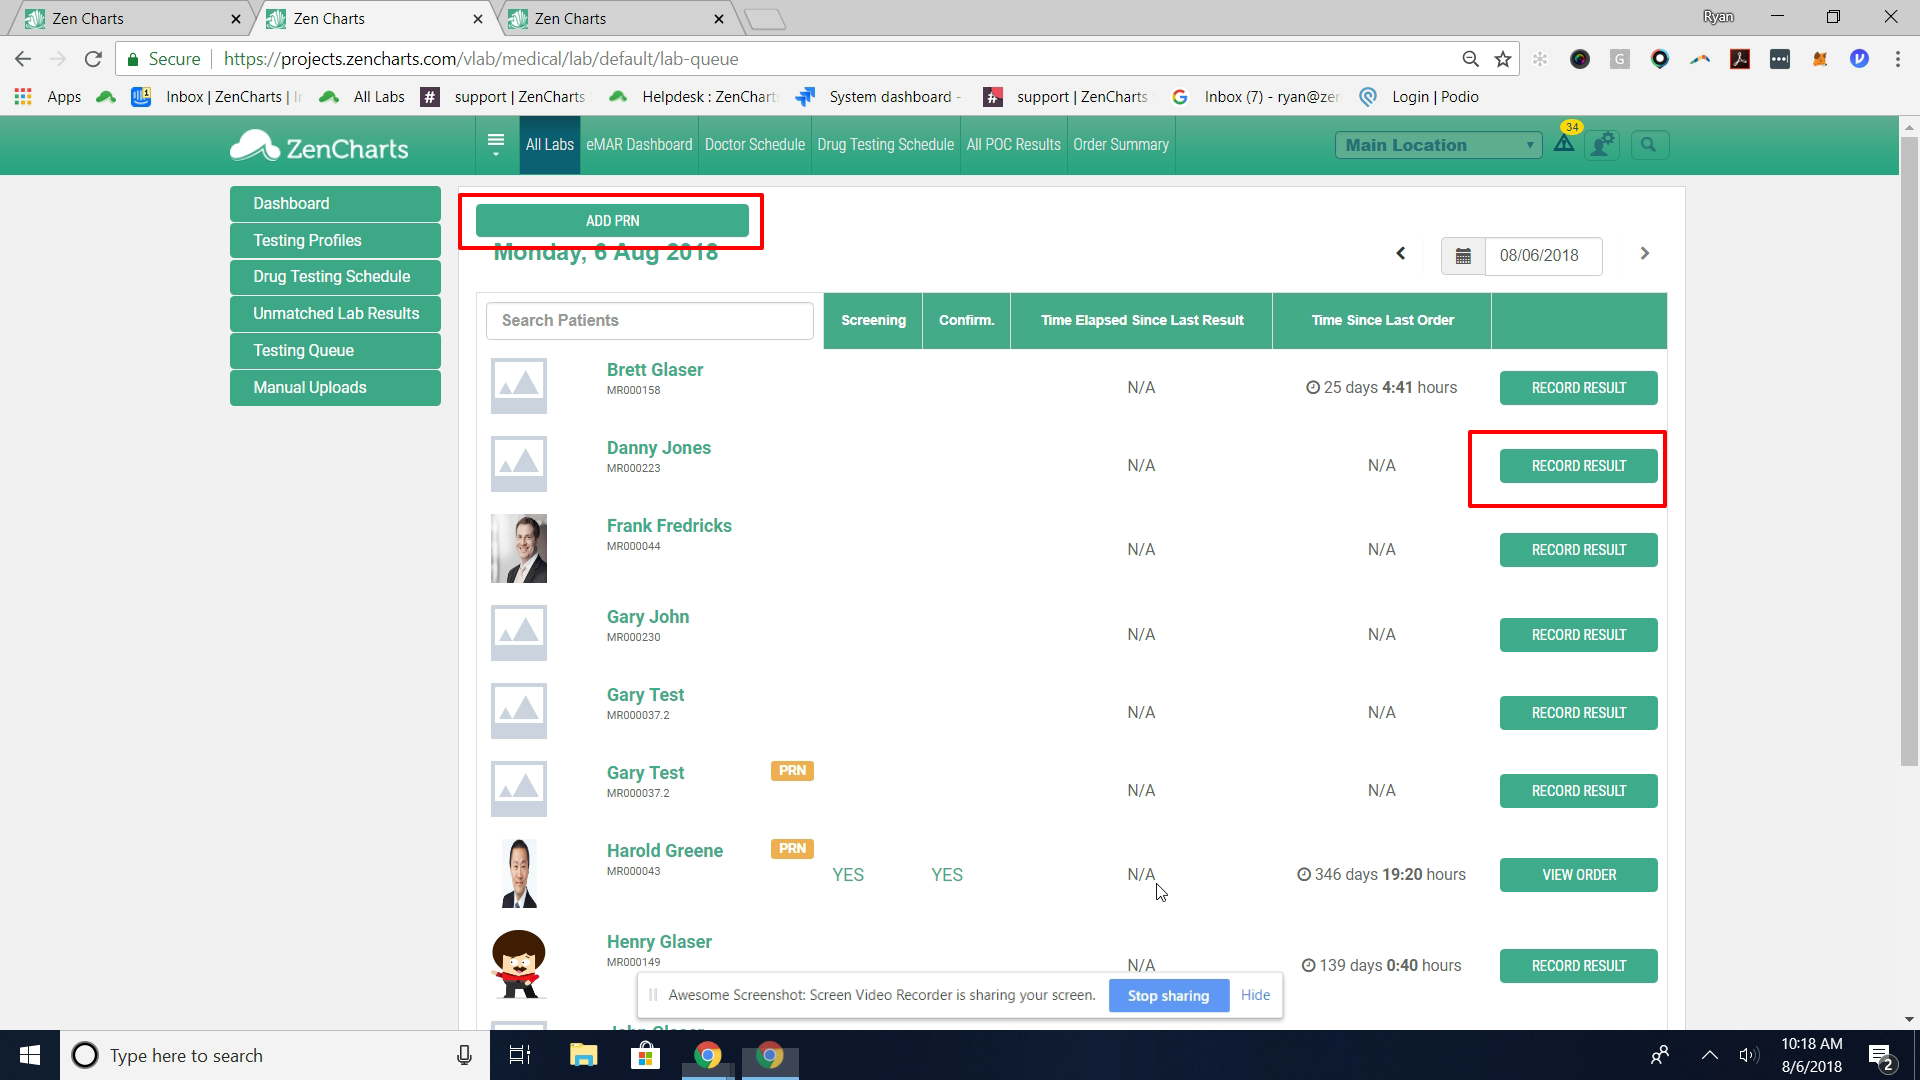
"Testing Que"
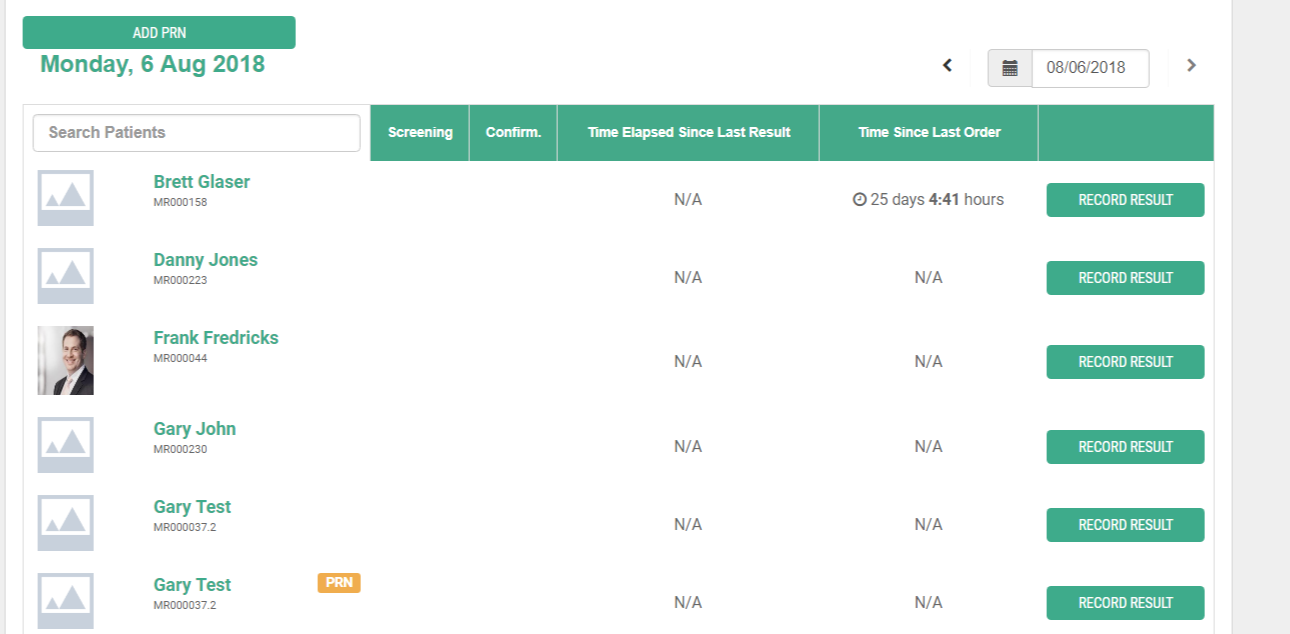
We advise using the "Drug Testing Schedule" to see the days for your screenings/confirmations but to use the "Testing Que" in your daily workflow for collection.
Via the "Testing Que" choose "Record Result" or "Add PRN"
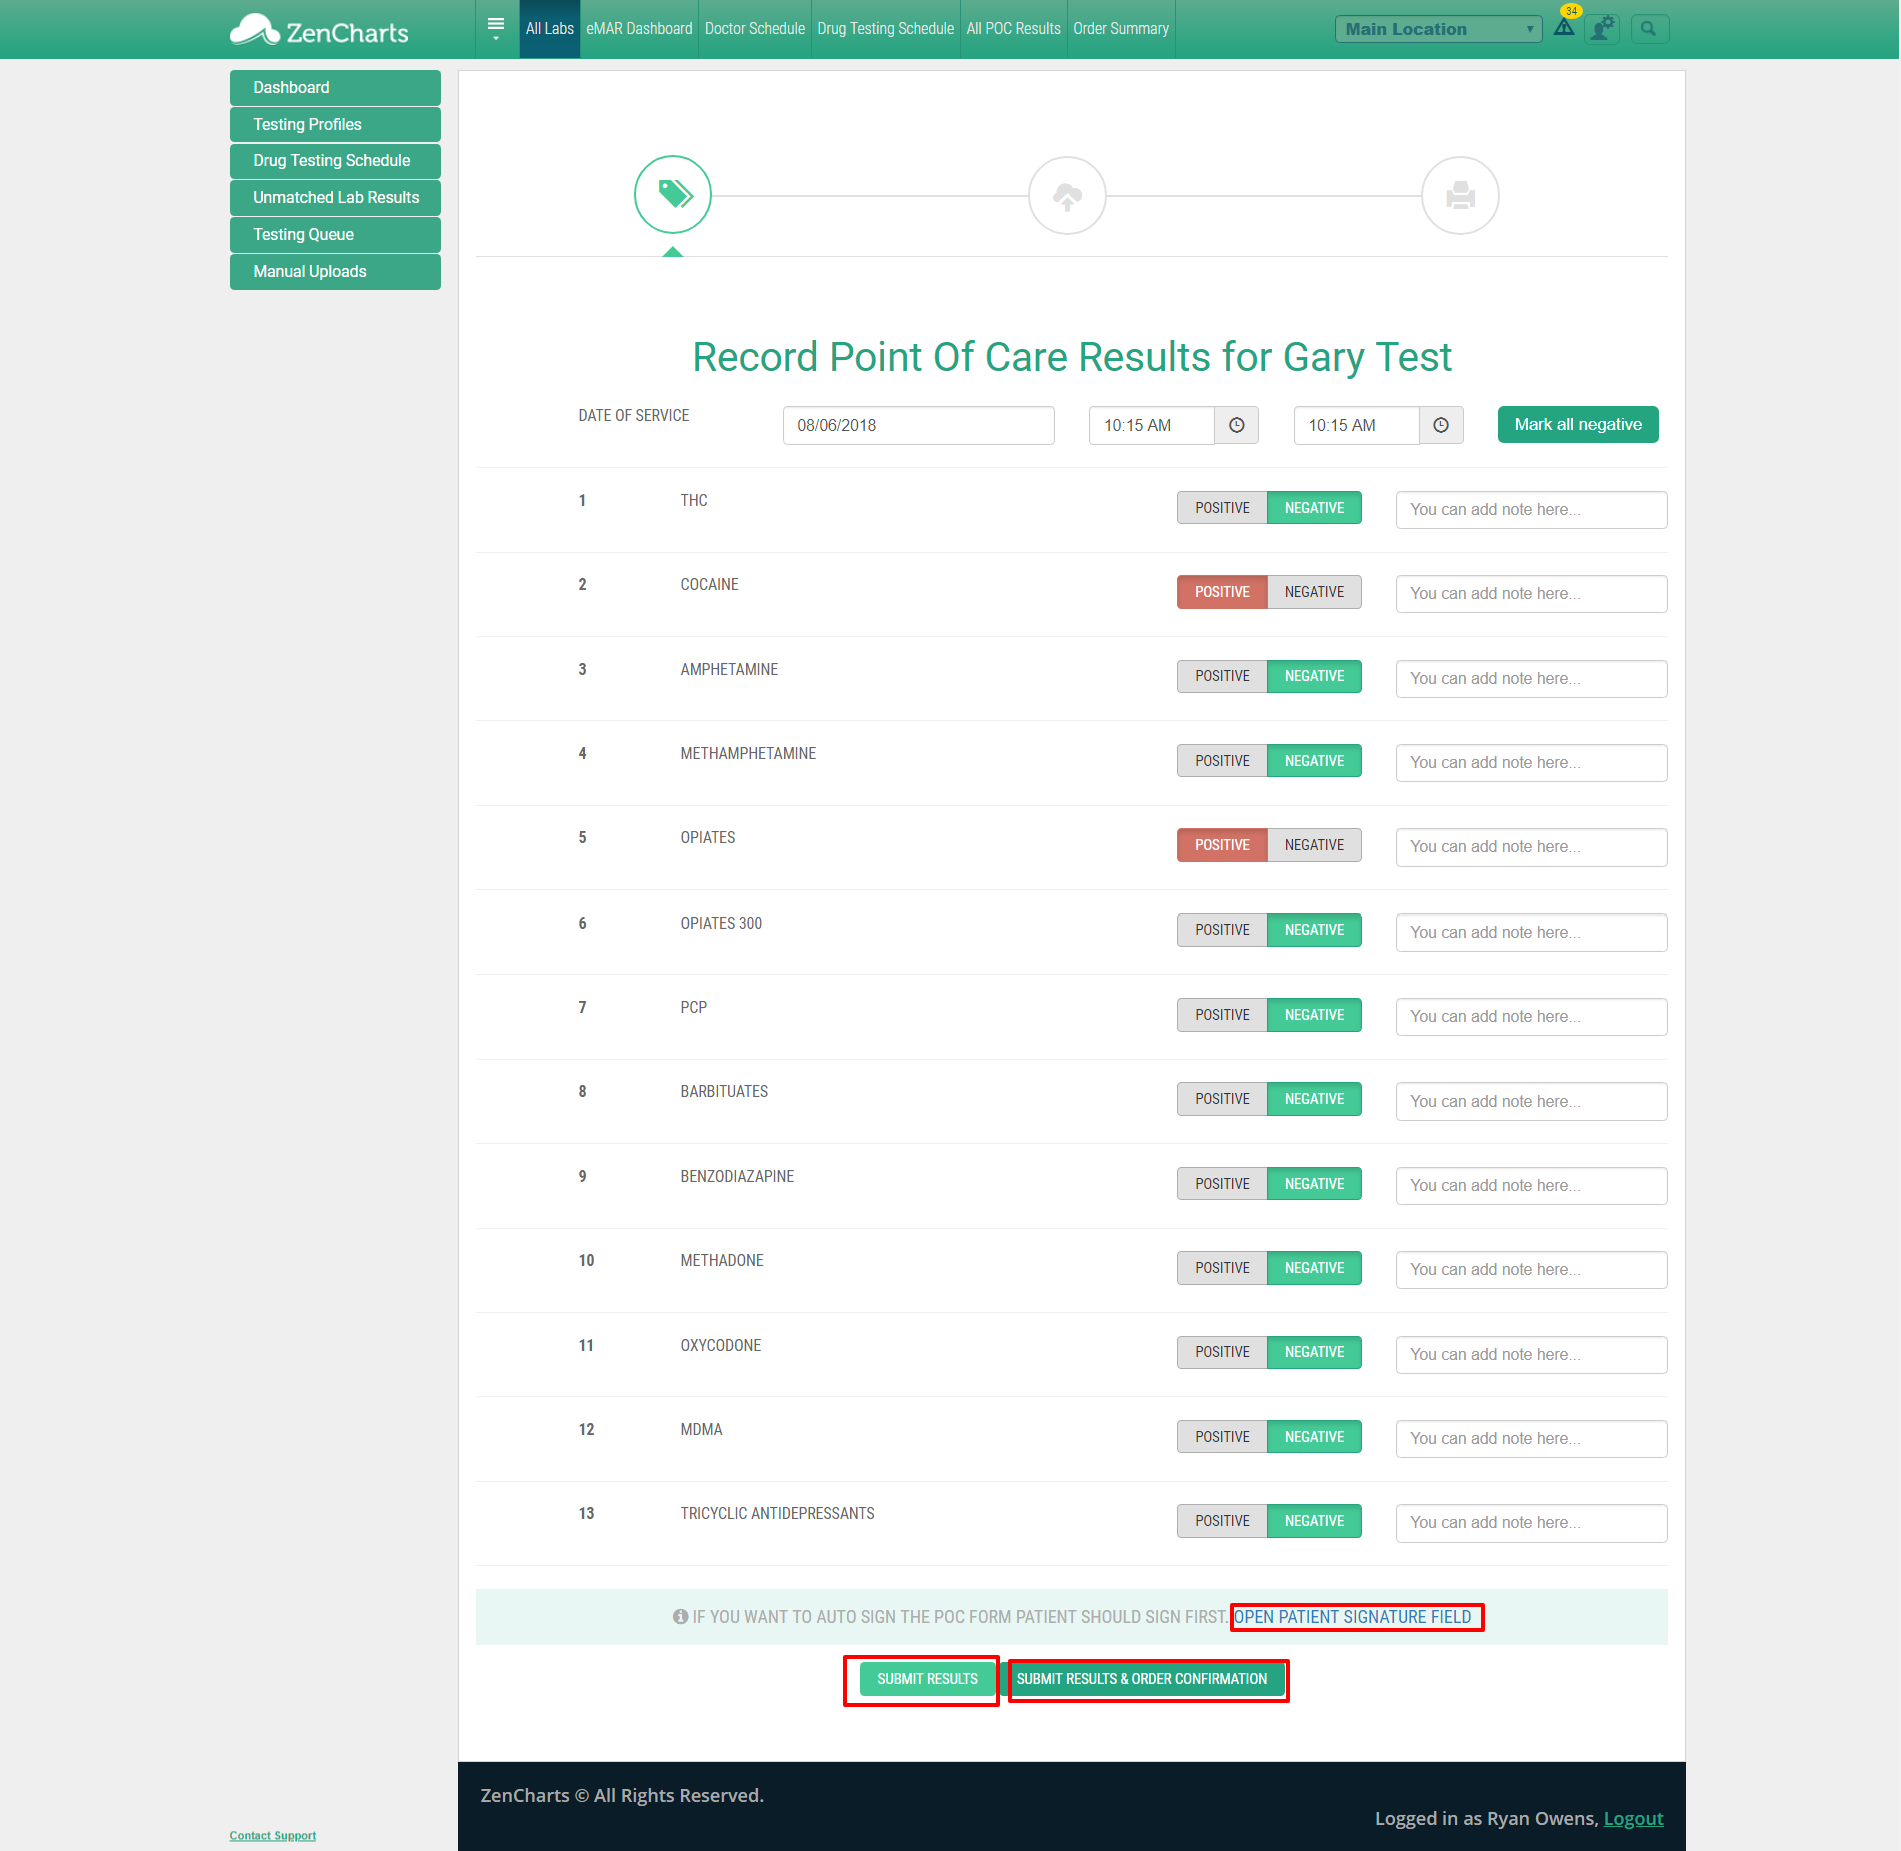
Now we have entered our collection wizard.
Step 1 - Screening/Point of Care results. Select positive or negative base on the results of the cup. We have the option to have the client sign. Lastly select "Submit Results" to ONLY do a Screening. This will generate a "Point of Care Result" form into the clients MR. Selecting "Submit Results and Order Confirmation" will submit the form and proceed into sending a Confirmation to the Lab.
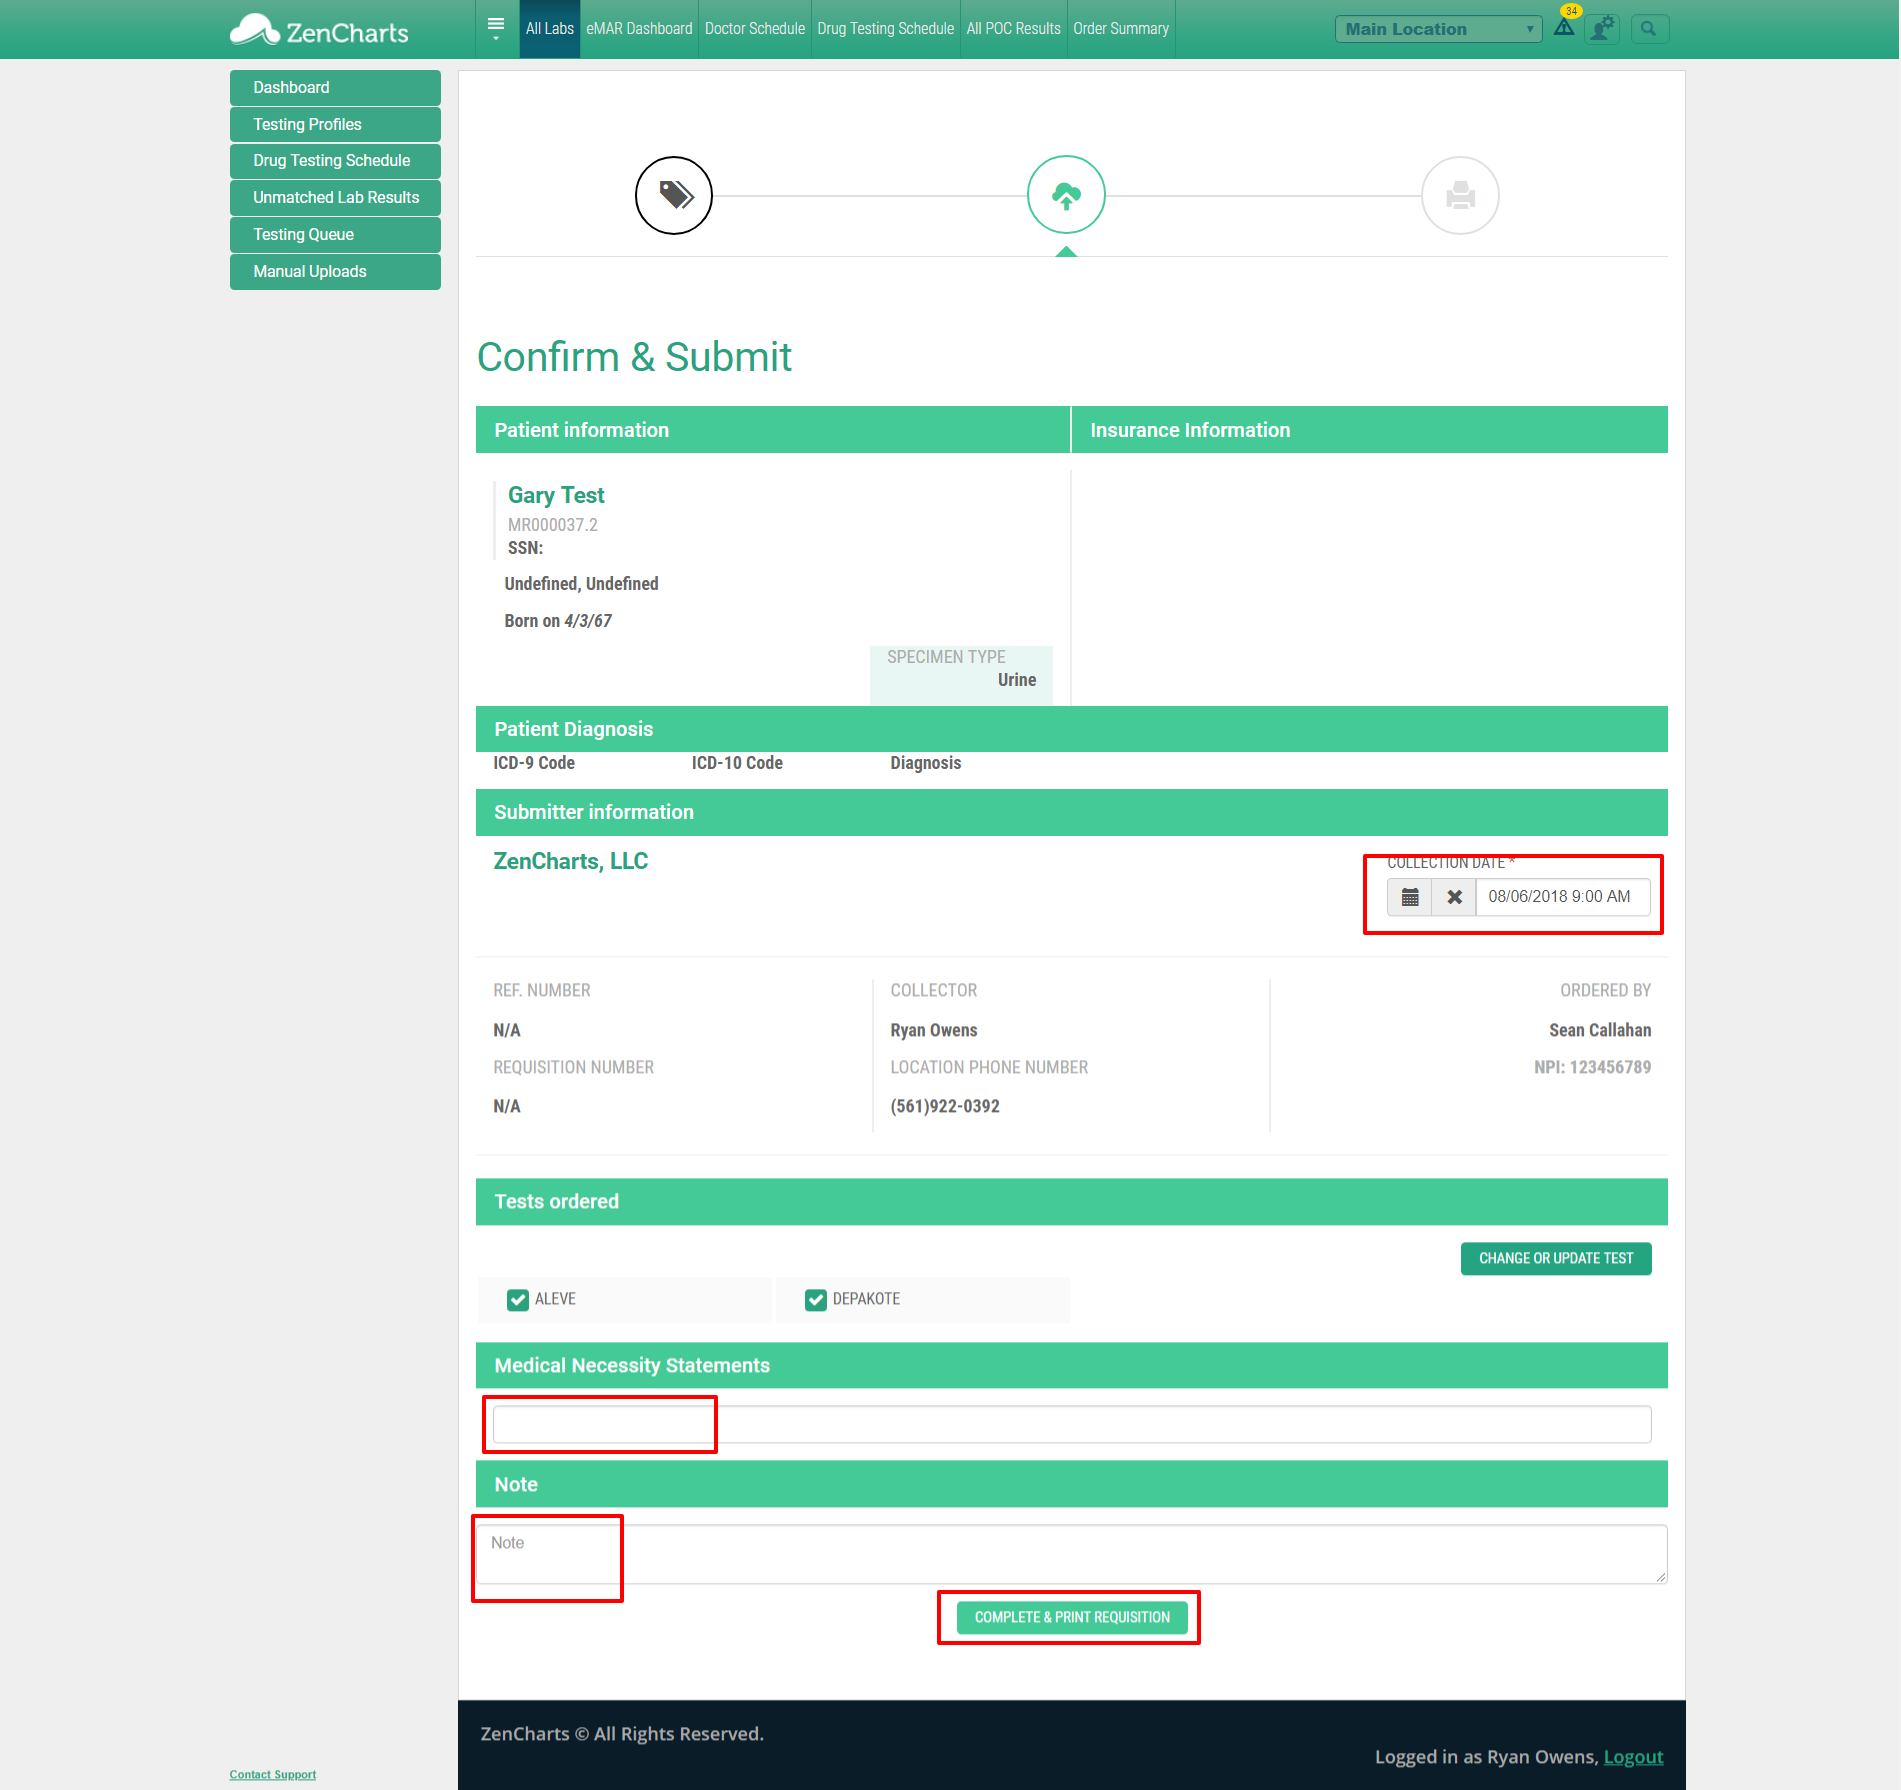
Having chosen "Submit Results and Order Confirmation"
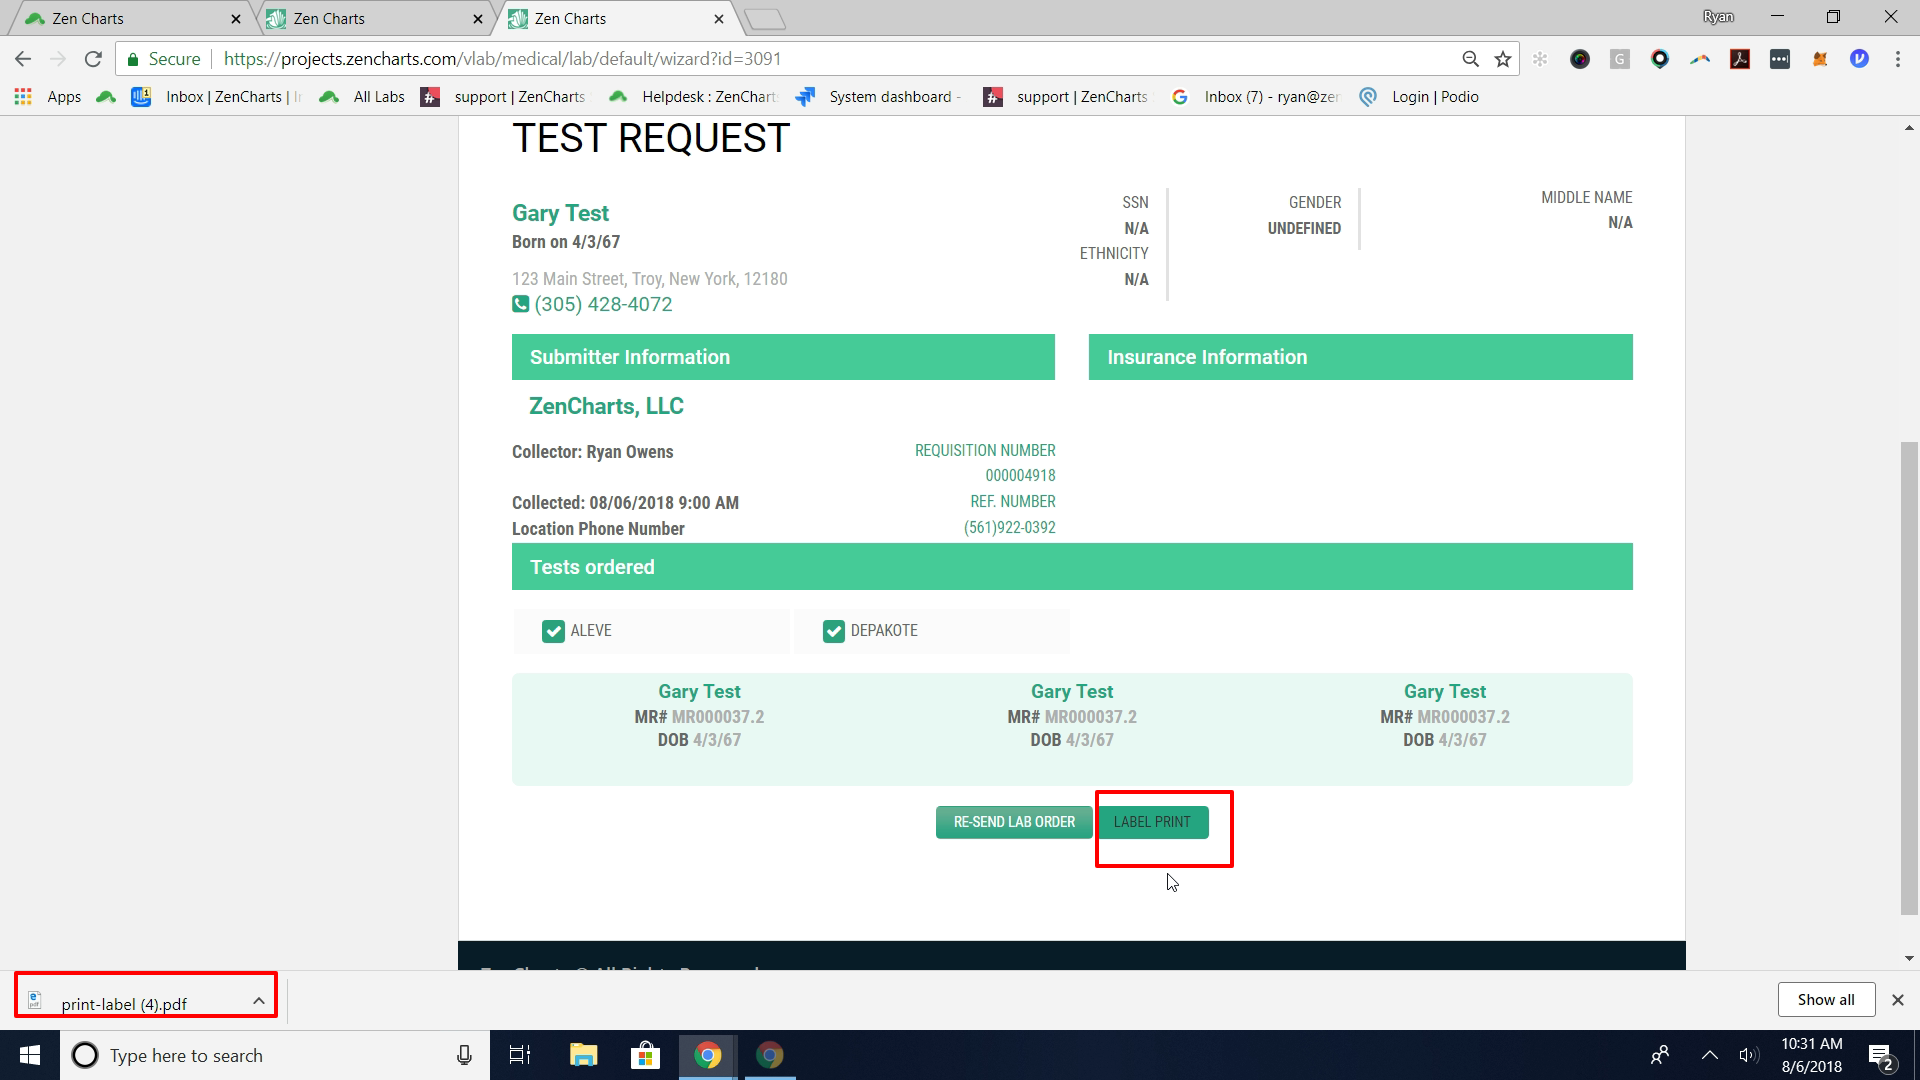
Step 2 - Review the electronic requisition form. You can audit the "Collection Date' add "Medical Necessity Statements" or a "Note'. After you review the information click "Complete and Print Requisition"
Step 3 - Click "Label Print". The Label will download, print it out and place on specimen cup.