Individual and Group Telehealth Sessions
There are a few prerequisites that you will want to make sure are addressed prior to using the native telehealth functionality within ZenCharts. These include, but are not limited to the following:
-
Make sure you have a signed 'Patient Consent to Telemedicine' on file for each patient. Every instance, or ZenCharts account has one pre-loaded, but you may prefer to use something else. Check with your Compliance person.
-
Any documentation that is completed in order to submit a claim for the service needs to contain certain information as it relates to telehealth. Check with your biller to make sure these items are addressed.
-
Patient information should always be accurate, and up to date. Confirm that the patient phone number, email, and other information is accurate.
With that said, let's get into how to use ZenCharts Telehealth.
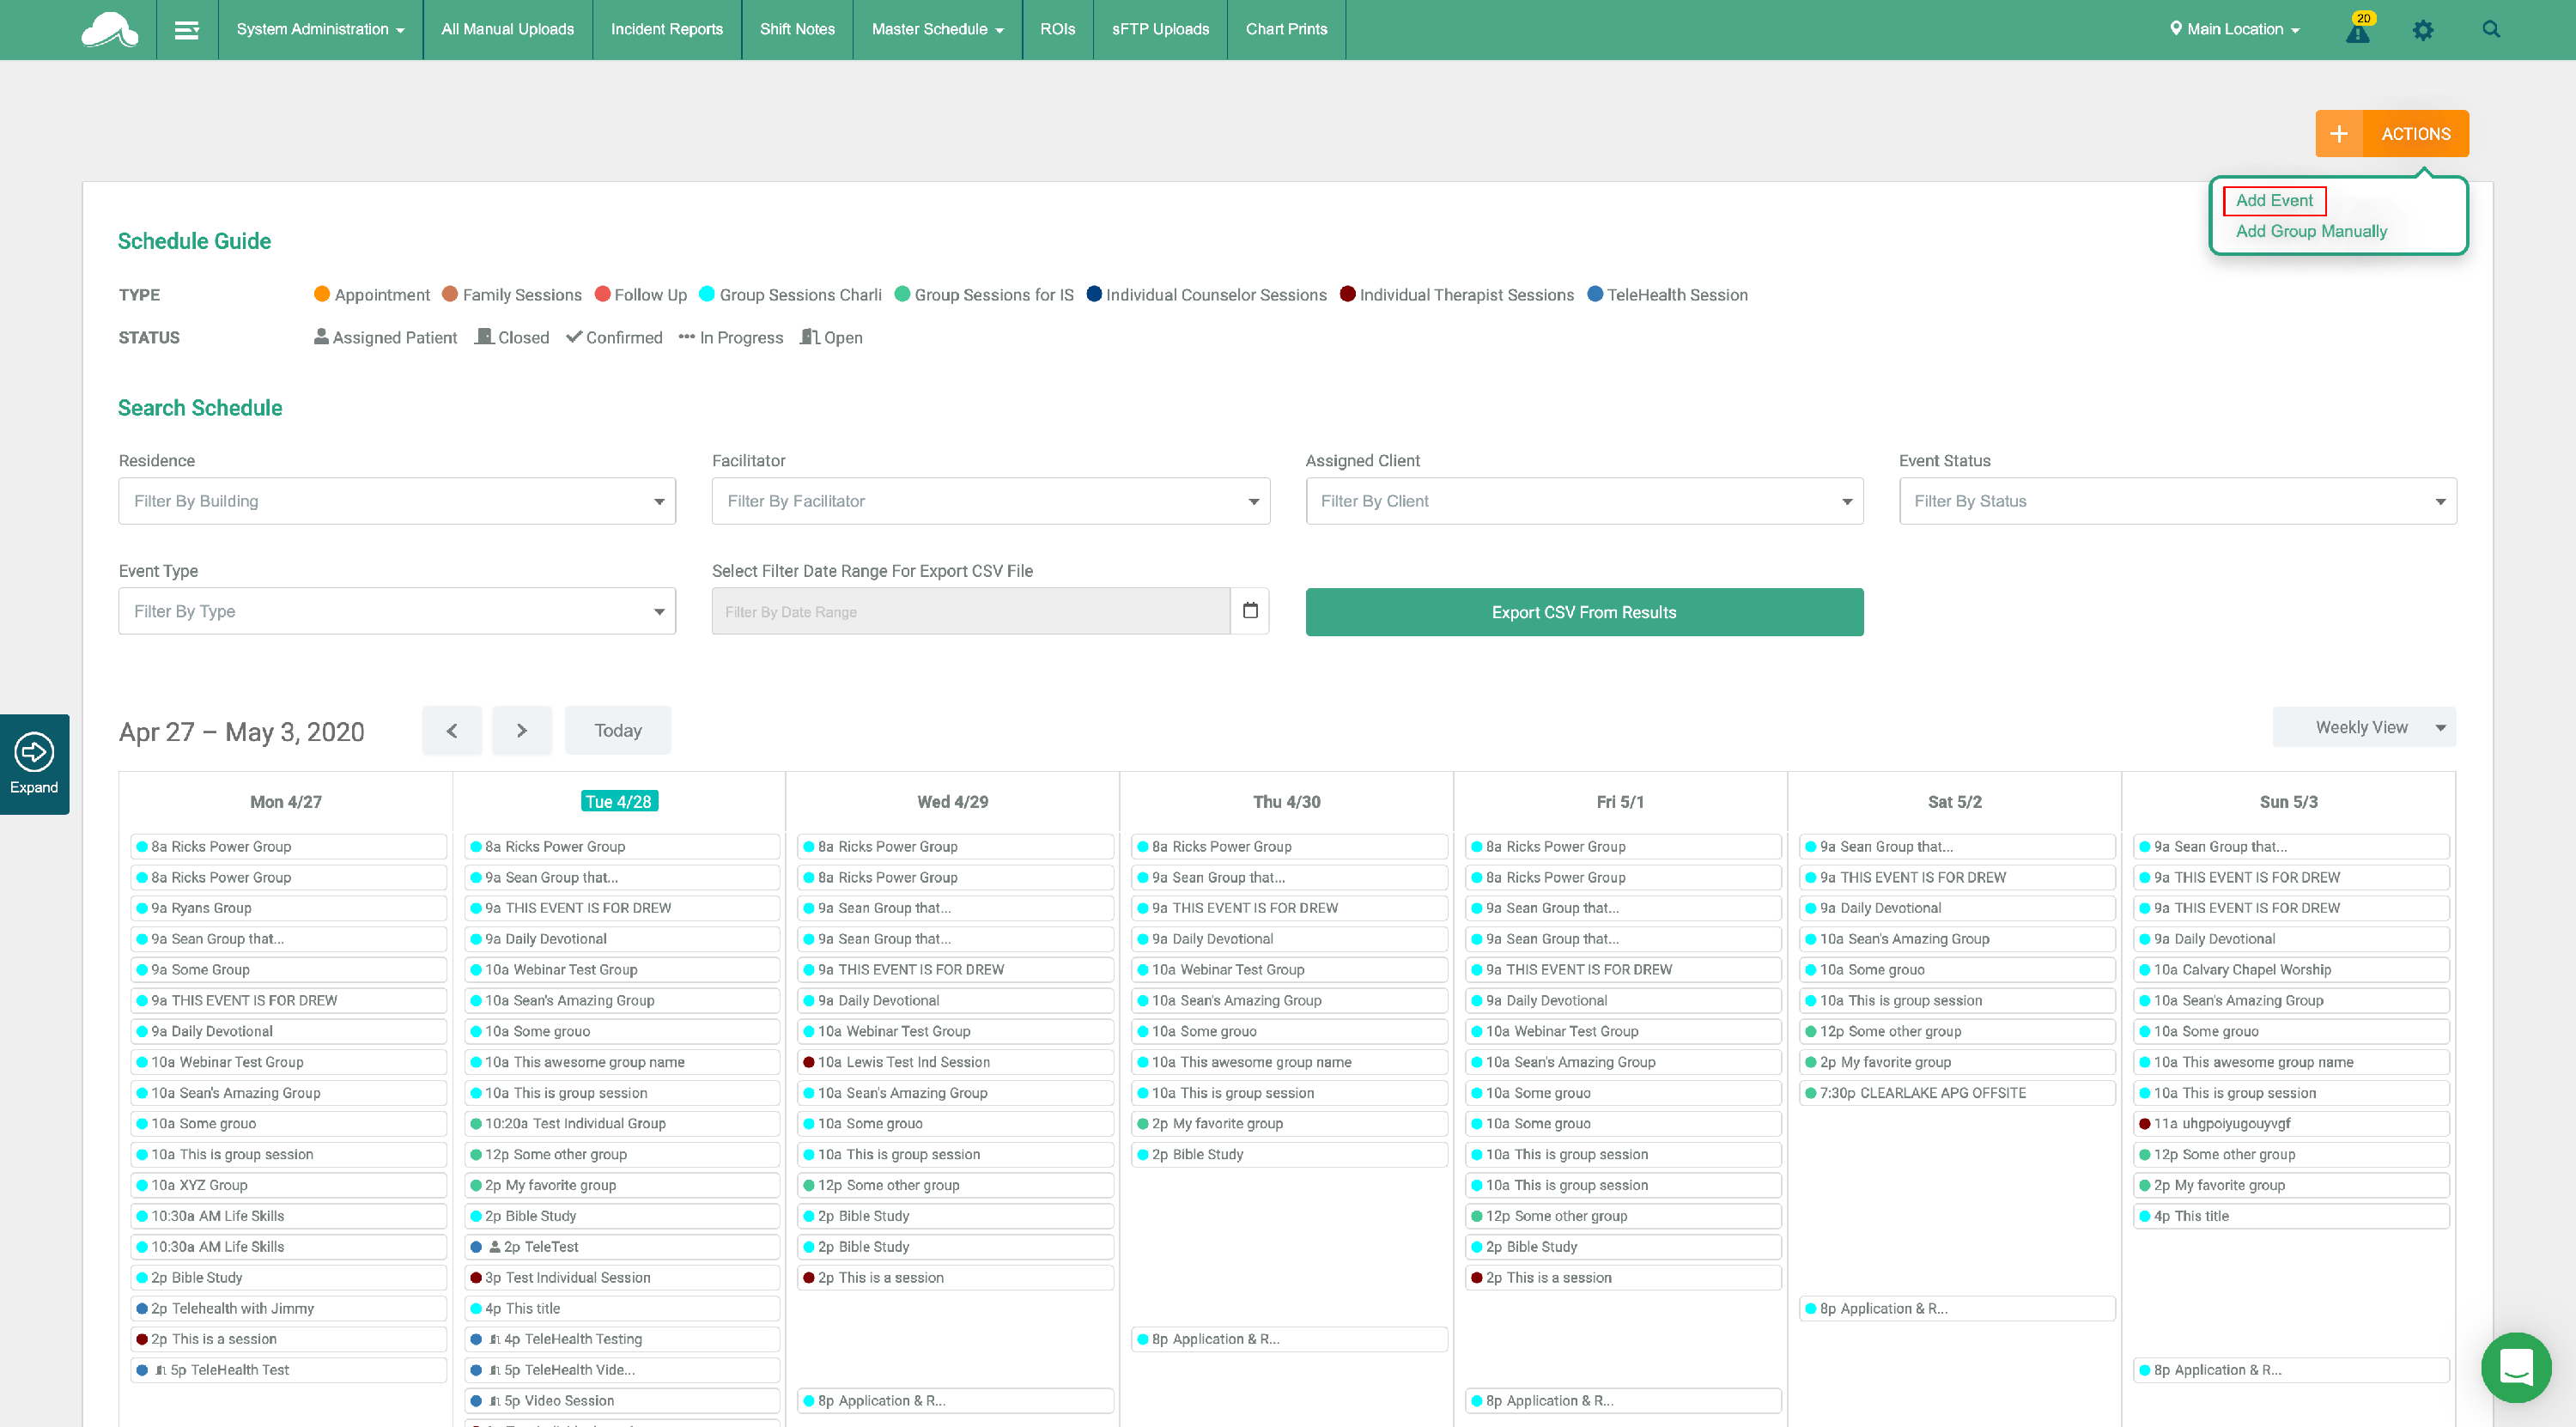
1. Add an Event
From the calendar you will be able to 'add event' by selecting the action in the upper right corner of the calendar.
In the modal that appears, select 'Telehealth session' for the type, and fill out the rest of the information as much as possible. You can change the assigned user, or assigned client later (and add to it for group sessions).
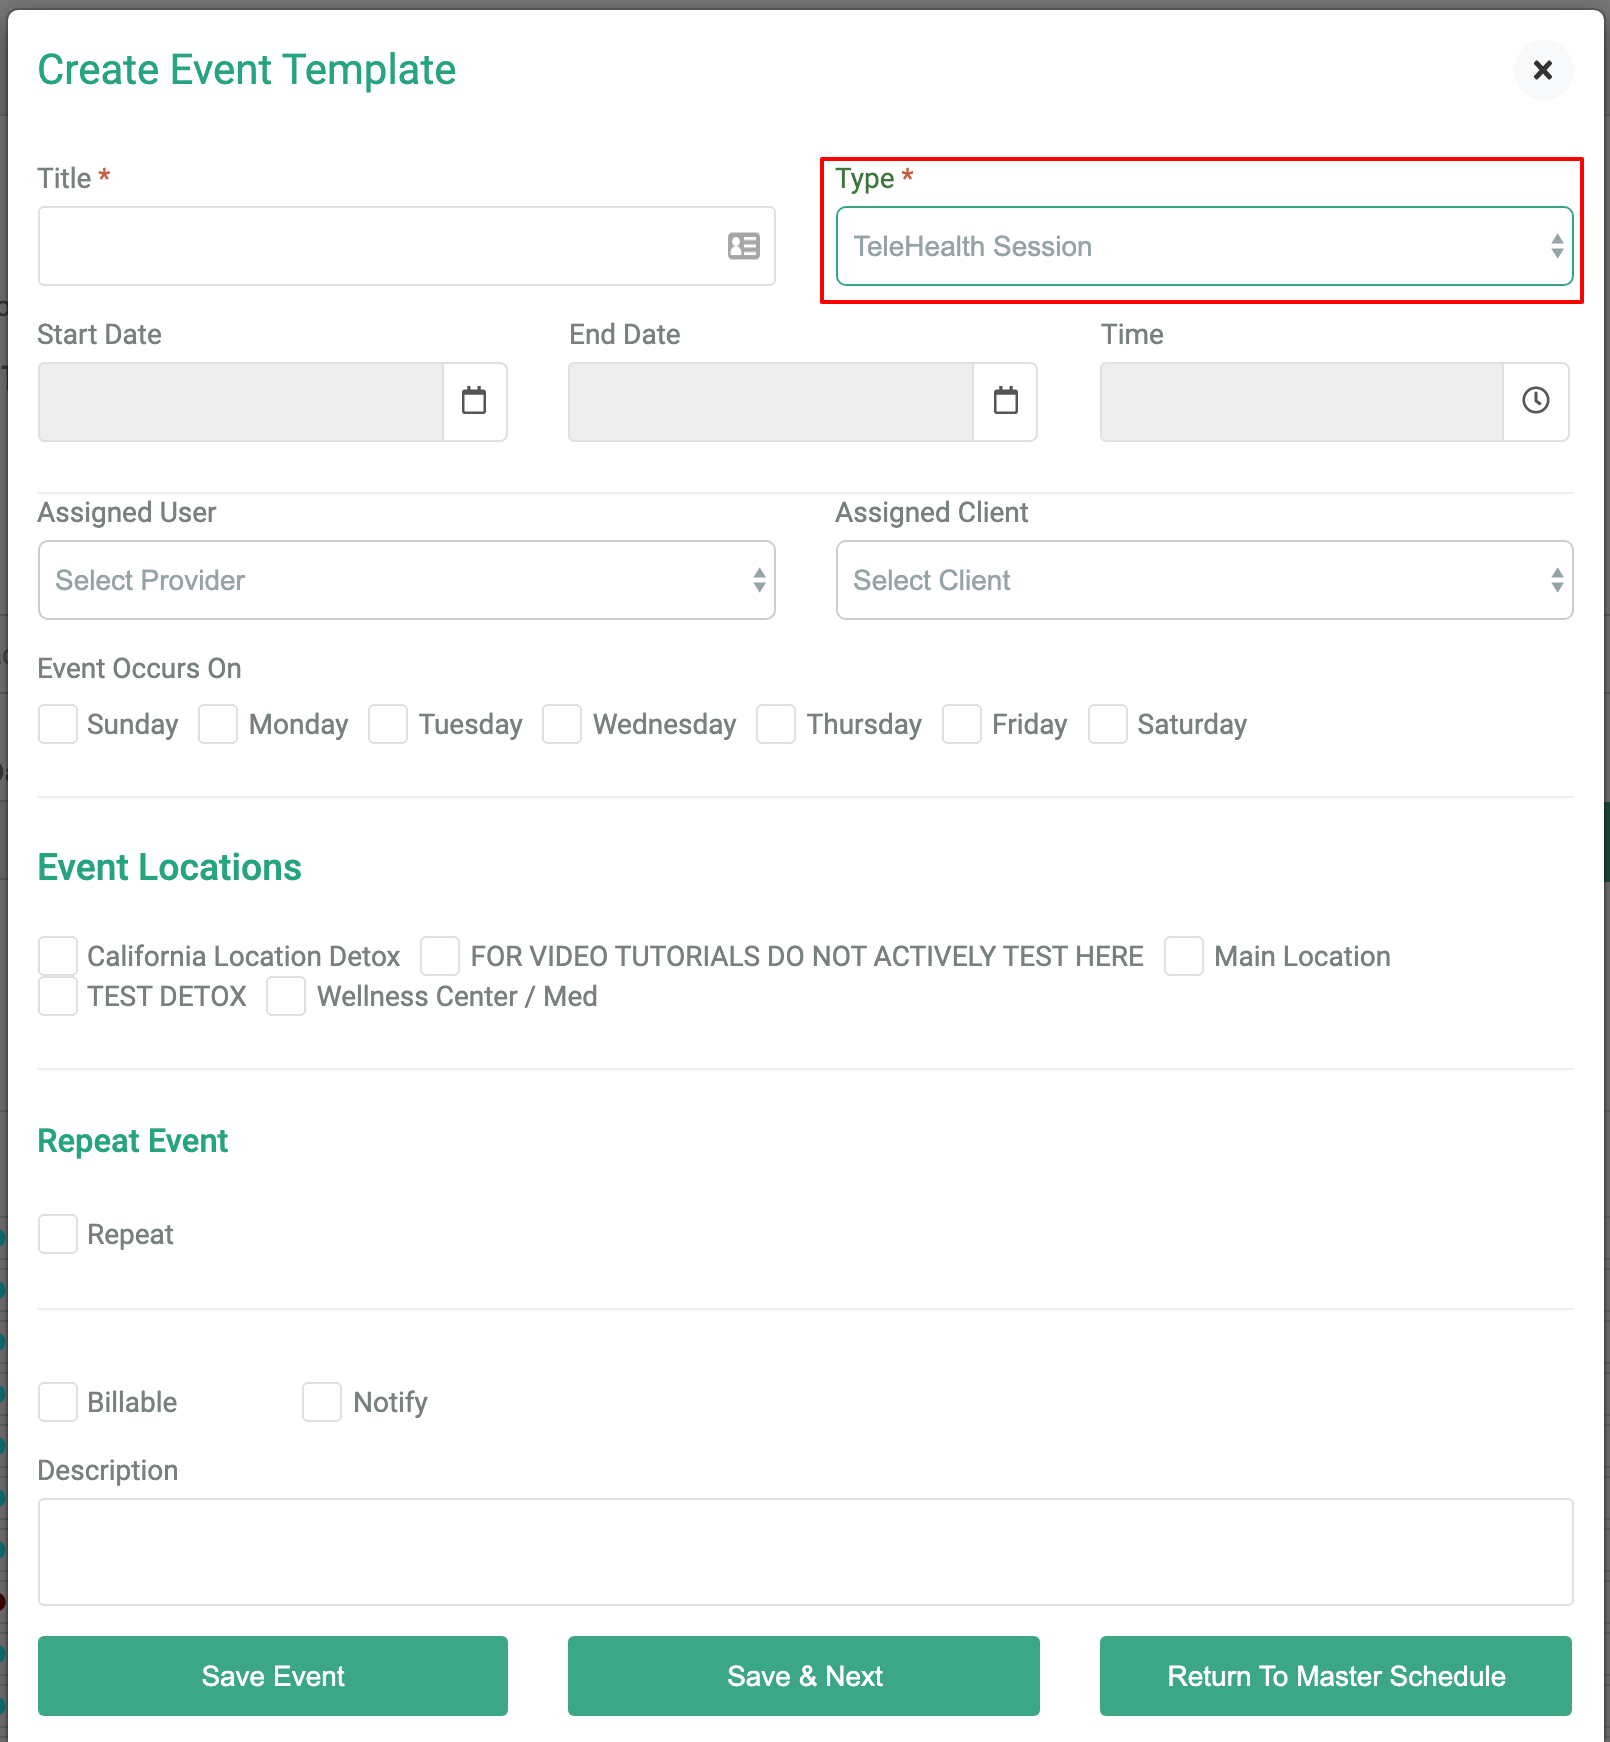
When all of the required information is entered, select 'save event'. This will save your event, and bring you back to the calendar.
You can optionally sort the calendar by event type 'Telehealth session'.
2. Start the Event
Now, let's invite others, and eventually start the event we created by selecting it from the calendar.
You must now select an organizer (the person hosting the telehealth session). All other items are optional at this point.
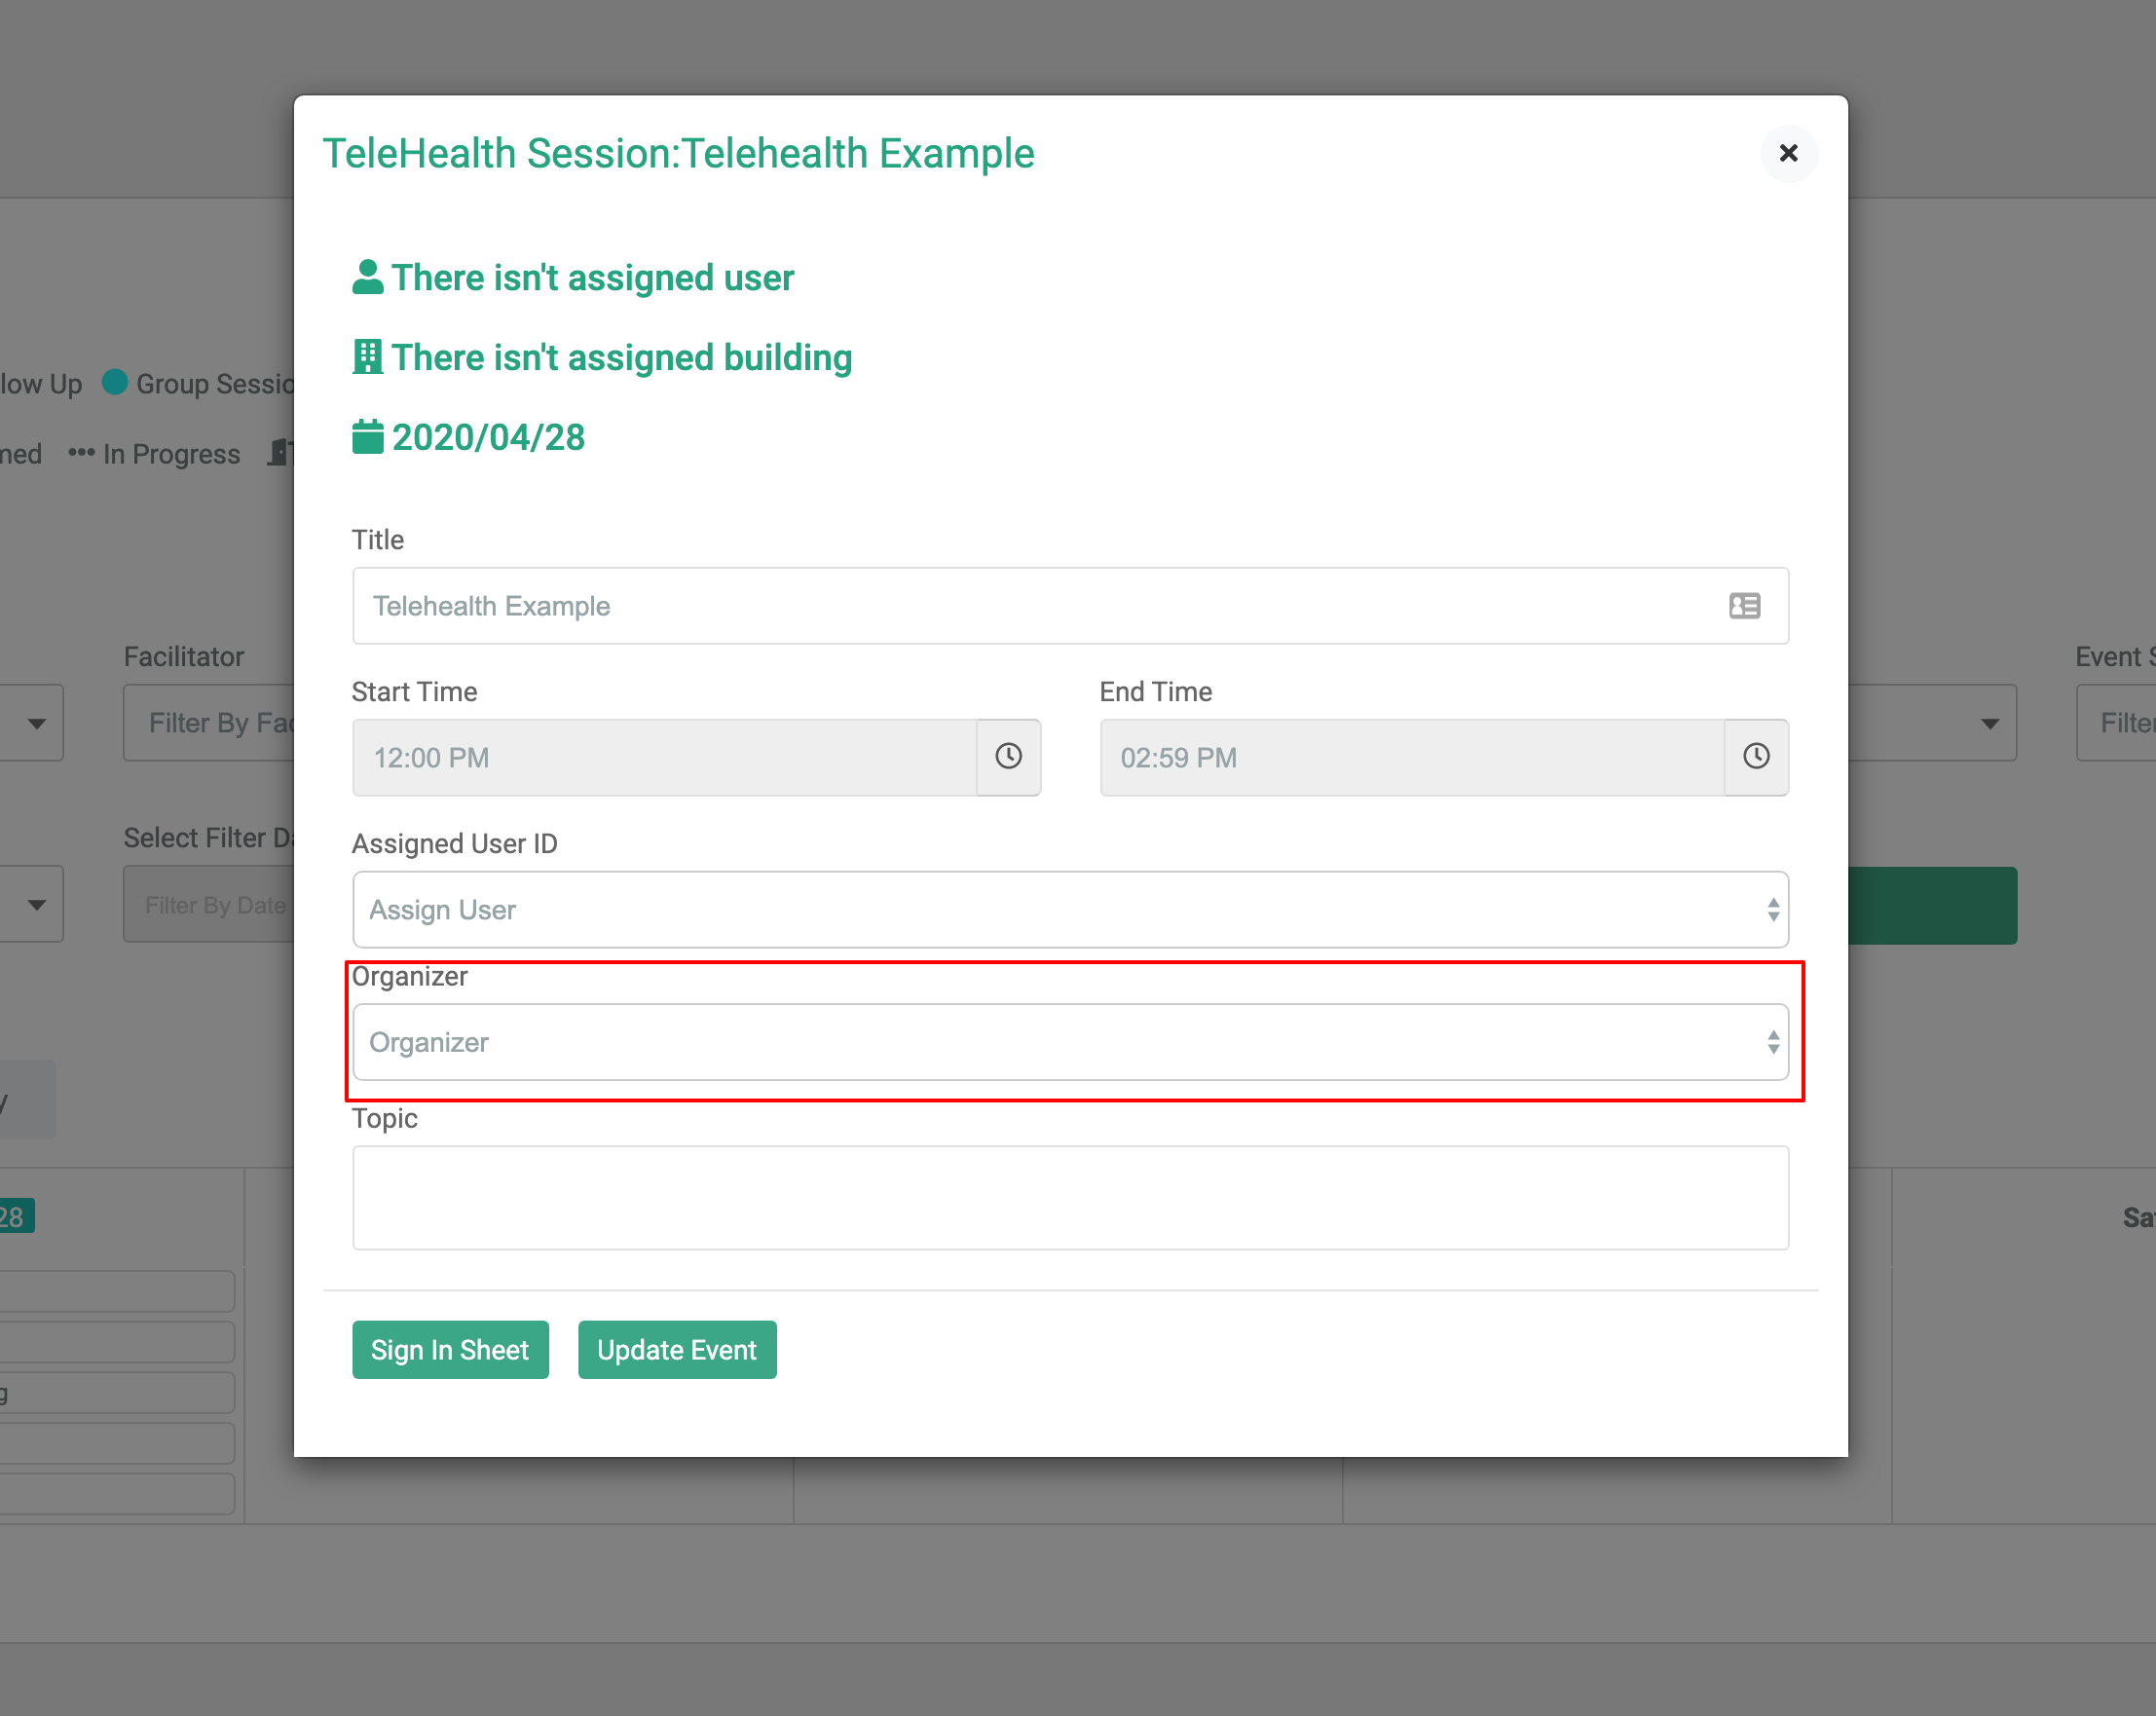
Select 'Sign in Sheet', where you will begin to add / assign clients.
Once you are at the 'sign in sheet', you can add one client for a 1:1 session, or multiple clients for a group therapy session. You can also add those that are currently part of your caseload.
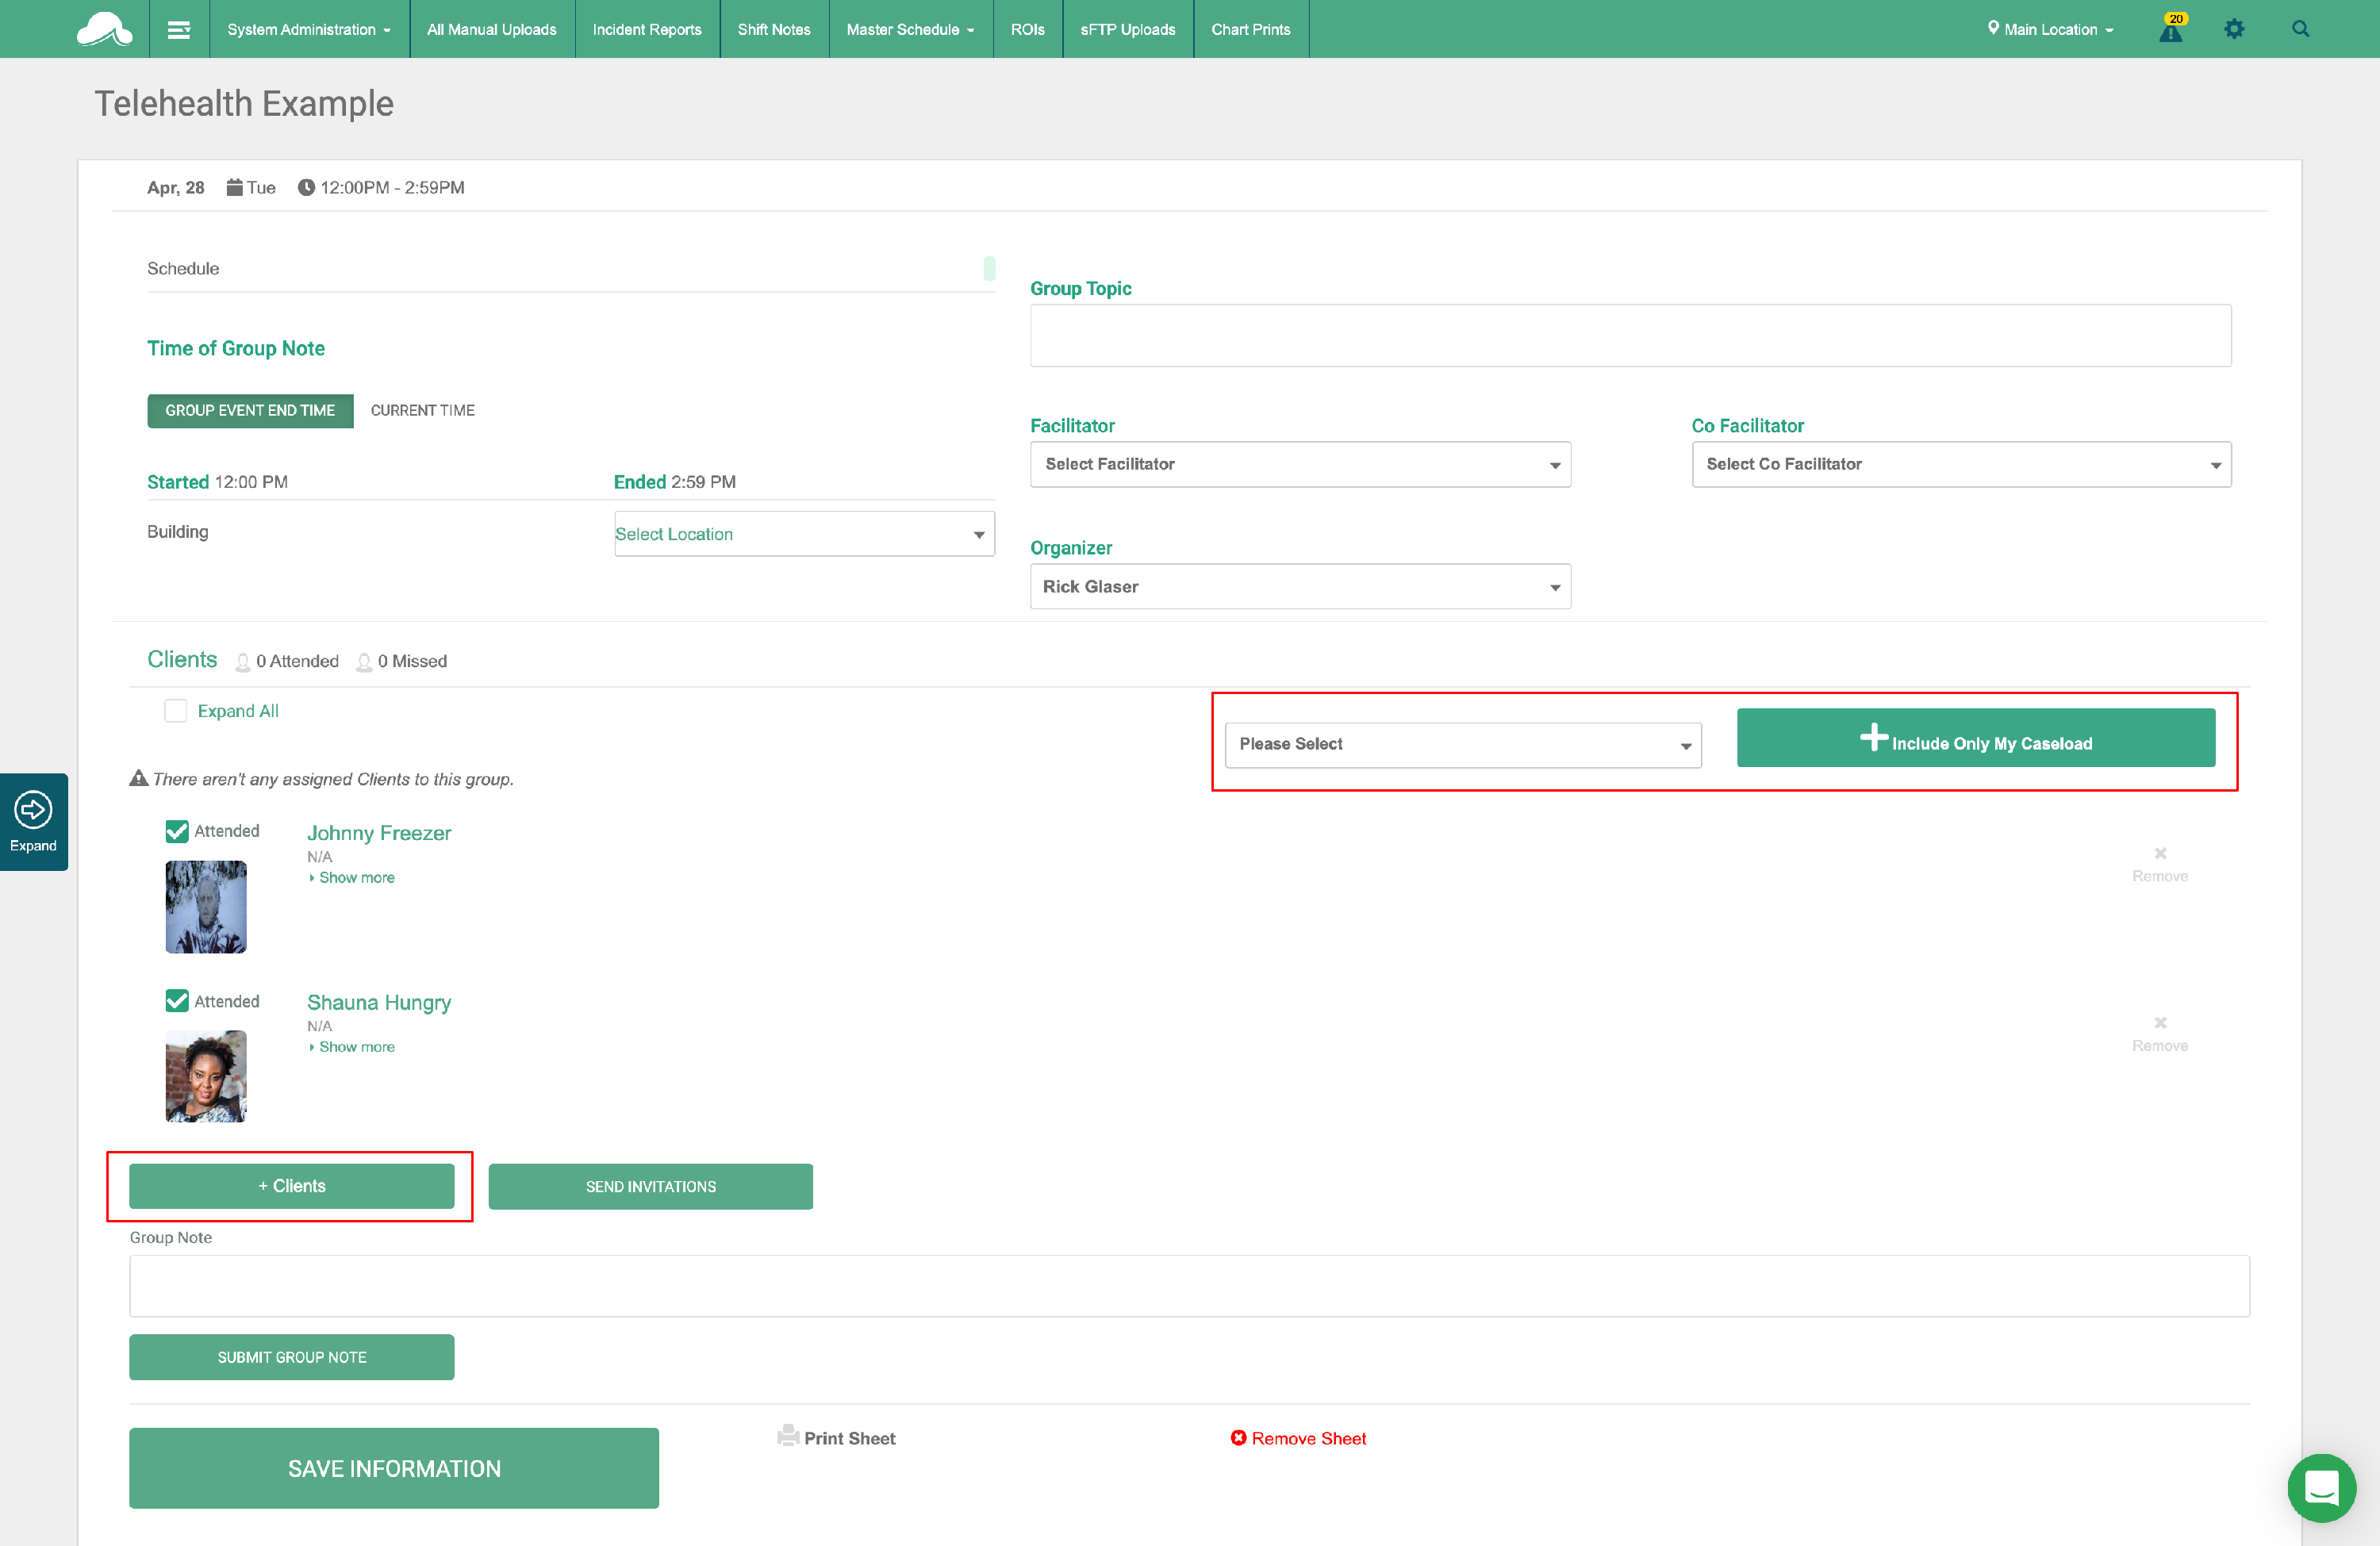
Now that the clients have been added to your 'sign in sheet' it is time to invite them to the session. This is done via the patient email.
Note: You should confirm in advance that email address is correct for each client. This was set on the patient facesheet.
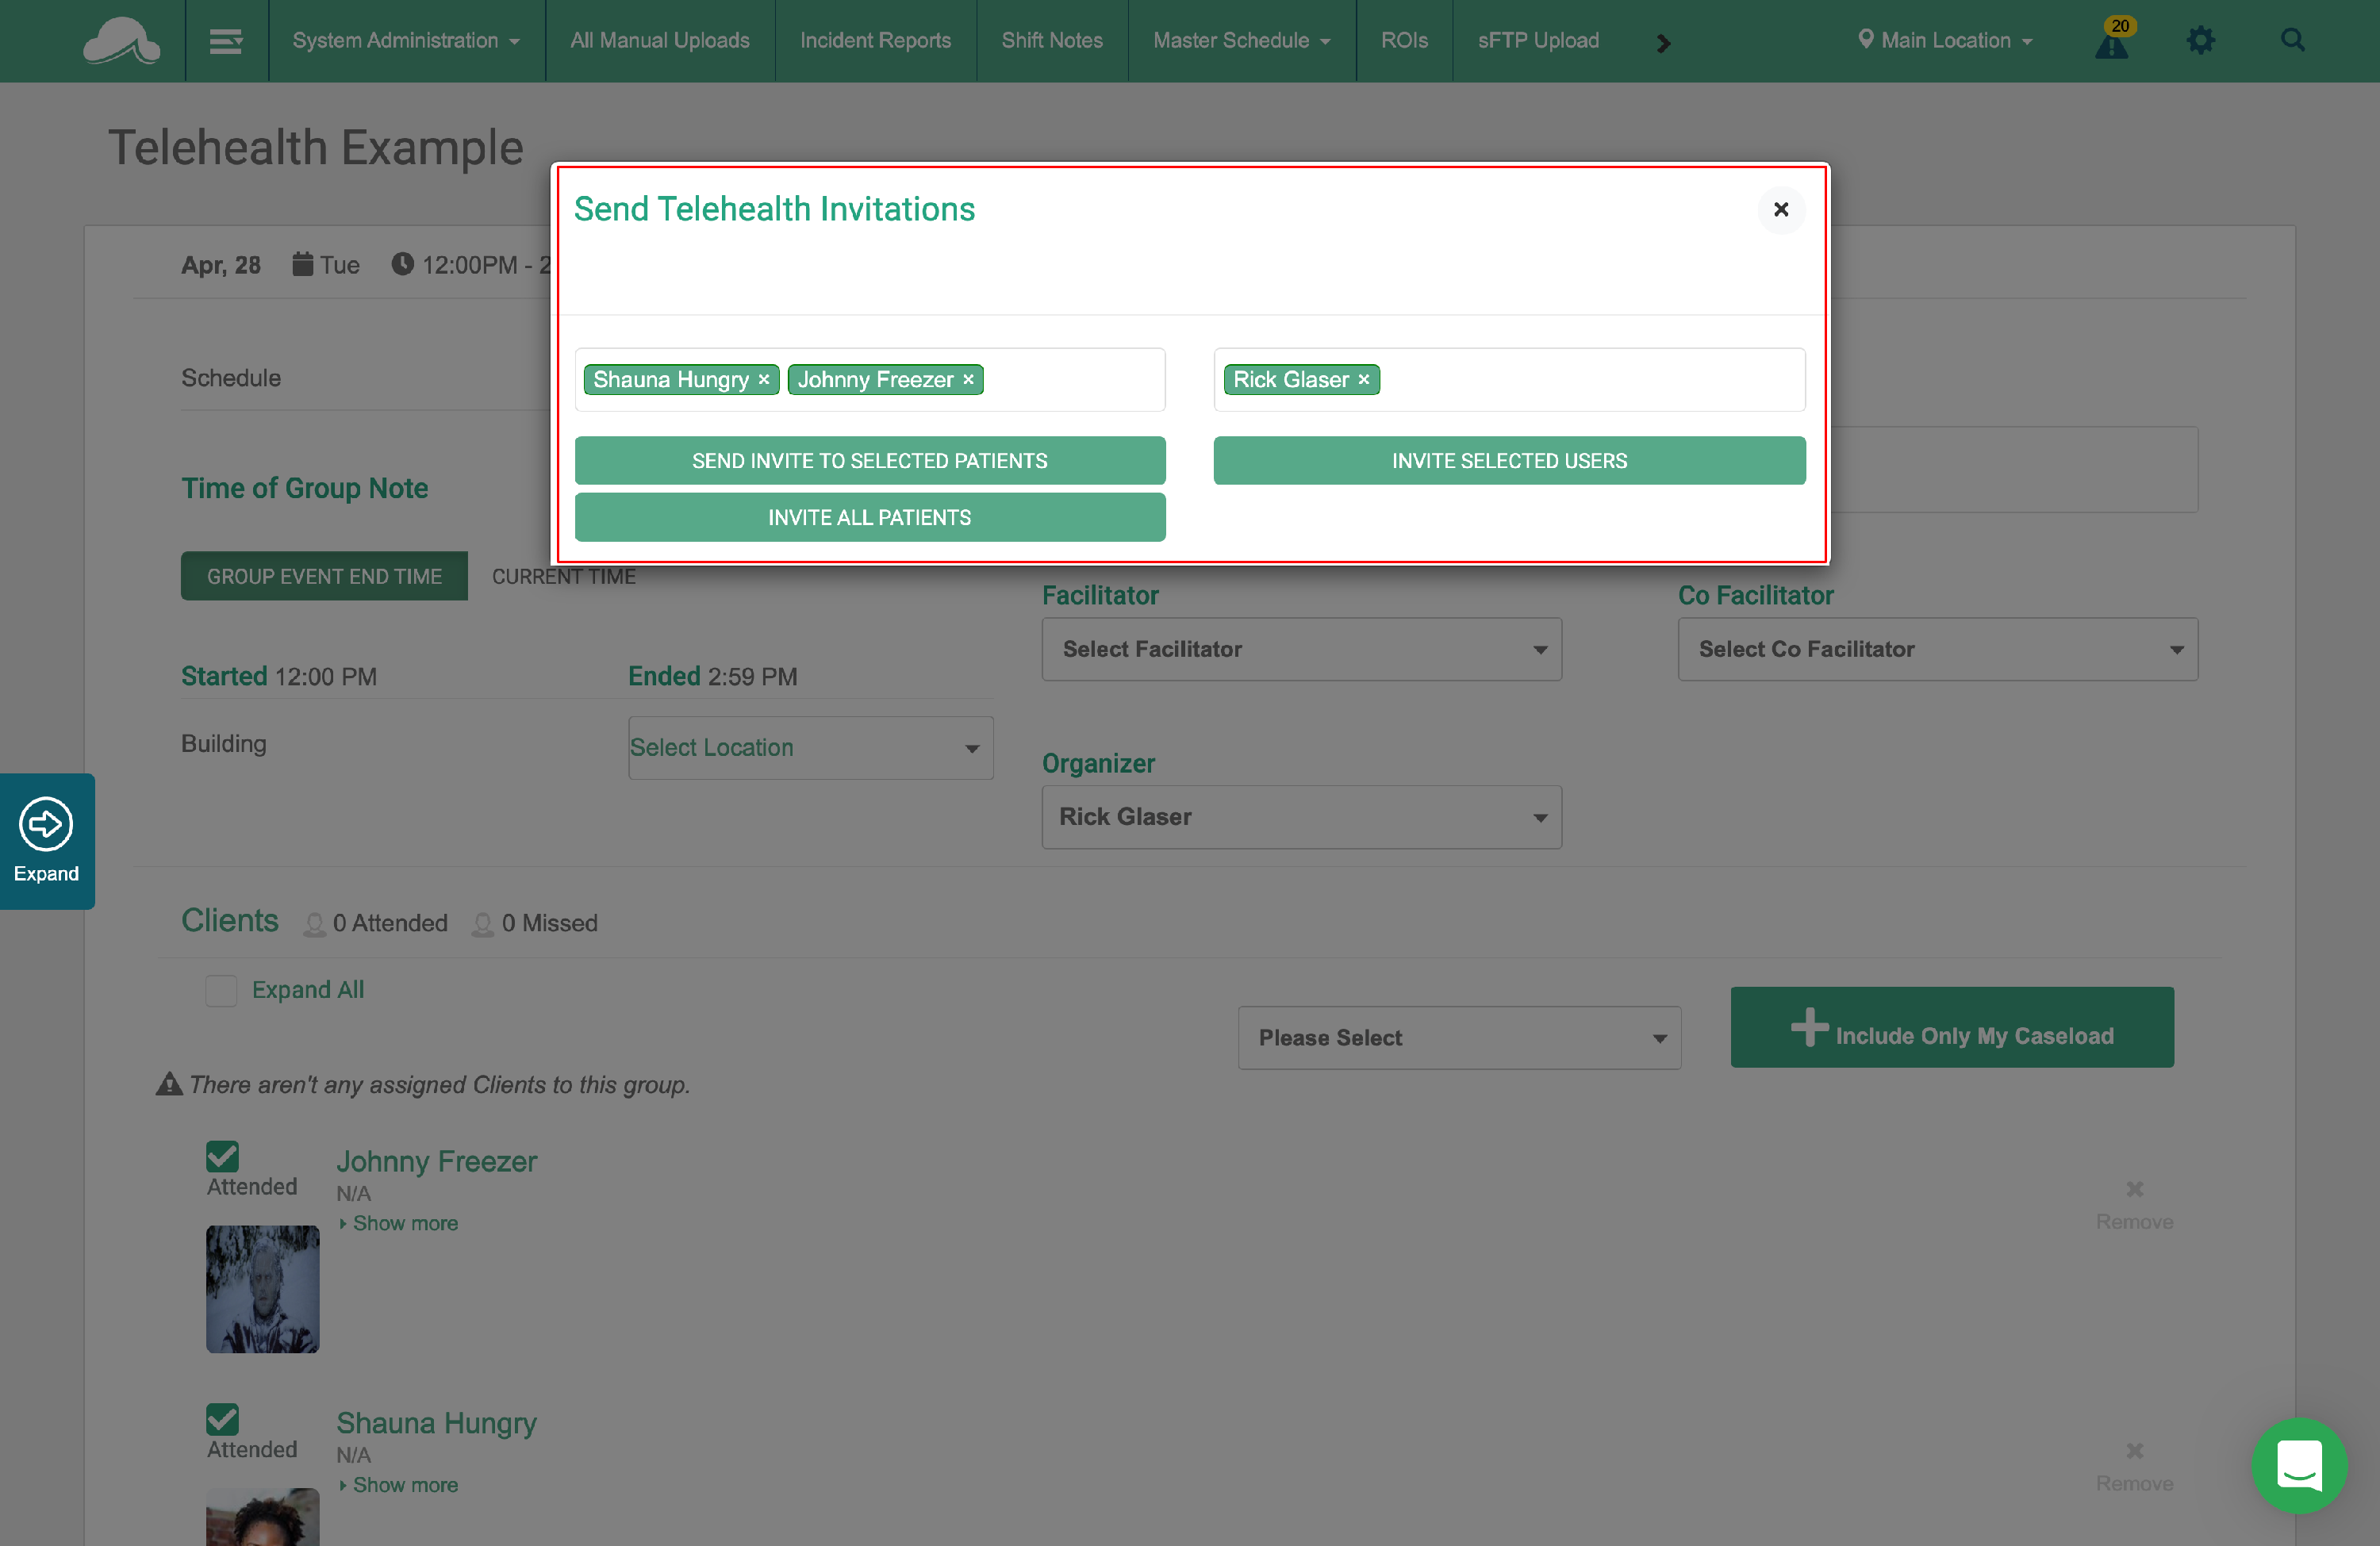
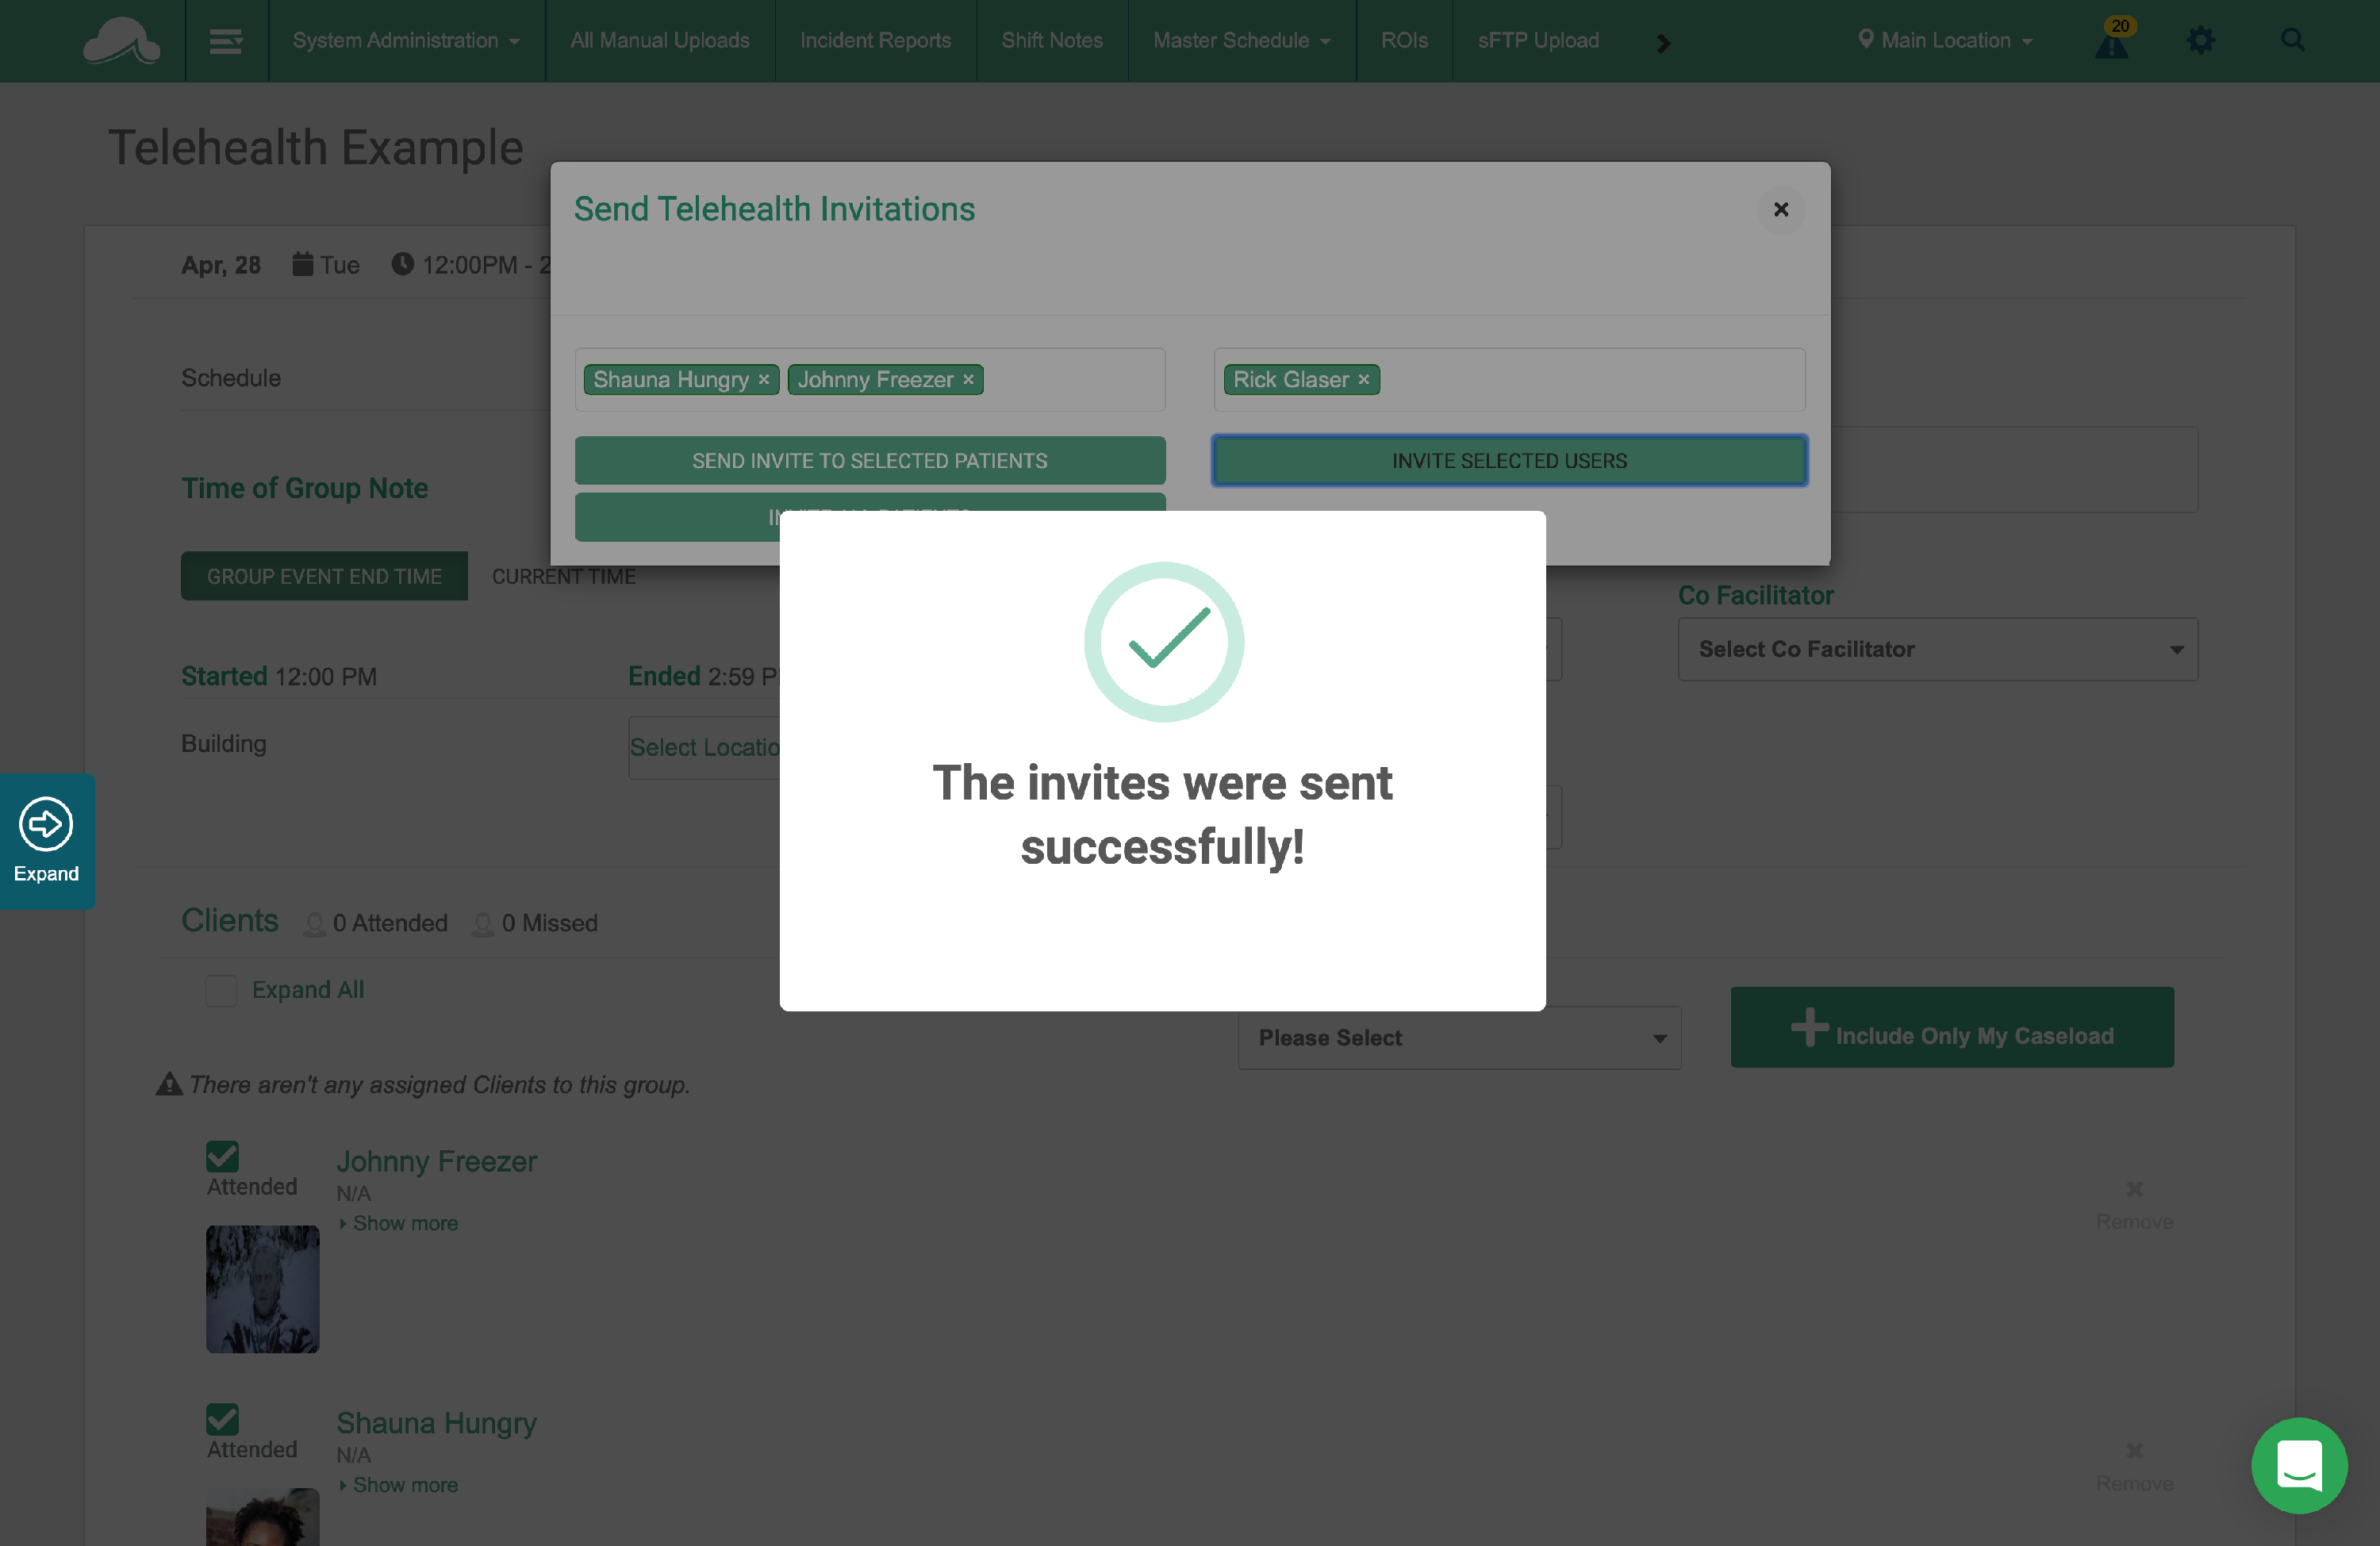
Select the patients, and the users (staff members) who will be participating in the event, and send invitations to each group.
You will now receive a confirmation that the invitations were sent successfully.
3. Start your Video
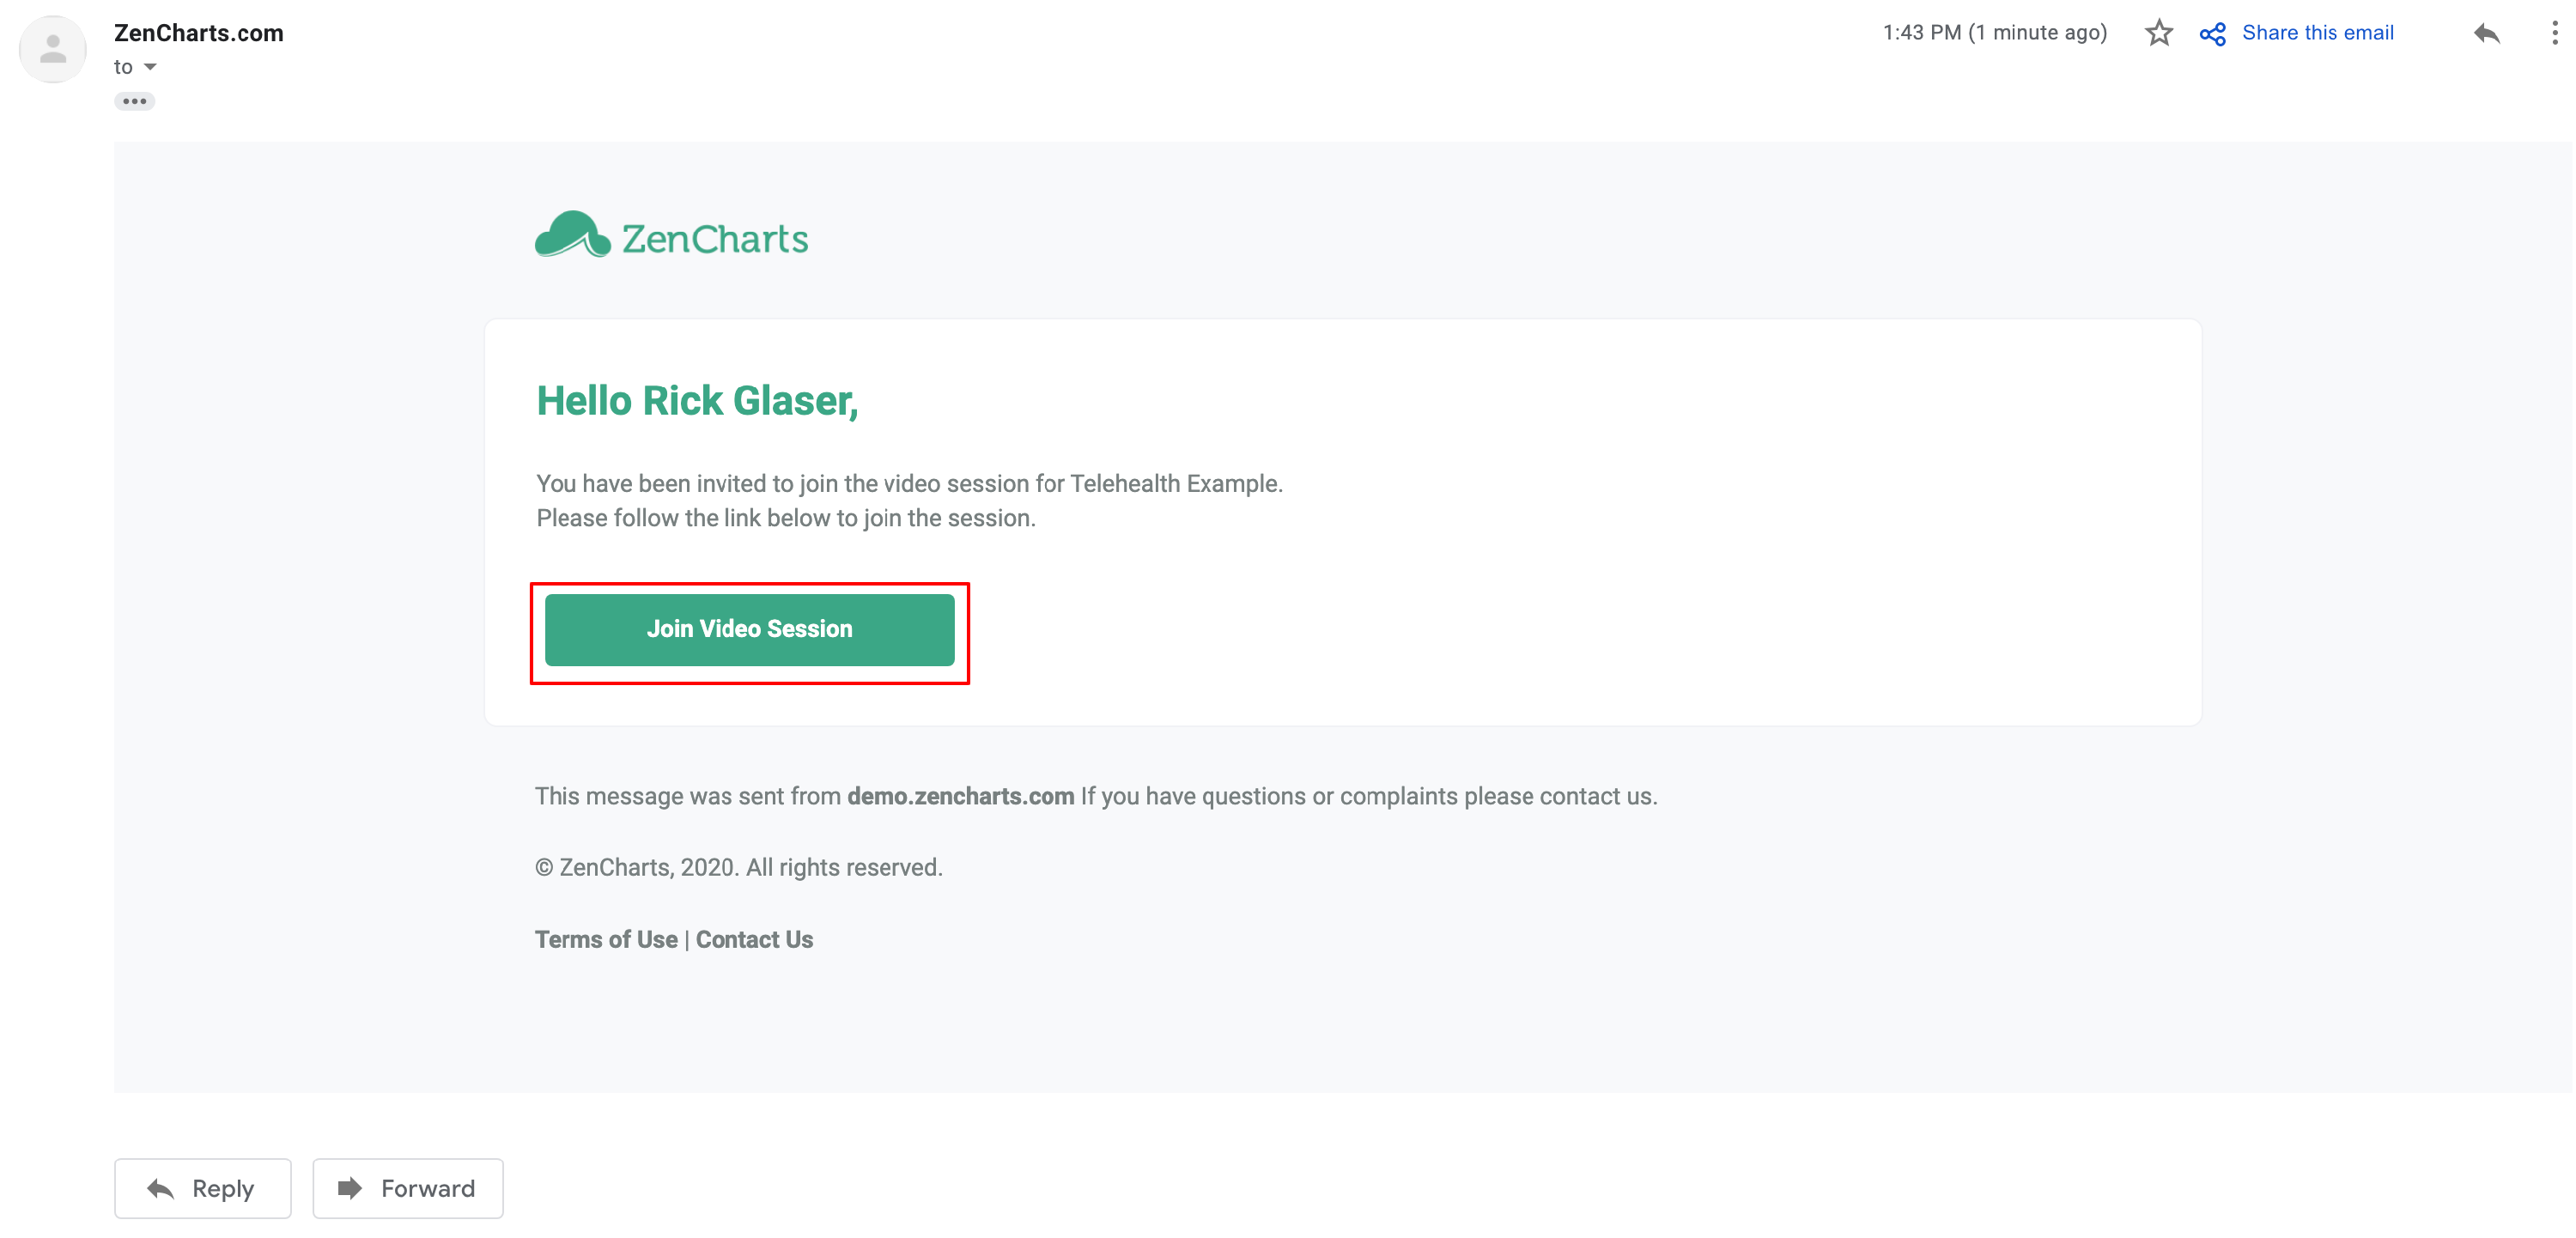
The invitations will be sent via email. Each user or patient will be able to select 'Join Video Session'.
IMPORTANT: Do not copy, and paste this link for others to use. Each link is specific to each patient, or staff member. Sharing a link will log out the other devices using it.
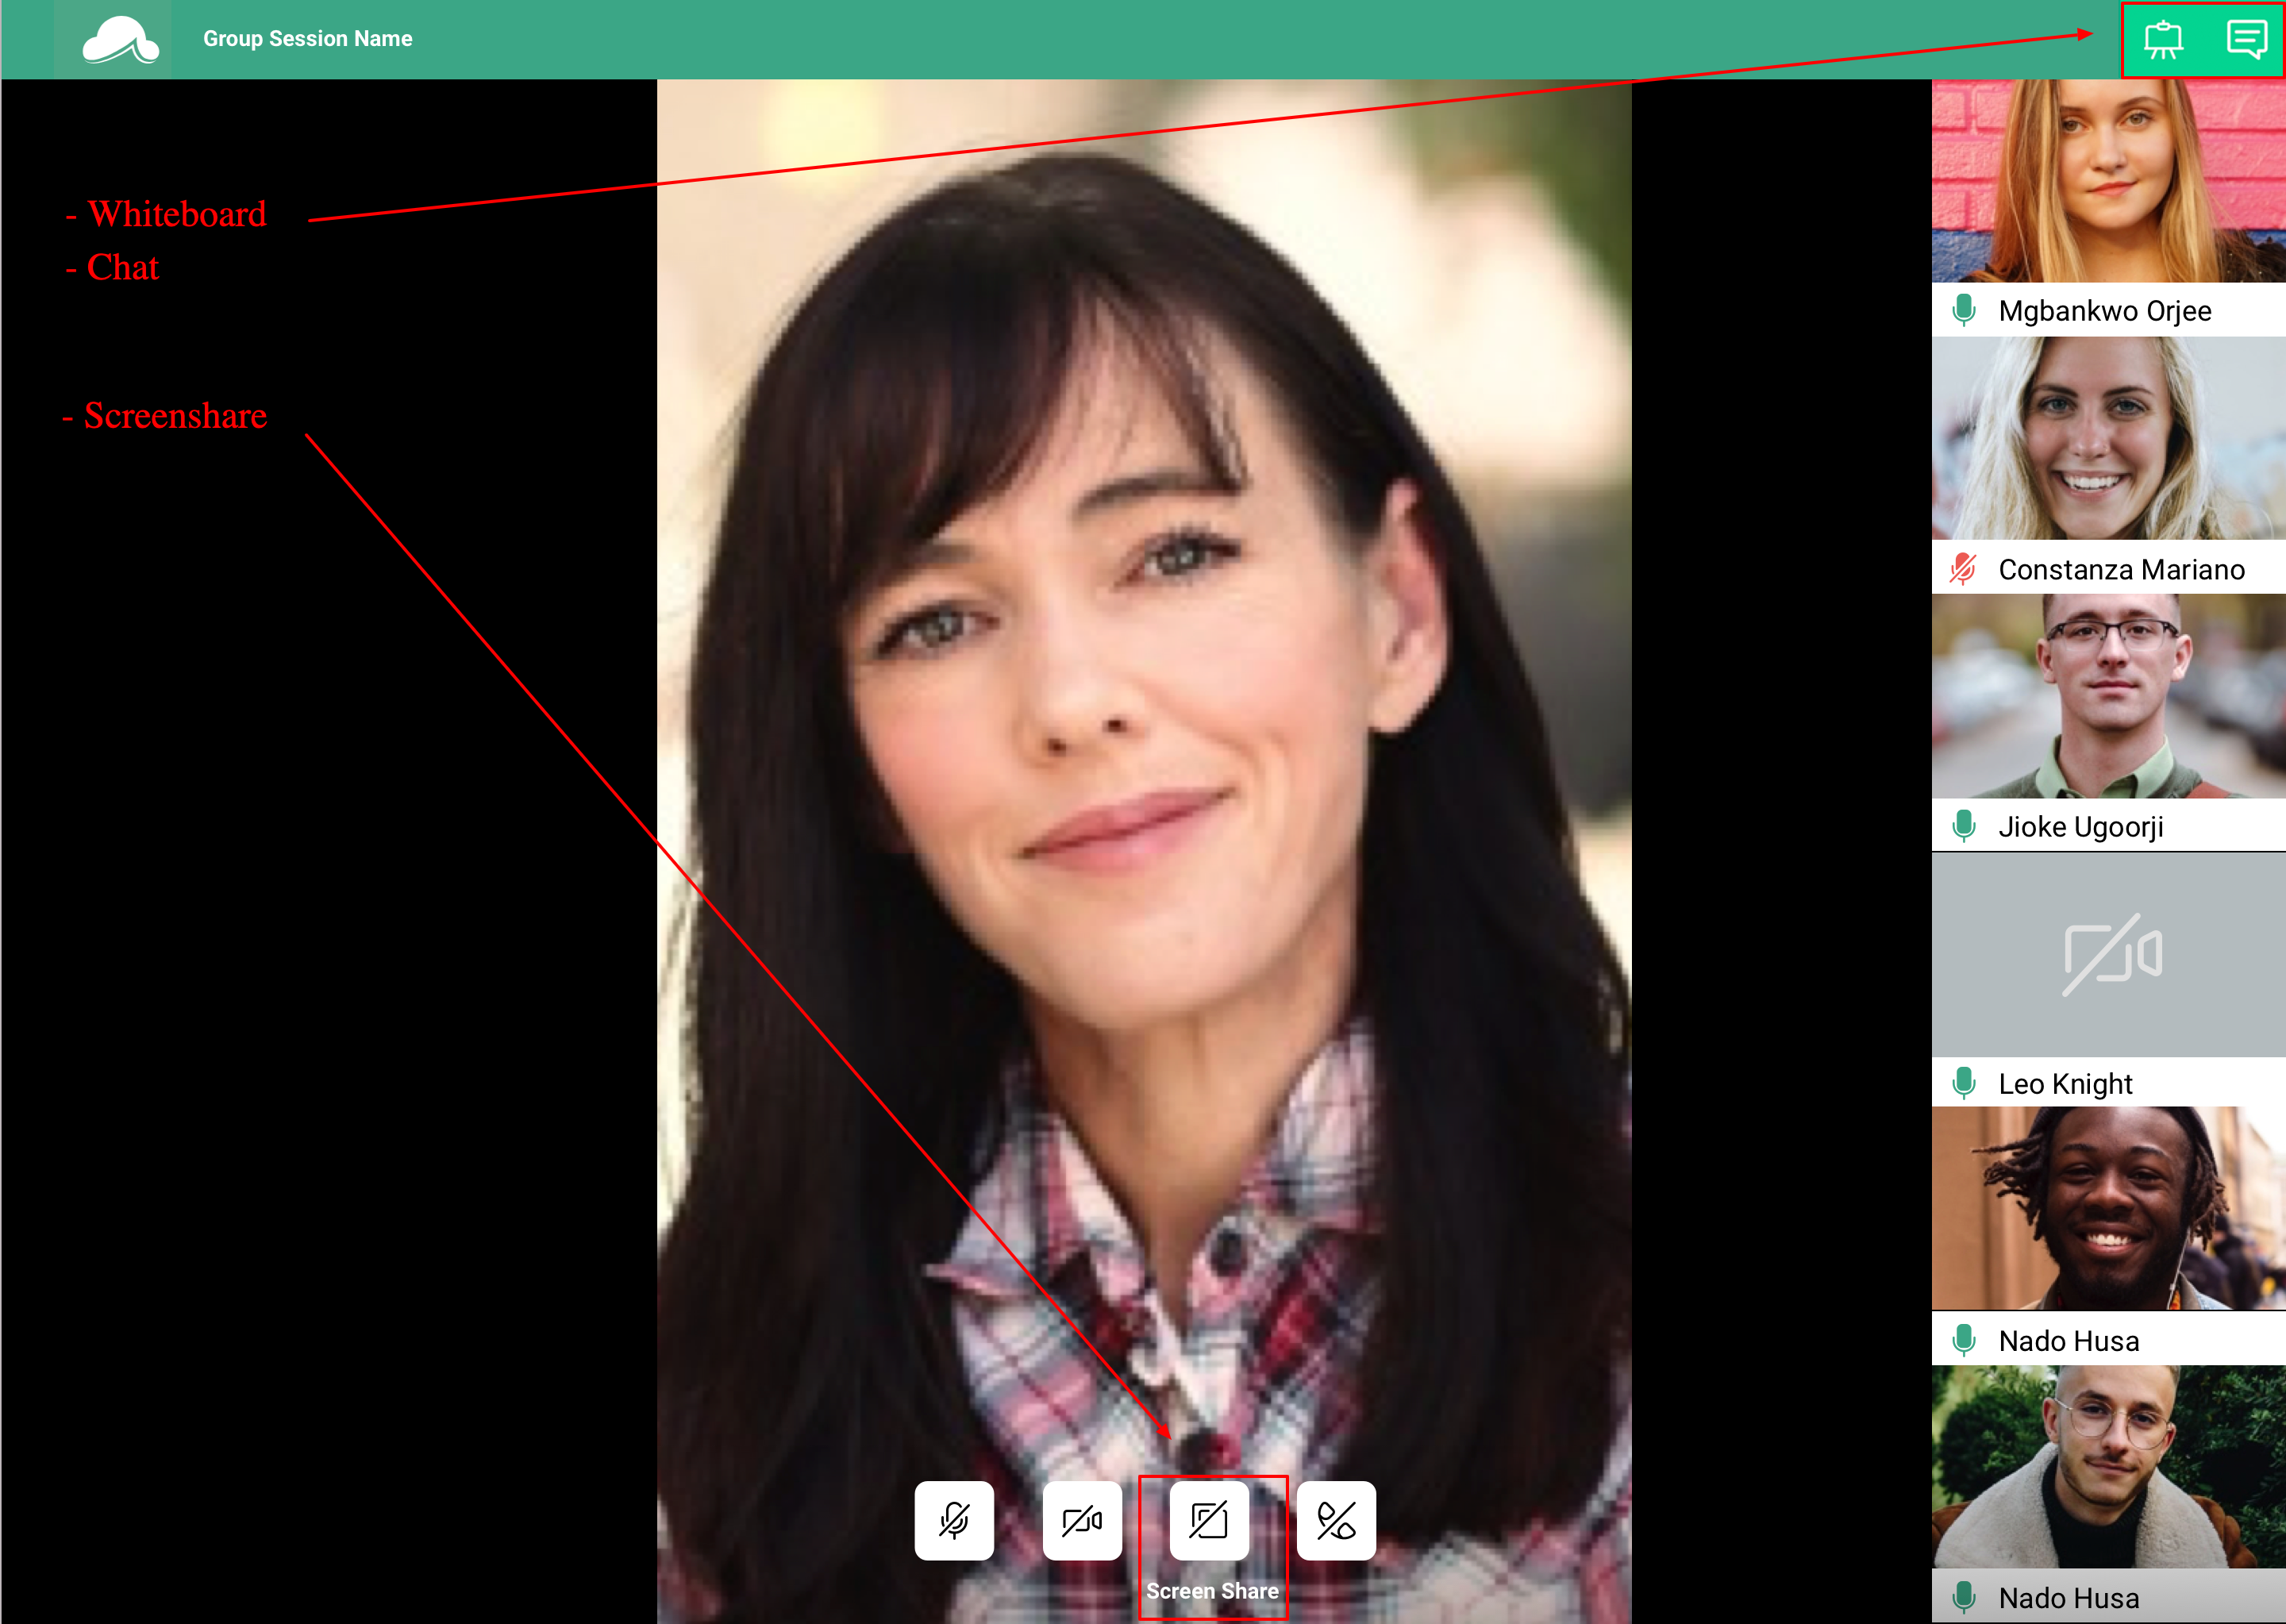
Once the event has been started, the organizer can:
-
Mute participants.
-
Chat via the icon in the upper right corner.
-
Create a digital whiteboard using the icon in the upper right corner.
-
Share their screen.
We hope you enjoy FREE use of the telehealth application while we continue to fight through this pandemic together.
While we understand that there may be some changes and adjustments to this telehealth feature, we wanted to roll it out to our customers as quickly as possible.
You are now able to do more within the ZenCharts application.
Stay safe, and if you have any questions please let our team know.
Thank you,
Team ZenCharts