How to Create and Update Saved Order Templates (v3)
Note: Creating and updating Saved Order Templates is by default a System Administrator function, unless granted special access by an SA for you to manage
Creating a Saved Order Template
1) After logging into ZenCharts, go into the Main Navigation Menu > Other
2) In the Other Sub Menu, click System Administration > Order Templates
3) Click "Create Order Template".
The process of creating an Order Template is very similar to adding a manual order to a client's chart, so for this article it will be assumed that the you are already familiar with the manual ordering process. If you are not familiar with this, please click the button below to view the article and video detailing how to enter a Manual Order.
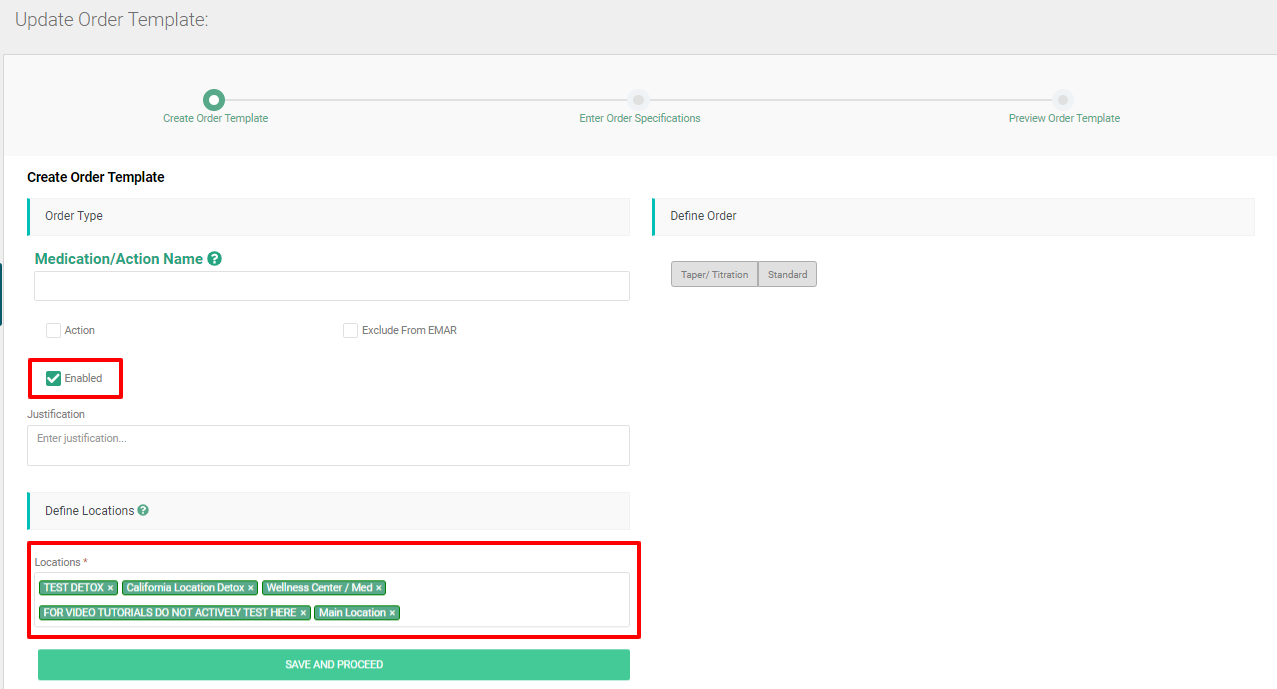
There are two additional features when making a Saved Order Template that are not available for a Manual Order, and it is located on step 1 of the ordering wizard, :
A) The Enable Feature. If the "Enabled" box is checked and the template is completed, the order template will show in the Saved Order list to be selected and added to a client's orders. If the box is not checked, the order template will be disabled and not show in Saved Orders, thus it cannot be added to a client's orders.
B) Define Locations. This feature is more geared towards multi-location facilities. It allows the user to select which location(s) will have this order template in their saved orders. If a location is not included in the field, the order template will not show in the Saved Orders, thus is cannot be added to a client's orders for that location.
After going through the ordering wizard (steps 1-3) and completing and saving the Order Template, you will be brought back to the Order Templates page. That's all there is to it! You've just completed creating a saved order template
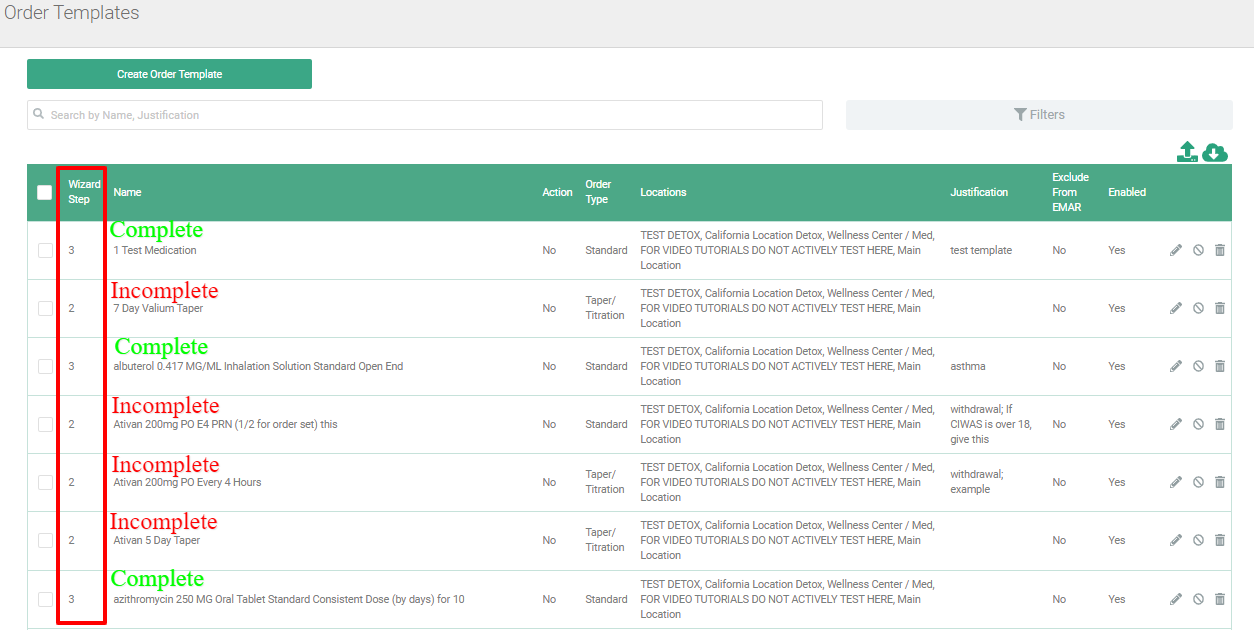
Note: The Wizard Step on the left side of the order template is numbered based on the steps completed in making the template. An Order Template on Step 3 means that it is complete and live in Saved Orders to be added and used. If the template is not on Step 3, it will not show in Saved Orders to be used and will stay in the Order Template library until fully completed to Step 3.
Step 2 = Created Order Template, awaiting Order Specifications to be completed
Step 3 = Order Specifications Completed/ Order Template Complete.
View The Tutorial Below:
Updating An Order Template
If an order template is not completed or needs to be revised, it will need to be updated from the System Admin > Order Templates Page as well.
1) After logging into ZenCharts, go into the Main Navigation Menu > Other
2) In the Other Sub Menu, click System Administration > Order Templates
3) Under the Order Template list, go to the desired template and click the Pencil Icon to Edit. You will be brought to the last step that was completed.

4) If you want to edit a different step, click the desired step at the top.
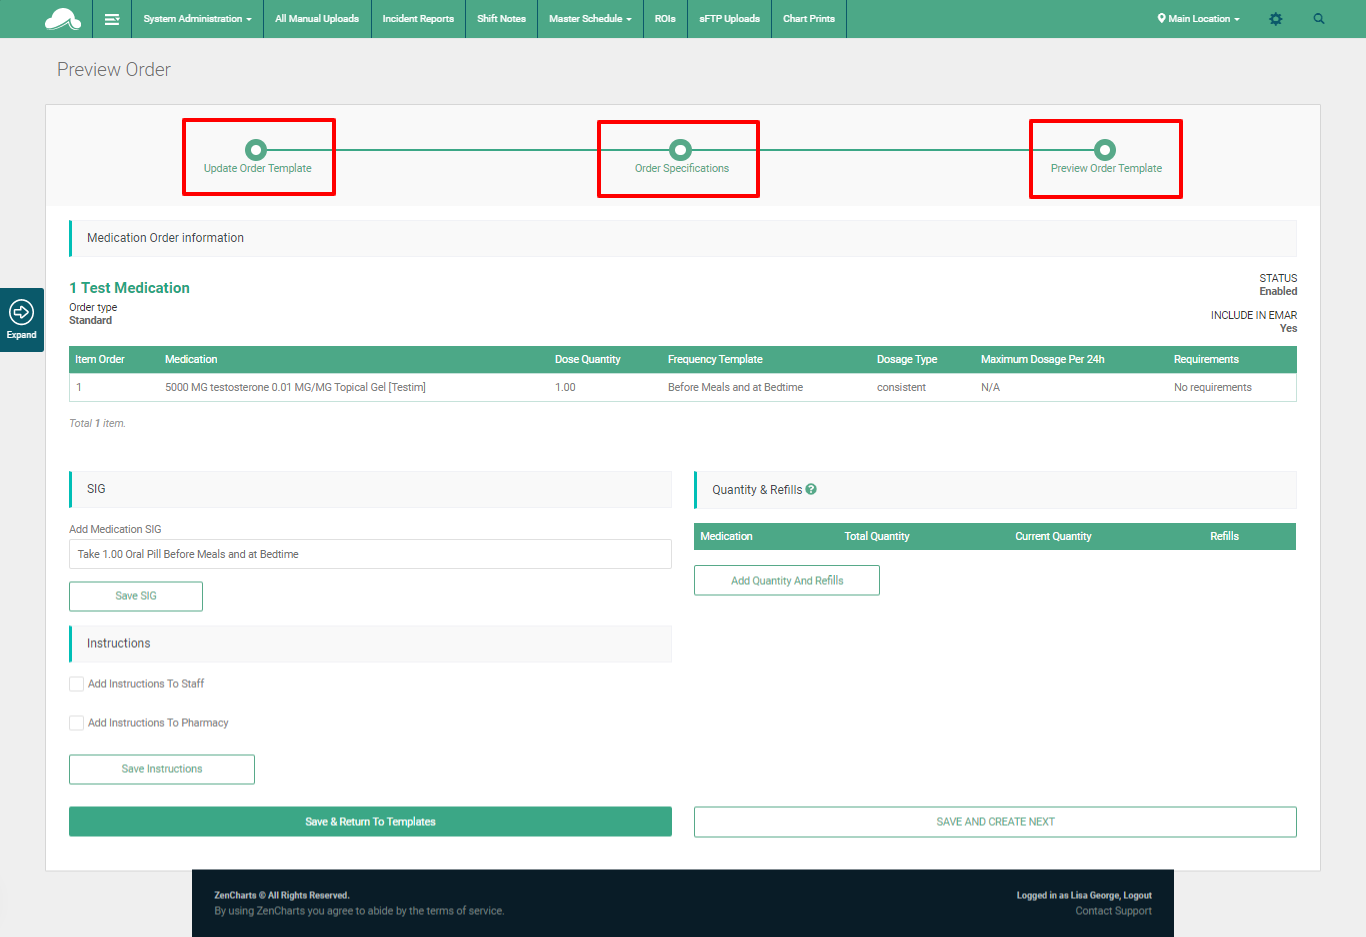
If you go to Order Specifications and it had already been completed, use the Pencil Icon to go in and edit specifications.
Make sure to save after editing each step.
On Step 3, review the order template for accuracy. You may update the Sig field, quantity and refills, or instructions to staff or pharmacy fields here. Be sure to save each field after you update, then click 'Save and Return to Templates' to return to the Order Templates list.
If you need to Disable the template from showing in Saved Orders but want to still keep it in the Order Template library, click the 🛇 icon (Prohibited or no entry sign). If you would like to delete the template, click the Garbage Can Symbol.

Once completed, the updated template can be added from Saved Orders and the updated order will pull into the eMAR.
View The Tutorial Below: